
 (no, that’s not my strawberry patch)
Early last week I inspected my strawberry beds to see how close I was to un-mulching them for the spring. You can tell they are ready when you see healthy new growth at the base of the plants. At that point they need fresh air and access to sunlight. My plants were ready to go…and so was I.
I am ready to get outside and start my gardening!!
So here is that project/adventure. Stay around till the end and learn from my mistake.
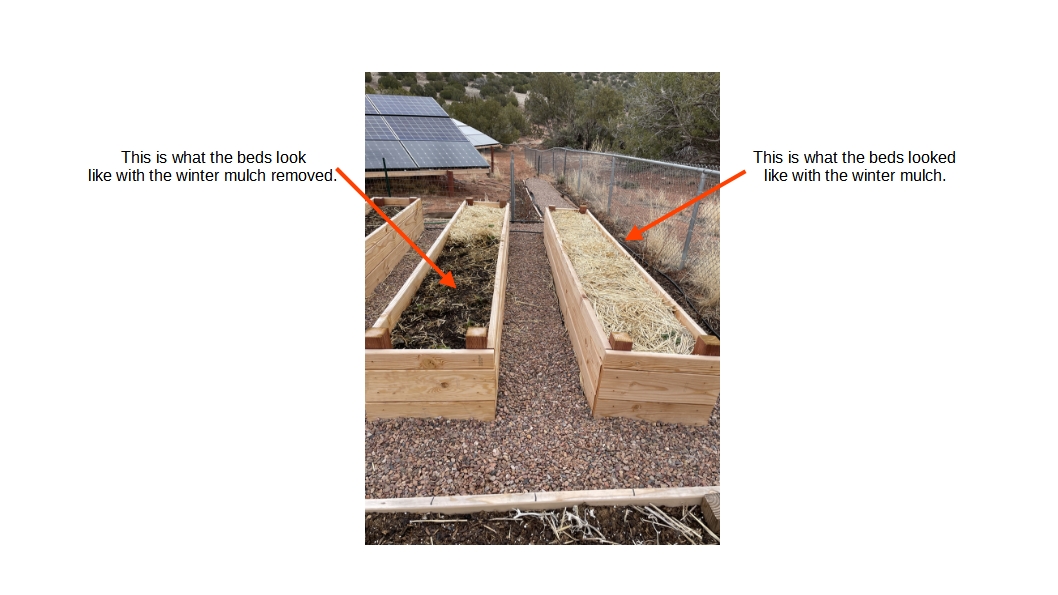

 Then I de-thatched the original bed on the left. And got two full 5-gal buckets of partially composted mulch…
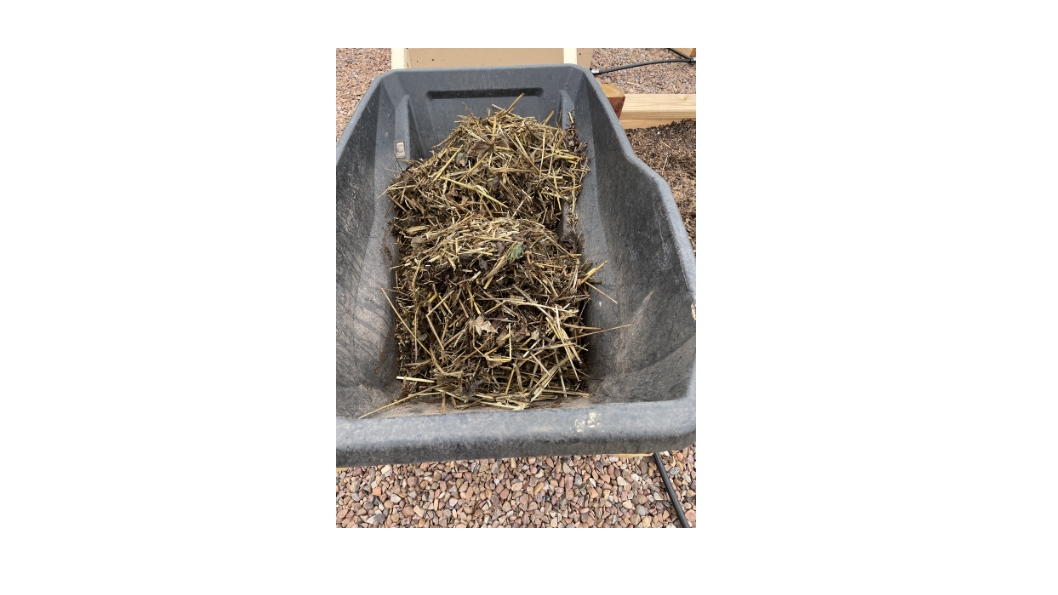 And yes, since this is broken down so much I will keep this and turn it into compost. The drier mulch that I took off at the beginning will go back under the strawberry plants once the irrigation is installed. It is important to keep the berries off the dirt. That helps prevent disease and bugs from getting to the berries before you get to eat them. FYI…I got 3 full contractor trash bags of much off the beds. I am thinking it was a bit too thick for our area.
Also, as a really good note…I found earthworms in the beds when I was removing the mulch. Yea!!!
Once I got the mulch off I installed all new irrigation in the original bed and added irrigation to the 3 transplant beds. You can see how I did that in the next videos.
So now come the ‘ooopppssss’…I did all of this on Friday of last week. Made me really happy, and even more excited about my garden experience/success this year! And yes, I checked the weather report for the next 10 days. You see strawberry plants can handle some cold weather, even below freezing temps as long as it isn’t for long periods of time or too cold. The blossoms can’t though, frosts and freezes will kill off blossoms. But, no blossoms on my plants, so no worries. But…
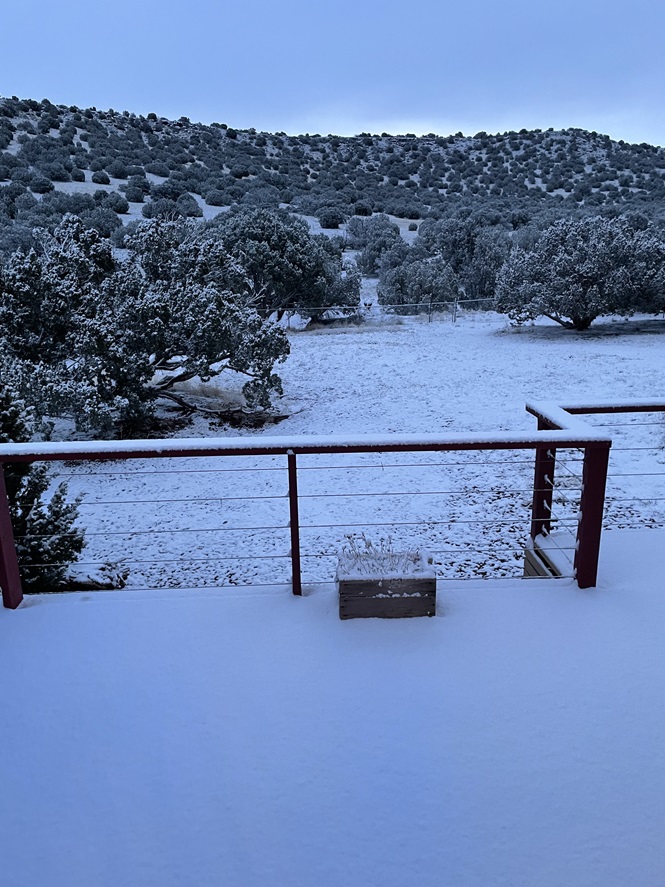
Here is a picture from the next morning (Saturday)…

But it melted off and was in the upper 40’s.
And then Sunday morning…
 But it melted off and was in the mid-40’s.
And then Monday morning…
 But it too melted off and was in the mid-40’s.
This morning (Tuesday) it was bright and sunny with clear skies. It isn’t even noon yet and it is 46. Should hit mid-50’s with beautiful clear blue skies all day.
So now are 2 videos, both taken this morning. First one is to show the condition of the plants and to show you my irrigation…
And yes, the video above is this morning after three days of rain, snow, hail, and even thunder with the hail and snow.
The video also shows the irrigation I am doing for them. The original bed has bubblers since there is so much ground clutter and I can’t get tot he soil for soaker hoses. The other three beds have soaker hoses. Notice the soaker hoses are set-up with two connections with the supply line to ensure a steady and consistent water flow. I only put 3 bubblers on a 1/4″ line to make sure I was getting enough water supply there as well.
The video below is a bed comparison. The first two beds are the beds with only about 10 – 15% native soil. The last bed is about 50% native soil which means sand that turns into clay when it gets wet and also doesn’t drain as well. It was a test. If it really shows poorly I will dig it out and replace with the better soil.
So I guess I am going to have to give the patch a few days and see what damage was done with the cold, snow, rain, and hail.
So the moral of the story…time to think about your garden…just don’t get too impatient.
Related Articles –
 2009 - 2024 Copyright © AHTrimble.com ~ All rights reserved
No reproduction or other use of this content
without expressed written permission from AHTrimble.com
No legal, economic, or financial advice is given, no expertise to be assumed.
See Content Use Policy for more information.
