EMP, CME, & Lightening Surge Protection – Part #2

If you haven’t read Part #1 of this 2-part series you probably should.

< click here to read Part #1 >

My Protection Strategy –

So how do I protect my off-grid home?

First off…I place a more likely chance that I will suffer a lightening strike than an EMP. However, I don’t discount the occurrence of an EMP strike on the continental US, and that has the potential to affect our home. Remember I am off-grid so I don’t have thousands of miles of electrical transmission lines attached to my house. That my friend greatly reduces my exposure to an incoming EMP surge.

All that being said I take some basic precautions first…

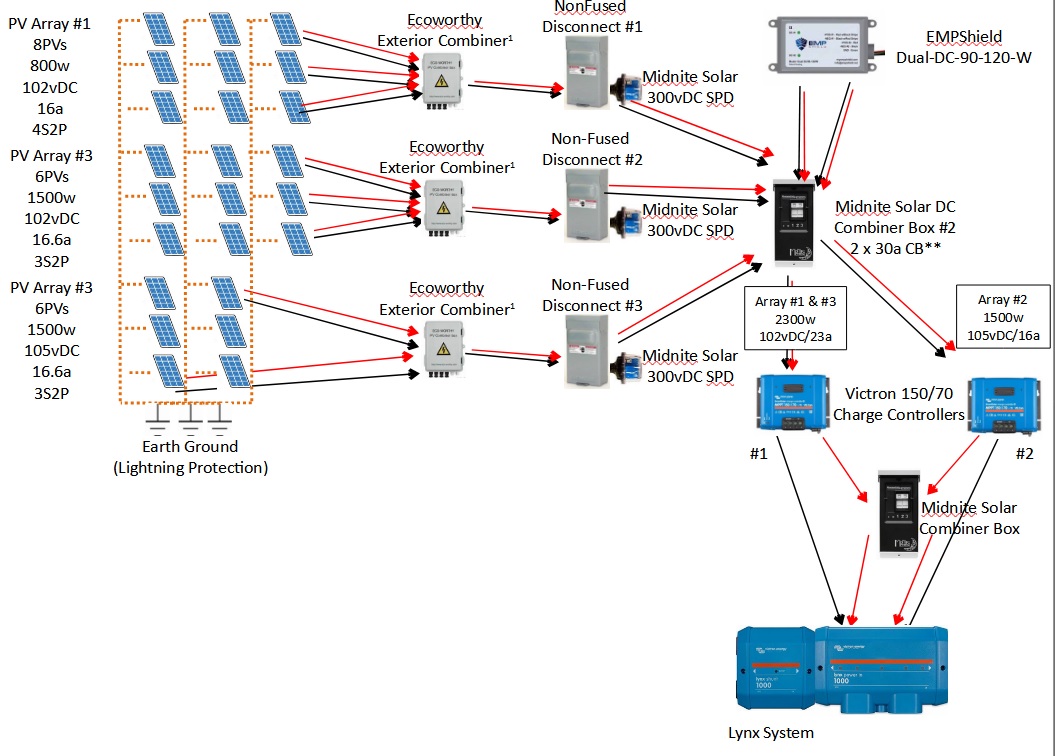
  1. My PVs (solar panels) all have aluminum frames, all those frames are attache to an earth ground system. The earth ground system includes:
    1. A single continuous 8AWG bare copper wire connected to each panel of 3 PVs in the string via a lay-in grounding lug.
    2. The 8AWG bare copper wire from each string is connected to a 6AWG bare copper wire handling the array that contain 2 strings each.
    3. The two main arrays (#2 & #3) are connected via 6AWG bare copper wire to an earth ground that consists of three 8’ copper clad rods driven in the ground 10’ apart bonded with 6AWG bare copper. Note1: the arrays are approximately 50’ apart and the 6AWG bare copper wire connecting the two arrays are buried 12” in the ground between the two arrays. Note2: the third array is grounded separately to its own earth ground that is also the house system earth ground. Again, it consists of three 8’ copper clad rods driven in the ground 10’ apart bonded with 6AWG bare copper.
    4. Each array also has a 40ka surge protector in the EcoWorthy combiner box. That surge protector is connected to the 6AWG array ground wire. The combiner box is a Chinese manufacturer and I don’t know if it will work or not when the times comes. The SPD was included with the boxes when I bought them.
    5. This gives two types of surge protection; 1) any energy absorbed through the PV metal frames is directed into the ground, 2) any energy absorbed into the PV wiring is directed to the external combiner box’s SPD and that energy is directed into the ground.

  1. The utility room that houses the solar/electrical/electronic equipment has a metal roof and foil backed OSB on the side walls. I have no idea whatsoever if this provides any protection. Some folks think so, others don’t. I don’t count on it.
  2. Inside the utility room the incoming PV power lines come into separate array disconnect boxes. Each disconnect box has a Midnite Solar MNSPD-300-DC (80ka) installed.

I consider this to be my lightening strike/surge protection (E2 & E3); 1) good grounding, 2) a 40ka SPD, and 3) an 80ka SPD. But that stills leaves out the EMP E1 power surge. To address that issue you have to go downstream of my system.

Downstream of the array disconnect boxes I have a combiner box that combines arrays into a circuit breakers that also acts as disconnects. that is located just before my charge controllers. Arrays #1 & #3 go into my charge controller #1, and array #2 goes into my charge controller #2. For the E1 surge I have an EMPShield model Dual-DC-90-120-W. Each charge controller has its own protection via this EMPShield unit since it is a “dual” unit. And yes, the EMPShield unit also provides E2 & E3 protection.

And how good is the EMPShield? Well, that is hard to say. Remember, we have no definitive idea if a device works, or not, until an event occurs. But, the documentation on the EMPShield device, along with the advertised testing, assures that it will protect against E1, E2, & E3 power surges. So that combination of surge protectors protects against surges coming into the system from the outside via the DC side of my off-grid solar system.

Now let’s talk the AC side of the system…I also have a Midnite Solar MNSPD-300-AC installed in my main breaker 
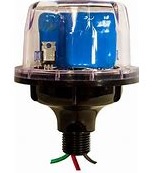
panel. That is intended to protect power surges getting into the system via house wiring. Yup, that means every single inch of wire in the house is a potential “antenna” for power surges. And yes, that means I am only protected against E2 & E3 surges from the AC side of the system. It is my intention that as my research continues and I become 100% convinced of EMPShield products I will install one of their AC units in the main breaker panel and move the Midnite Solar SPD to the inverter/generator transfer switch.

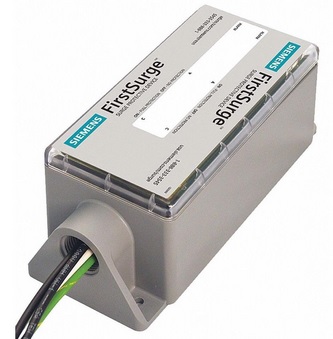
And if you are wondering…I have no problems with an Siemens FS140 (FirstSurge) being used as a substitute for a Midnite Solar SPD. I use Midnite simply because I found it first and have confidence in it for lightening protection.

How an SPD works –

If you are wondering how a SPD works…well, that is another whole article. But the short version is this…the SPD draws the power surge into itself away from other wiring and equipment and dissipates it through its internal parts. Yeah…call it magic, voodoo, or a modern engineering marvel…but that’s how they are designed to work.

Now, have you asked the question yet…Will all of this work and protect my house full of electronics/electrical equipment, and better yet, will it protect thousands of dollars worth of my solar system gear? If you have an answer let me know!

Yeah, a funny way to say I have no idea if this will all work to save me from an EMP, let alone a lightening strike. But I do know that doing nothing will definitely result in a bunch of burned up and useless equipment.

I will write reviews on EMPShield and Midnite products fairly soon. Should you buy now? Well…I did. And doing something is better than doing nothing. Do nothing ensures failure.

< click here to read Part #1


If you are interested in buying any of the mentioned products…PLEASE DO 🙂

I am providing links to the equipment below. If you buy one of the Amazon products through my link I will earn about a 1.5% commission. If you buy an EMPShield product I will earn a 15% commission. And if you use the coupon code “ahtrimble” when you buy an EMPShield product on their website you will get $50 off any product.

Any money I earn will go towards a test unit for the AC side of the system. If I earn more than the cost of a test unit then any excess funds will go towards another LifePO4 battery.

Click on the icon below for the MidNite Solar 300vDC unit (for protecting DC voltage equipment)…

MidNite Solar MNSPD-300-DC Surge Protection Device (300vDC )


Click on the icon below for the MidNite Solar 300vDC unit (for protecting AC voltage equipment)…

MidNite Solar MNSPD-300-AC Surge Protection Device (300vAC )


Click on the icon below for the Siemens FS140 Whole House Surge Protection…


Click on the EMPShield logo below  to buy EMPShield products. Use “ahtrimble” in the coupon code at check out for $50 off any EMPShield product. Hint: If you are buying more than one product then make them separate purchases and use the coupon code for each. If are having trouble deciding which product to buy, then write a comment below and ask for help from me.


Related Articles –


 2009 - 2023 Copyright © AHTrimble.com ~ All rights reserved
No reproduction or other use of this content 
without expressed written permission from AHTrimble.com
See Content Use Policy for more information.

EMP, CME, & Lightening Surge Protection – Part #1

Time to go technical…’high-tech’ to be exact…let’s talk surge protection.

For this discussion surge protection will include the concepts of lightening strikes (LS), Coronal Mass Ejections (CME), and of course, Electromagnetic Pulses (EMP). While they do differ, they all can be a threat to electrical and electronic equipment. Additionally, I won’t go into detail on protecting small devices such as handheld radios since I have already covered that in the past. I will concentrate on covering entire systems such as home AC electrical systems and solar systems (both AC & DC sides).

As with all my articles regarding equipment/gear I define the mission, or job, that I want that equipment/gear to accomplish. For this I define it as…

Reasonably, effectiveness & economically, protect our home’s complete electrical systems from damage due to electrical surges regardless of their origin.”

Also, when you hear me refer to a SPD, I am talking about a ‘surge protection device’.

Now that’s done let’s talk about risk management. As I have previously written extensively about risk management, it is determining the probability of an event occurring, and if it does occur, how severe will the potential damage be. Once those two criteria are properly assessed then proper mitigation measures can be identified and undertaken.

In my original article “Will we really be hit with an EMP?”, written in 2015 and updated in 2019, evaluated and stated both the probability and severity values. I originally set the probability at ‘very low’ and the severity as ‘nationally devastating’. Numerically speaking now I would go with 4 – 5 for probability (moderate) and 9 – 10 for severity (nationally devastating).

For the purposes of this article I put the CME events at a ‘moderate’ in severity and ‘low ‘in probability. And then for lightening I go with ‘serious’ in probability and ‘devastating’ in severity. And then somewhere in here I have to inject a healthy dose of reality. I don’t it is feasible at all to ‘harden’ my entire house and all associated electrical and electronic items against all possible surge events. I simply don’t have them time, the expertise, nor the money to do so. And honestly, I don’t have the desire to. I want to live in reality and not acquire a bunker and/or siege mentality out at the fringes.

So let’s talk the most likely of the surges involved with the most potential of severe damage…EMP.

EMP’s are a result of a high-altitude nuclear detonation. Modern nuclear devices that would be used in an EMP strike consist of three waves of energy pulses; E1, E2, & E3. Now, I am not going into intense details…it would make everyone’s eyes glaze over. There are plenty of articles on the subject if you want to get that far into the weeds.

EMP information, generally speaking…

  • EMP devices are generally detonated high in the atmosphere so the damage can cover large areas of earth’s surface.
  • The detonation effects spread out in all directions but the earth attracts most of the energy pulses downward.
  • The higher the detonation the lessening of the pulse energy.
  • The further away from directly underneath the detonation the lessening of the pulse energy.
  • In North America the energy pulses are drawn more to the south of the detonation point due magnetic field and orientation to the equator.
E1 Pulse –

This first pulse of energy does most of the damage in systems. It is primarily high-voltage that does the damage. This first pulse of energy travels at about 90% the speed of light (about 168,000 miles per second) and peak energy is about at the 5 nanosecond mark.

Realistic Example: You are 250 miles from a EMP blast, that means it hits you in about 0.0015 seconds (15 thousandths of a second) but traveling at 168,000 miles per second, and once it hits you, the peak energy arrives in 5 nanoseconds. So once the energy hits you, the energy goes from 0% to 100% of peak withing 5,000,000,000ths of a second. And the pulse has passed you in about 100nanoseconds. Meaning you have to protect your systems quickly, approximately within a nanosecond, and for about 20nanoseconds.

The voltage that actually reaches a maximum of about 50,000volts per square meter. Meaning, if you had a 1 meter square steel plate sitting on the ground directly beneath the detonation point the steel plate would absorb 50,000volts. If what was struck was a normal 3-wire household service cable 100’ long from the electric pole to the electrical service entrance it would absorb about the same 50,000volts. Ironically, the amperage would only be less that 50amps for that same area…but only for far less than a second.

As you can see it is the absorbed voltage that will do the damage but it occurs very, very quickly. And that is why normal residential, and even commercial, surge protectors simply won’t provide protection…they can engage/react quickly enough…about 500-1000 times too slow to react to the incoming energy surge.

E2 Pulse –

This is the next energy pulse to hit…about 1000nanoseconds after the E1 strike, and 900nanoseconds after the E1 is gone. And the reaction speed required is about a microsecond. Yeah, slowpoke!

To get a grasp of this energy pules you can think in terms of a lightening strike. And also think of it in terms of DC voltage. The power can reach 100,000 volts and 100,000amps when it hits…depending on your relative location to the detonation. And surge protection devices such as Midnite SPDs can handle this kind of strike..essentially a lightening strike.

Here’s the problem…that same SPD would get burned out by the initial energy surge…the E1…so it is no longer available to handle the E2 energy surge…and your system is pretty sure to now damaged.

E3 Pulse –

The final energy surge is just plain weird! The energy surge is produced by the earth’s magnetic field being heaved about. And that surge can last from 10 – 100’s of seconds. To get an understanding of this pulse…think DC current. Unfortunately household systems, including power stations and transmission equipment are designed to handle AC current not DC current. That gets you a whole lot of burned out equipment.

Once again E1 pulses normally burnout SPDs that could have handled this E3 power surge.

Pulses Summary –

Whew! I am glad that is over. But the summary is pretty simple, 3 different pulses of energy, all 3 can destroy equipment, and the first pulse is the worst and generally destroys any device (SPD) that could prevent damage from the 2nd and 3rd pulses. And yes, generally speaking almost all SPDs in use today can’t handle the E1 pulse. So you’re screwed right? Ah, no.

Remember, most common SPDs can’t protect against an E1 pulse…they burnout with all your other electrical/electronic gear. But, most common SPDs are fairly inexpensive…about $125 – $150 range for Midnite SPDs. The commercial grade SPDs can hit $300, but they still are too slow to protect against the E1 pulse.

That means something rather simple…You gotta find E1 protection if you are going to be worried about EMP protection. If you are going for less protection against energy pulses, such as lightening protection, then a Midnite Solar SPD or the more expensive Siemens FS140 are great options.

Next comes what I do!

NOTE: In Part #2 I will give links to various products that I personally use and believe in. And if you purchase a product through one of those links I will make a bit of money…from 2% – 15%. The money I make from any of those purchases will go towards a new battery for my solar system. And I can offer a $50 off coupon for the #1 EMP surge protection device!!!

< click here to read Part #2 >


Related Articles –


 2009 - 2023 Copyright © AHTrimble.com ~ All rights reserved
No reproduction or other use of this content 
without expressed written permission from AHTrimble.com
See Content Use Policy for more information.

Workman Magnetic Mobile Antenna (KRDB)

I originally purchased several of these back in 2013 based on some good reviews that the antenna had gotten. When I first started to use it I thought it looked a little “boxy” and “put together with parts” vs. “designed and built.” But, I thought I would give it a try. Oooppppssss…

Now you're talking!

Now you’re talking!

About a year ago I noticed that one of the units had a broken piece of plastic on the base. I thought I might have damaged it in some way. I knew it wasn’t due to exposure to the elements because it has been stored for use when needed. That need hasn’t developed yet. I was disappointed to be sure and I set the antenna aside to work on it at some later date.

Today I went to do some antenna testing of the Baofeng UV-5RA radio vs. the Baofeng UV-5RMHP radio. I got a variety of antennas to compare SWR and power to see which radio was more efficient. When I retrieved the magnetic mount Workman KRDB antenna I saw that it had a broken piece no the base as well. I got the original Workman, and sure enough, the Antenna Workman mobile antennabroken pieces matched each other. I had one more of the Workman antennas and it too had the same broken piece.

This antenna is made by Electronic Products, Inc.. The company is listed as being located in Delta, Ohio but the antenna is made in China. Yeah, big surprise there!

Now that shows a clear design and engineering flaw as well as very poor quality materials. So now I have to look for a way to not lose my $105.00 worth of antennas. I am working on a “fix” and will keep you posted.

Piece of the base breaks off to expose the entire insides of the base.

Piece of the base breaks off to expose the entire insides of the base.

Based on just the design, engineering, quality of materials, and the fact that 3 out of 3 have broken…yeah, no doubt about it.

The piece that broke off on all 3 of the antennas is almost exactly the same.

The piece that broke off on all 3 of the antennas is almost exactly the same.

“Do Not Buy!”

Thumbs Down ReviewNote: “Fix” article <click here>

2009 - 2020 Copyright © AHTrimble.com ~ All rights reserved
No reproduction or other use of this content 
without expressed written permission from AHTrimble.com
See Content Use Policy for more information.

RIGrunner 4005H Power Distribution Unit

note: article first appeared in May 2016

Sometimes you just stumble onto a great piece of equipment. Sometimes you do it completely unaware of you needing that piece of equipment. Sometimes you are pleasantly surprised at the quality of that piece of equipment.

“Yes!” to all three of those when it comes to the West Mountain RIGrunner 4005H.

Over the last year and a half I have been working a whole lot on some great power projects. Correction, sometimes they have been radio projects but those too needed power. Years ago I standardized on Anderson Powerpoles for connecting all things power when it came to my radios. It seemed that every mobile radio I purchased had a different way to connect to a power source. And as you know, I like standardization…a lot.

Why? Because it makes things more inter-operable. And that applies to MOLLE tactical vests and pouches or radio rigs and power supplies. The solution became obvious to me early on that Anderson Powerpoles made the most sense.

Especially considering it makes it virtually impossible to cross-polarize your power. I like “dummy-proof” systems!

Using Anderson Powerpoles gives me a solid connection every time and makes it clear when connecting positive to positive and negative to negative. Gone! Were the scrambling around to figure out how to connect this or that radio to this or that power? They all had Anderson Powerpoles and naturally connected effortlessly.

To generically distribute power in my Power-Box project I used a simple Powerwerx PD-4 unit. Any one set of the Anderson Powerpoles going in supplies the power, three sets distribute the power to whatever device needs it.

Two drawbacks –

  1. There are only three outlets for devices to hook to for a power supply.
  2. There are no fuses to protect the devices from any power problems.

The West Mountain RIGrunner 4005H solves that problem very easily and rather gracefully. Yeah, I just used the term “gracefully” when talking about electronics. But, I am serious, this sweet little unit just matches that terminology to me. It is simple, clean, effective, efficient, and looks great.

But, notice I have yet to state the mission? Almost criminal on my part based on my long-standing advocacy of always having a mission for any piece of gear or equipment. So here it is –

“A cost effective method of distributing fuse protect 12vDC power to a variety of electronic devices using standard Anderson Powerpoles.”

Once again, I did my background research pretty well. I looked at available options, their features, and reputation. It was clear from the get-go that the RIGrunner was the choice.

This is the second product I’ve purchased from West Mountain Radio. I purchased the PWRgate PG40S Auto-Switch previously so I had a good feel for the overall quality of West Mountain Radio products. West Mountain didn’t disappoint me.

Let’s look at some information directly from their website…

Manufacturer Description –

RIGrunner is the most convenient and safest way to connect all of your DC equipment to a power source. It uses the excellent Anderson Powerpole® connectors, standardizing all of your DC connections. This RIGrunner can deliver up to 40 amps total through 5 outlets and is available with side mounted Powerpole® connectors. Side mounted connectors enable horizontal mounting. Works equally well for 6V, 12V, 24V and 48V systems. Operates at 40 amp continuous duty with 5 outlets in operation. 

Specifications –

Overall Dimensions (maximum, w/o cables):  1.4″ H x 7″ W x 3.0″ D
Weight:                                                             6 3/4 oz.
Voltage:                                                            Positive up to 48 VDC
Maximum total current:                                    40 amps
Maximum single individual outlet current:        40 amps (fuse protected)

Construction

  1. Built in USA to IPC-610 commercial manufacturing standards by an ISO9002 facility.
  2. Printed circuit board .062 FR4 material, extra heavy 3oz. copper, with greater than 1″ wide high current traces.
  3. Double sided, plated through holes, solder mask over bare copper, silk screened commercial grade printed circuit board.
  4. Enclosure: .062 aluminum, with attractive and extremely durable powder coat painting and clear silk screen labels.
  5. Power connectors: exclusively Anderson Power Products®Powerpole®.
  6. Connectors are arranged according to the ARES/RACES standard (see our links).
  7. Fuses installed are standard ATC/ATO automotive fuses available in 10 values from 1 to 40 Amps.
  8. Stainless steel hardware with PEM™ threaded mounting standoffs.

So, since the real meat of this unit is on the inside…naturally I had to open it up.

This puppy was a clean and graceful on the inside as it was on the outside. But, let me give some details –

  1. The case is solid and of a sufficient weight/strength/thickness to protect the sides from damage under any reasonable conditions.
  2. Two screws hold the case in place and can be easily removed to access the inside.
  3. Once inside the first thing I noticed was the quality look to the board. By quality I mean the board was clean, obviously well made, and the solder was first rate.
  4. I started poking around at the various components and they were all tight and securely soldered to the board.
  5. The Anderson Powerpoles themselves were tight and solidly connected to the board.

And then I noticed this…

The folks at West Mountain put their actual call signs on the board to show who it was made by. Now, that may not be a big thing to you, but to me knowing that Hammers were behind the design and manufacture of this unit just gave me a sense that it was done right by people who know.

The unit was easy to put back together and gave me that quality “feel” once again. This unit is made for real-life field operations.

So, was there anything that could be better about this unit? You know…the “Cons” side of things. Yes, two –

  1. The unit is not weather proof, not even weather resistant. This unit must be installed where it is protected from the elements. Rain, dust, snow, etc. can relatively easily enter the case and reach the board. I suppose you could silicone seal around the blade fuses and the Anderson Powerpoles to make it almost weather tight. So that is something to take into consideration. However, my applications do not require “weather-proof” or “weather-resistant” ratings so this is no big deal to me.
  2. Let me show you how picky I can be. The power outlets are clearly marked “1” – “5” with no problem correlating the fuse to the outlet. But, then I noticed the “DCIN” label. I was not really paying attention and trying to figure out what “DCIN” meant. About a second later, and a darkening red face, I realized that was the DC power inlet fuse. Yeah, sorry, mini-bran fart on my part. So I would rather see “DC IN” vs. “DCIN” and yes, I know it is extremely picky.

Occasional Issue –

I never have experienced this myself but I did read where a couple of folks made the comment that on the rare occasion the Anderson Powerpoles separated from the unit. Not the ones mounted to the board, but the Powerpole (from the cable) plugged into the unit’s Powerpole seperated from the box connection. I tried like heck to get mine to separate by pulling on them and no success. OK, well that isn’t entirely true. They did separate but only as designed after apply considerable separating force to do so.

However, I wanted to make sure I included a “fix” just in case you might worry about that occurring in your set-up. So step-by-step…

Standard Anderson Powerpole connection example.


Used my punch and removed the roll pin from the connectors.


Got out one of my retention clips to stabilize and reinforce the connection.


The final product with the retention clip securely holding the connectors together.

Now, if you were still really worried about (i.e. obsessed) the connection, you could put a spot of Superglue on the retention clip. That would hold those puppies together through anything! Alternatively, you could wrap a piece of electrical tape around the retention clip a couple of times and that would hold the clip in-place as well. Problem (if there ever was one) solved!

Summary –

This is a great piece of equipment that functions flawlessly. On top of all that, it is solid, and will do the job for you. This product is an unquestioned

                          “BUY!”                              

< click here to go to West Moiuntain website RigRunner page >


Related Articles –

  1. Super PWRgate PG40S Auto-Switch


2009 - 2020 Copyright © AHTrimble.com ~ All rights reserved
No reproduction or other use of this content 
without expressed written permission from AHTrimble.com
See Content Use Policy for more information.