Protecting your Radio from an EMP: Part #1

note: article first appeared in May 2016.

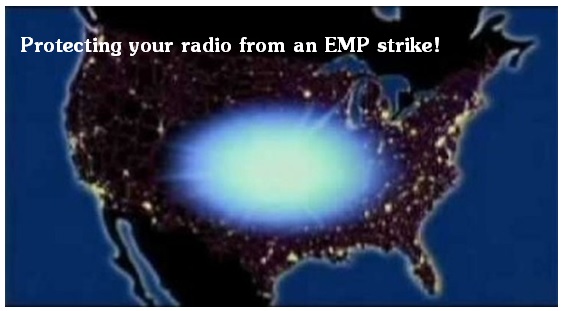
So what about the EMP thing?

Is it for real? Can it affect your handheld radio? Can you protect your radio from an EMP?

Before I get into all of that, remember, I look at “threats” as “risks.” And I then look at all of it as “risk mitigation”. The level of risk is judged based on probability of the risk actually occurring and severity of what the aftermath looks like. I look at an EMP strike the same way…a risk to be calculated and mitigated.

Probability –

I see the risk of us being hit by a nuclear weapon that generates an EMP as low, very low actually. The reason I give it such a low probability is the attacker’s fear of retaliation. Russia and China have no desire to exchange a nuclear strike with us. Iran would probably love to but they aren’t ready for that…yet. Pakistan probably isn’t too far behind Iran but they are maintaining a resemblance of normal behavior. North Korea, well, their leadership are complete nuts jobs in that country. I don’t expect North Korea to actually launch a nuke at us, but you never know with them.

So based on all of that, I see the probability as pretty dang low. However, 20 years ago I would have given it a zero chance. 10 years ago, slightly more than zero. When Iran did the nuke deal with Obozo I believe Iran’s potential use of a nuke against another country went to 100%. Their use of a nuke against us maybe 50%…against Israel is 100% but only when Iran is ready.

And then there is the wildcard…our missile protection system. Can we stop/defeat a missile that is EMP capable from reaching us? Yes…for the most part…but, there is no guarantee…and it depends on how many missiles are inbound over a given period of time and from what directions..

So now I have the probability rating “on the chart.”

Severity –

Here is where it could get ugly. If anyone launches a nuke at us and it actually detonates on US soil, it will be devastating. It will be the blow that negates our super-power status. If we are hit, and we don’t hit back. we will be re-categorized to the same group that includes France, England, Italy…maybe worse. If we are hit and we hit back, then we can expect WWIII. And should that happen, an EMP is the least of our problems.

So let’s look at the severity if it is just an EMP strike against the US. By the way, it would be more along the lines of North Korea going rogue and hitting us without China telling them to. However, there is a potential scenario where China would tell them to hit us with an EMP just to weaken us and test out retaliation resolve. China could then deny involvement and avoid retaliation.

Whatever the reason we would be hit, the outcome would be very damaging. The damage would be two-fold. 1) The actual direct result damage to infrastructure, 2) the economic fallout.

The economic damage would be far worse than the direct damage. The stock markets would crash, the economy would nose dive, and the dollar would be become worthless as a world reserve currency, And all of that would transpire very quickly. It would be Economic Armageddon for a while. Mostly due to banking be out of business. Yeah, completely out of business. Modern banking is all computer based with that information being transferred between customers and banks, banks and businesses, banks and banks, etc. And all entirely by electronics. An EMP would fry most large-scale electronic systems, including telecommunications.

The direct damage is a little less clear. EMP damage is directly affected by a few things:

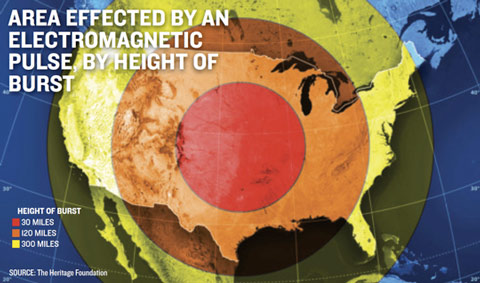
  1. The size of the weapon as described by “megatons”
  2. The altitude above the surface
  3. The electronic/electric system relative location to the blast area

The absolute worse location would be directly under the atmospheric blast. As the zone expanded outward, the impact would lessen. But, that would be in direct relation to the size of the detonated weapon. The bigger the weapon, the larger the affected area. However, the further away from the blast you were, the more diminished the impact would be. Finally, the closer the detonation to the earth’s surface the smaller affected area as well.

So, for this discussion we are talking about an EMP strike that will affect you with the Electromagnetic Pulse but won’t fry you into a gooey mess of melted skin, muscle, and bone.

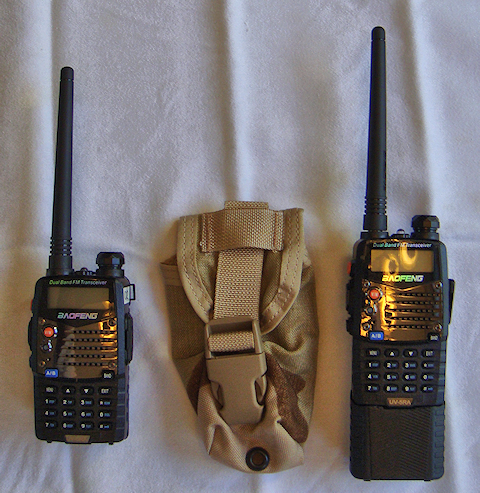
Can you properly prepare for such a strike ensuring your radios make it through in operating condition?

Well, I honestly can’t answer that question. Yeah, bummer, I know. And realistically, no one can give a 100% sure answer to that question either. At least not honestly. Why? Because it hasn’t actually happened anywhere so there is no historical perspective. Sure, there have been experiments and endless computer simulations…but it hasn’t actually occurred so even the best scientists don’t know for sure what an actual strike would look like. If someone tells you they have a 100% guaranteed solution they are BS’ing you.

But, let’s remember what you are actually protecting against…

Real-Life EMP –

I had the opportunity to talk to a 40 year expert that worked for Motorola and was a professor of electronics at a major university. We discussed the EMP potential. He explained to me that all their testing was different than the hype and scare that we hear about in the media and read about in the books.

If electronics weren’t protected they usually got wiped out. But, they also discovered that protecting the delicate electronics wasn’t all that difficult. They found the concept was to direct the energy of the pulse around the electronic gadget not allowing any of the energy to come in contact with the guts inside the piece of equipment.

When I asked him how difficult it was, he chuckled and said, “Not very.” He told me that placing electronics in a metal box on insulated material should be just fine.

To me the operative word was “should.”

He said there was no way to conclusively say what kind of metal box worked all the time. And the reason is the EMP pulse itself. The energy flows through the air at different frequencies. The key was to block that specific frequency of energy. And he also told me that there couldn’t be any gaps in the metal box, a tight seal wsa paramount.

Then he said it was pretty simple to test. He said take an FM radio, tune it to a clearly heard station, and turn the volume up. Then place it in your metal box on insulated material. Slowly start to close the lid. If the radio reception died away and you could no longer hear the radio then the box was blocking the energy frequency of most EMP pulses.

He did qualify that by saying that to the best of their knowledge at that time EMP, energy pulse frequencies were roughly that of FM stations. And that is why if you could block the FM reception, you could block the pulse energy. And technically you weren’t “blocking” the energy pulse. The metal box was moving the energy pulse around the outside via the conductive metal not allowing the energy to come into contact with the radio’s antenna.

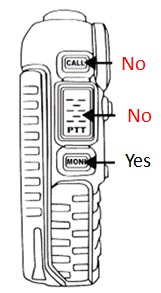
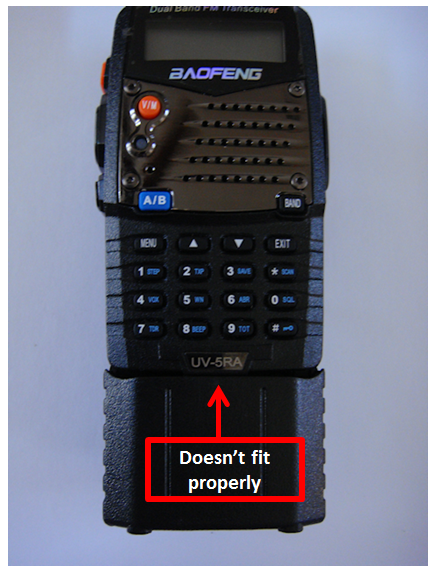
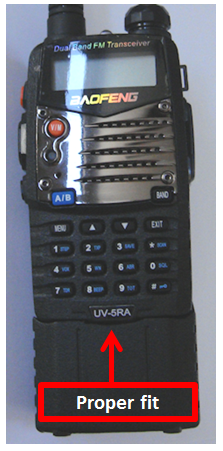
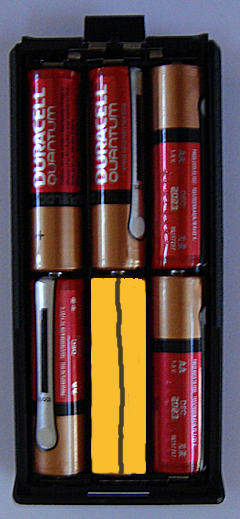
He also said it would be a good idea to remove the battery and the antenna. That would further assist in keeping the energy out of the radio since both of those items attracted energy. We talked about wrapping the radio in a layer of insulation and he said it would help if there were no gaps.

Faraday Cages –

There is a lot of talk, as well as a lot of hype, about Faraday Cages. I have read countless stories and articles about different version and options of a Faraday Cage. Everything from simple chicken wire to a box made from an old microwave. Some have even talked about making their house or bunker a Faraday Cage itself by using cooper mesh, etc. wrapped around the entire structure.

Well, I just don’t get it! Yes, the theory is supposed to be sound, and is supposed to work just fine. Some “experts” have talked about the practicality of Faraday Cages and that they will work perfectly to protect your gear. Some of the written stuff out there sounds really, really impressive. But, and I don’t know how to put this nicely, but…I just don’t trust them to have the prefect solution.

Here’s what I mean…The concept is to move the surge of power that is coming in on a range of frequencies, around the electronic gadget, without any of the power actually contacting the gadget itself. So do you want a mesh with a bunch of holes/gaps protecting the gadget…or solid metal with no holes or gaps?

Yeah, I know…the electromagnetic energy can flow around mesh just fine. But, what if just one of those gaps in the mesh allows the energy to come into contact with the gadget? You’re screwed. And ever get a quote for a house covered in copper mesh????

To me, it makes much more sense for a solid layer of metal to protect the gadget that has no holes in its protective cover combined with an insulating layer to protect the metal outer layer from contacting the gadget. My person, the real-life expert, also promotes that “solid “alternative. Then it dawned on me that during my days in the Navy I served on-board an aircraft carrier. And on that carrier were a variety of jets; bombers and fighters. One day I noticed that the canopies of those jets had a faint gold coloring to them. I asked one of the airman what that was all about. He explained to me that is was actually “gold.” It was so thin it was transparent like sunglasses. But the gold protected the pilot from radar microwaves.

And what are microwaves? Energy. Energy pulsed out on specific frequencies. Just like an EMP pulse of energy. Bingo!

My Solution –

After talking with my “expert” who actually worked in the field and had researched EMPs, and then drawing on my Navy experience, I went into research mode big time. Bottom line is two-fold:

  1. Insulate the gadget from energy pulses reaching the gadget.
  2. Deflect (i.e. move) the energy around the gadget vs. through it.

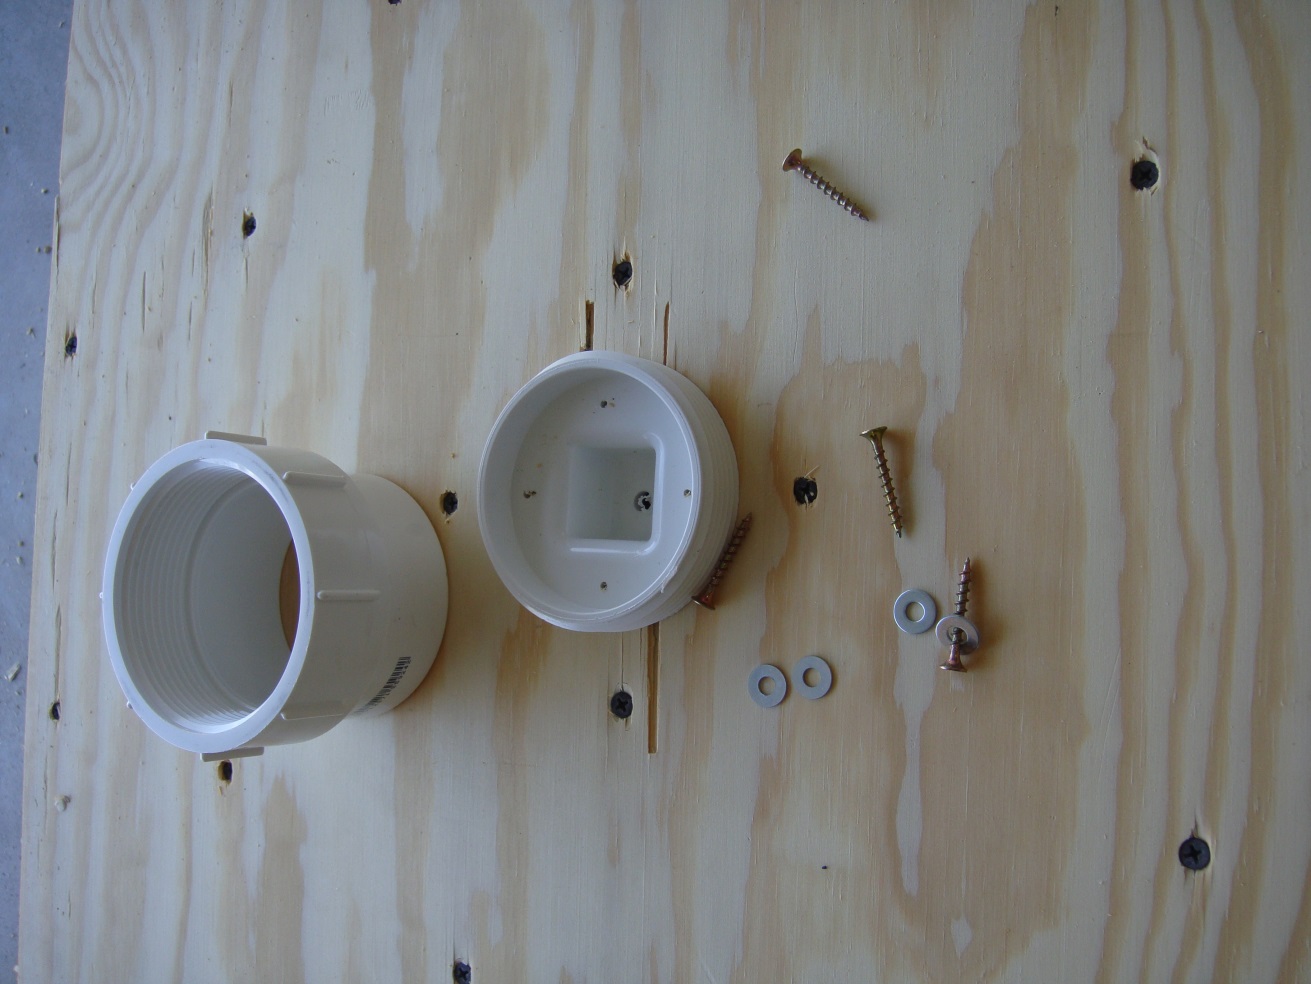
So, based on all of the above, here is my step-by-step solution:

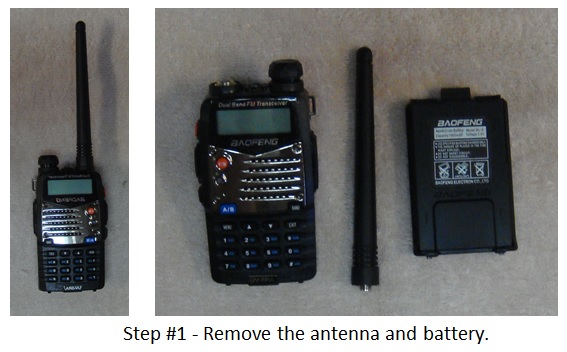
Hey, for Steps 2 – 27 you gotta read the next article!  It will be posted tomorrow.


Related Articles:


2009 - 2020 Copyright © AHTrimble.com ~ All rights reserved
No reproduction or other use of this content
without expressed written permission from AHTrimble.com
See Content Use Policy for more information.

Cloning your Baofeng UV-5RA

note: article first appeared in December 2015

The ability to clone radios is a nice feature and can be very advantageous in the field. While there are benefits, there are some limitations.

But, you may be asking, “Why do you need to clone a radio anyways?”

And that my friend is a good question, maybe even a great one. If you are serious about the UV-5RA radio for your emergency communications you probably already own them and have the RT Systems software to program them. So why not just program a radio vs. clone a radio?

The only response I have to that is, “What if you don’t have a computer available to program a radio?”

Yup, you get together with a neighboring self-reliance group and need to make your radios talk to each other for a mission. You are using the AHTrimble standard channel plan, but the other group is a little backwards and are not using it. They like your plan and want to have the same frequencies and channels as yours. Now what?

We will assume that they are savvy enough to also be using the Baofeng UV-5RA (or compatible), so cloning will be no problem. You simply whip out your cloning cable and “BINGO!” you are ready to go.

Or, you may be in the field with your group. You have to make a programming change in the CommPlan for a tactical reason. Once the change is decided upon everyone can sit down and reprogram their radios to match the new CommPlan. Or, the radio guru (Comm Unit Leader) can change his radio and then clone everyone’s radio within a couple minutes vs. an hour of programming.

Whatever the reason, having the ability to clone radios is a high-value feature.

With the Baofeng UV-5RA radio there are only a couple of limitations to positively ensure cloning compatibility; 1) both radios should be UV-5RA model radios, 2) both radios should have BFB297 firmware or above.

NOTE #1: The UV-5RA and the UV-5MHP are not compatible when it comes to cloning. They will not clone.

NOTE #2: Only channel information will be cloned. The general radio menu options will not transfer to the receiving radio.

The cloning process is pretty simple and straightforward. Making sure you get it right is important.

There are two radios involved; 1) the sending radio (the radio that holds the programming information your wish to send to another radio), 2) the receiving radio (the radio that will receive the programming information and will “look like” the sending radio when the cloning process is over).

In the steps below the sending radio is on the left, the receiving radio is on the right.

So here are the cloning steps:Cloning baofeng UV-5RA Radios

  1. Turn both radios off.


  1. CloningRadios-006With both radios off, plug the cloning cable into the receiving radio’s accessory jack. Ensure that the plug is seated firmly.
  1. With both radios off, plug the other end of the cloning cable into the radio’s accessory jack.


  1. TCloningRadios-007urn on the receiving radio.


Cloning baofeng uv-5ra Radios

  1. On the sending radio depress the “moni” key and hold. Turn on the sending radio.CloningRadios-005
    • The sending radio will display “coping” on the display screen and the status LED light will flash red.
    • Once the status LED light begins to flash red you no longer have to keep the “moni” key depressed.
    • The receiving radio’s status LED light will flash green.


  1. When the cloning process is complete both radios’ status LED lights will stop flashing and both radios will momentarily turn off and then back on.
  1. Turn both radios off and unplug the cloning cable.

The radios are now ready to be used.

I’ve tested two different cloning cables, both performed 100% perfectly. Why? Because they are the same cable. So, why did I buy two different ones? Well, one was advertised under the name Tenq and the other was an AnyTone cable.

Cloning Cable for Baofeng UV-5R radioNote: The cloning cable sold by Powerwerx is the same cable as well.

When they arrived I looked them over closely and they are the same cable. Both are probably made in China at the same factory and then sold to US suppliers for private label. There was one difference, $9.99 vs. $13.95. The Amazon link to the Tenq cable, $9.99 is below…

Amazon - Tenq boafeng uv-5r Cloning Cable


2009 - 2020 Copyright © AHTrimble.com ~ All rights reserved
No reproduction or other use of this content
without expressed written permission from AHTrimble.com
See Content Use Policy for more information.

Running a Baofeng UV-5RA Radio on AAA & AA Batteries

Batteries - Energizer Sucknote: article first appeared September 2015

I’ve never seen anything so conclusive in all my testing of gear. I mean it was crystal freaking clear what the outcome is. Here’s the short of it:

  • Don’t try to run your Baofeng UV-5R on AAA batteries. It just doesn’t work out well whether rechargeable batteries or high-quality alkaline batteries…it just doesn’t work. In three separate tests I never got more than 1.5 hours of radio run-time out of the Energizer 850mAh rechargeable nickle metal hydride batteries. And that meant no heavy transmission time.
  • Batteries - TenergyI got just under 3 hours of run time on Tenergy 1000mAh rechargeable nickle metal hydride batteries.
  • The AAA battery tray works just fine and fits well without any modifications.

So, the bottom line is…only use AAA batteries when you don’t have any other battery option available.

What my testing showed for AAA batteries:

  • AAA batteries just don’t have enough power to keep the radio running for very long. Even with the best of the AAA batteries, 3 – 5 hours of run-time is just not adequate. Well, unless there simply is nothing else available.
  • Rechargeable AAA batteries suck. Energizer AAA rechargeable batteries really, really, suck.
  • Alkaline batteries are marginally better. But only marginally better.

What my testing showed for AA batteries:

  • AA batteries (the big brother to AAA batteries), are exponentially better for radio operations. They lasted 5 – 8 times longer their smaller counterpart.
  • Rechargeable AA batteries are also acceptable for using in radios, but only quality Batteries - TenergyAABatteries - Duracelrechargeable batteries such as Tenergy or Duracell. Energizer rechargeable batteries are worthless.
  • Running my UV-5RA on Duracell alkaline batteries (5 to start with and a dummy battery to prevent over voltage) I was able to get 38 hours of operation. When the radio shut down I swapped the dummy battery for a brand new Duracell and got another 1.5 hours of radio operations out of it.

For rechargeable AA & AAA batteries I like Tenergy batteries. Remember, there isn’t a good rechargeable AAA battery for radio operations.Batteries - Energizer SuckAA

I won’t ever depend on Energizer AAA or AA rechargeable batteries. Energizer batteries suck…period.


For alkaline batteries…Duracell. Period!

For alkaline batteries…Duracell. Period!


2009 - 2020 Copyright © AHTrimble.com ~ All rights reserved
No reproduction or other use of this content
without expressed written permission from AHTrimble.com
See Content Use Policy for more information.

Dummy Batteries to Reduce Voltage

Article first appeared August 2015

There are times, especially with electronics, that you want to use AA batteries but to do so would give you and pile of AA Batteries“over UltraCell2voltage” situation that would burnout those sensitive electronics. Well, there is a solution…dummy batteries.

Briefly, these are battery “look-a-likes” but are not actually batteries. They pass current through them but add no voltage themselves.

So the first picture below is that of a AA battery tray for a Baofeng UV-5RA radio. This battery tray is part of an aftermarket battery case that allows you to use AA batteries with the UV-5RA radio. < read more about the battery case here >Baofeng UV-5RA AA battery tray

So, this looks all fine and dandy and ready to use with the radio. However, you could burnout the radio using this battery case with these six 1.5 vDC batteries in the battery case.

Why?

The UV-5RA radio is designed to work on a maximum battery voltage of about 8.5 vDC. This battery configuration would give you about 9.1 or 9.2 vDC with brand new decent-quality AA batteries.

Can you say “sizzle!

So why was the case designed this way to begin with?

Baofeng UV-5R AA battery caseIf you swap out the  alkaline 1.5 vDC batteries with the standard 1.2 – 1.3 vDC rechargeable batteries then you get voltage measuring in at 7.2 – 7.9 vDC. And that is well within the operating voltage range of the radio.

But you have another option, an option that can be used with alkaline batteries pumping out 1.5 – 1.6 vDC per battery…dummy batteries that I mentioned earlier.

The dummy battery is simply a non-battery in a casing that looks like a battery.  The dummy battery allows current/voltage to flow through while taking up space in the UltraCell dummy battery with battery case battery case and not adding another 1.5 vDC to the current. So now you can put five alkaline batteries in the battery tray along with one dummy battery and have voltage that is within operational voltage range.

Note: Carry the sixth alkaline battery with you. When the electronic device shuts off due to low voltage, swap out the UltraCell dummy battery for the good alkaline battery that you’ve been carrying. You will get a little more life out of the electronic device. Maybe just enough to make a huge difference before the fresh battery is discharged.


2009 - 2020 Copyright © AHTrimble.com ~ All rights reserved
No reproduction or other use of this content
without expressed written permission from AHTrimble.com
See Content Use Policy for more information.

Baofeng UV-5RA : Hypario Battery Case for AA batteries

Article first appeared in June 2015

I am a huge Baofeng UV-5R handheld radio fan! Yes, it is a Ham Radio, but it is also much, much more and I love Baofeng UV-5r handheld radiothe little radio. It is a dynamo! The radio is a great size, packed full of features, reliable, and more than anything else EXTREMELY affordable. You can read more about my review of the Baofeng UV-5R radio here < UV-5RA review >. This post is dedicated to the Hypario AA battery tray for the Baofeng UV-5A radio.Baofeng UV-5RA AA battery case

The very first thing I noticed about the battery case was IT DOESN’T FIT !  Yup, the battery case didn’t fit the radio. And the improper fit prevented the battery case from “clicking” into place correctly on the radio. But I had read the reviews and dealt with other Baofeng radio after-market equipment before. I knew what to do.

I got out my diamond files and my pocket knife and proceeded to whittle down the offending plastic. It doesn’t take long to remove a sufficient amount of the plastic that is prevent the proper seating of the battery tray. I suggest you just work at it slowly, taking a little plastic at a time and testing for the “click” often.

Baofeng UV5RA AA battery trayIt took me about 5 minutes of whittling and I was good to go.

Next issue that I noticed was no seal around the two pieces of the battery tray itself. So this battery case is NOT waterproof. I would expect the tray to be moderately water (rain) resistant at best. And from what I can tell, there really isn’t a good way to improve its water resistance. Well, there might be one way…using silicone seal around the whole thing where the two pieces come together. But then the functionality of the unit would drop significantly when it came time to swap-out batteries.

The next step was to test the AA battery fit in the battery tray. I am a big believer in Duracell batteries and not that long ago I bought a bunch of Duracell Quantums that were on sale. So I fetched 6 and they went right in and fit snugly.

Baofeng UV-5RA AA battery trayThe picture of the battery tray with the batteries installed appears to the right. Do you notice anything wrong? Well, you might think the batteries are running the wrong way vs. facing the alternate opposite direction. But, that is not what I am referring to. Look again, and think “operational.” There are six Duracell Quantum AA 1.5vDC batteries in the battery tray to power the Baofeng UV-5RA radio. A radio that runs on 7.4vDC power. You there yet?

Six 1.5vDC batteries delivers 9volts of power. Yup! That is about 22% more voltage than the original Li-ion battery that comes with the radio. Fortunately, the radio didn’t start smoking when I turned it on. The radio’s battery charge indicator did show a full charge. Go figure!

Option 1

Option 1

So the problem is over-voltage to the radio which I confirmed with my multimeter. There are three primary options to overcome this problem. First option, if the grid is down, is to make a “fake” battery that simply passes the current through or around the battery to the other in-line battery without adding any additional voltage. For instance, a wooden or plastic dowel rod cut to size with a wire that makes contact with the battery tray on one end and the battery on the other end. That reduces the number of 1.5v batteries to five batteries providing 7.5 volts, which the UV-5R can run on just fine.

However, I think that option is a bit clunky and could pose other problems in the field but if the grid Baofeng UV-5R -AA battery case UltraCell AA Size Dummy Batteryis down you can make this option. Now, a more commercial option a “dummy battery” that you can buy. I like the UltraCell AA Size Dummy Battery. You just slip one of those into the battery tray in place of a regular alkaline AA battery and you now are only using 5 1.5 vDC AA batteries for 7.5 vDC. Your Baofeng UltraCell dummy battery with battery caseUV-5RA will operate for 3 -4 days of light use with good quality batteries, to 1 – 2 days with heavy use or poor quality batteries.


I think Option #3 is a very viable option and gives a depth of operational capability…use Baofeng UV-5R AA battery casestandard rechargeable AA batteries. Rechargeable batteries have a DC voltage rating of 1.2 – 1.31 vDC. So six of the rechargeable batteries in theory provides 7.2 – 7.86 vDC to your radio. And yes, you are losing approximately .2 – .3volts per battery but I don’t see it being an actual noticeable difference while in the field. But using rechargeable batteries vs. alkaline batteries can result in shorter use time. All things being equal, alkaline batteries will last longer.

I did test the charging cradle that came with the radio. It charges at 8.37 volts when hooked up to the 110vAC wall outlet. The charger cradle information states that its output is 8.4 volts. The .03 difference is absolutely nothing to worry about. The radio can be left on and used while in the cradle and charging. So I am making an educated guess that the upper end of the vDC range is about 8.4 – 8.5 vDC. But I can’t find any actual technical documentation on that.

But DO NOT USE the charging base with a cigarette car adapter powering the charging cradle. Well, you can if you know for a fact that the cigarette car adapter is only outputting 10 vDC maximum. The charging cradle will burnout and maybe burn up with the direct voltage from your vehicle which is 12 – 14 vDC. The vehicle voltage needs to be stepped down to 10 vDC before it goes into the charging cradle. I have ordered an adapter that should work, but I will test it and put a review up when it comes it.

I like, and primarily use, Duracell and Tenergy rechargeable batteries. Nickel–metal hydride rechargeable batteries are made specifically to work with electronic devices. AA batteries are rated in mAh (milli Amp hours), which is a rating of how long the battery will provide power at a certain draw/drain level. Don’t worry about the actual details of how long a UV-5RA radio will last between a 1500 mAh battery and a 2800 mAh battery. Just know that the 2800 mAh battery will last considerably longer. So the higher the mAh rating your rechargeable battery has the longer your radio will stay operating.

I would suggest a minimum rating of 1500 mAh on your rechargeable batteries. My AA Tenergy batteries carry a 2600 mAh rating and have a great price point.

Don’t forget “redundancy” when it comes to rechargeable batteries. “Two is one, one is none, three is a good start.” is a standard rule in my preparedness efforts. To keep my batteries charged I have:

  • Multiple AC wall charges with sensor and conditioner capabilities to prevent over-charging. I use these for normal daily non-grid-down operations.
  • I have two large-quantity AC chargers to “bulk” recharge a number of batteries at one time.
  • I have two SolarAid SolPad7 solar battery chargers.
  • I also have two GoalZero battery charger packs that can hook up to my GoalZero Boulder 30 solar panels.
  • And yes, I have the Honda EU2000i generator to run the AC chargers as well, if an when that might be needed.

Go ahead laugh…I know you want to. But I think that having rechargeable batteries without a way to recharge them is a little silly. And my OCD demands that I have multiple ways to power the chargers…as well as multiple different chargers. OK, so I am snickering a little bit too right about now. But if I am going to preach preparedness and share that information with you, then I better be practicing what I am preaching.

Warning3Now, there is also a warning with this battery tray…DON’T USE THE RADIO’s CHARGING CRADLE! The UV-5RA comes with a charging cradle. But that unit is to be used only with the battery that is supplied with the radio. That unit is not intended to be used to charge rechargeable batteries in a AA battery tray/case like the one in this review. You need to recharge the batteries with chargers that are specifically designed to charge NiMH rechargeable batteries.

Bottom line – Buy this product!

Just remember that you will have to whittle a little bit of plastic to make it fit correctly. But you will be very happy with the added capabilities to use different batteries in your radio. Batteries that can be recharged in a more standard way than the original BL-5 batteries that come with the radio. The BL-5 battery that comes with the radio is not a standard battery that would be easily recharged via solar. And in a situation where standard utility electric power may not be available, it is good to have solar options. Yes, “standard” options that match your other power requirements. Namely, AA and AAA batteries.


2009 - 2020 Copyright © AHTrimble.com ~ All rights reserved
No reproduction or other use of this content
without expressed written permission from AHTrimble.com
See Content Use Policy for more information.

ComSec – What is it and how do I use it?

What does “ComSec” mean?

“ComSec” is the term used meaning communications security. Communications security is a system of protocols that protects your communications from interception and being used against you.

.How does ComSec apply to radio signals?

Radio signal interception can be used against you in two primary ways:

  1. If personnel are trained well they can use basic radio gear to “triangulate” your position. Yeah, that means they can find you.
  2. Once intercepted, they can use the information in your radio transmission against you. It is called “intelligence gathering” and can be quite effective as a tool.

The dual threat can be used with devastating results. But, there are some methods to defeat both:

  • Use as low a power setting for transmission as possible. That keeps the radio signals from traveling any further than they absolutely have to. The signal can also be reduced by using smaller/shorter antennas.
  • During very dire times transmit while moving and never from your area of operations (AO) unless it is an emergency.
  • Transmit for only a very short time. I am talking in terms of seconds, the shorter the better. That will make it more difficult for them to pick up your signal.
  • Randomly change the frequency that you are transmitting on.
  • If you are using a dual-band capable radio like the Baofeng UV-5RA split your radio traffic between both bands.
  • Use different radio operators so the voice doesn’t sound the same each time…or in the same transmission.
  • Use coded messages.
  • Substitute letters and numbers for locations. Example: the town of Salem is referred to as “Sierra Tango” meaning “Salem town”.
  • Use numbers as replacements for words. The most simple would be a two-number code for each letter. Example: “no” would be “1415” But that is easy to figure out. So come up with your own.
  • There are other coding systems but this posting is not an article for that subject. However, one method is Communications-Electronics Operating Instructions (CEOI). You might want to look into it.

Always assume the worst…assume someone is always listening to you and what you are saying. And always assume they can figure out the location that you are transmitting from. You should always act accordingly when circumstances require or demand it…especially in dire times.

There is always a cardinal rule, one that should never, ever be broken in terms of ComSec. You never, ever use a name…especially a person’s name, first or last, not even a nickname when talking on the radio.

Also, understanding all the above means you can turn it around and use it to your advantage. You can give out false or misleading information to misdirect those that might wish to do you harm. If it is a matter of life and death you could always draw them to a location through your radio traffic as well. Then deal with the risk/threat accordingly.

What I am trying to accomplish here is pretty straight forward. I want you to be aware of your radio traffic, safeguard your important information, and don’t say inappropriate or damaging things over the radio. It could be a matter of life and death…yours…or your family’s.

There were posters from WWII that tried to convince people not to talk too much or about the wrong subjects. Still applies today.


2009 - 2020 Copyright © AHTrimble.com ~ All rights reserved
No reproduction or other use of this content 
without expressed written permission from AHTrimble.com
See Content Use Policy for more information.

AA Battery Evaluation : Eneloop vs. Tenergy

This article was first published in late 2017 and subsequently lost in the website crash. I was unable to retrieve it, I had to rebuild it from my notes and scattered bits and pieces. This article is the result.

Comparison/Evaluation of Rechargeable AA Batteries – Eneloop vs. Tenergy
Panasonic BK-3MCCA4BA Eneloop AA
  • Ni-MH (Nickel Metal Hydride)
  • 2000mAh
  • 2100 cycles
  • $2.46 (Amazon 4/3/20)
Tenergy Premium AA
  • Ni-MH (Nickel Metal Hydride)
  • 2500mAh
  • 1000 cycles
  • $1.25 (Amazon 4/3/20)
Basic Comparison from product specs and after opening the package:·
  • Eneloop claims more recharging cycles (2100 cycles vs. 1000 cycles)
  • Tenergy claims 25% more storage capacity (2500mAh vs. 2000mAh)
  • Enloop shows more out of the package charge (1.38v vs. 1.35v)
Charging:

I used the same smart charger for both brands. Same charging cycle at the same time. Alternated the batteries in the charger trays. Used “refresh” cycle to drain and charge the batteries equally. Allowed to sit 1-hour after charging cycle before testing:

  • Eneloop 1.38v
  • Tenergy 1.35v
Discharge:

I put them into brand new AA battery flashlights purchased at the same time, same brand & model. Turned em on and let them run. More than 48-hours later the results were startlingly significant.

    • The flashlight with the Eneloop batteries couldn’t keep the light on.
    • The flashlight with the Tenergy batteries was still very bright.

I was surprised to say the least…in practical testing the Tenergy blew away the Eneloop. But, I wanted to see how much more energy the Tenergy battery had left. I put the voltmeter to each battery:

    • The Tenergy batteries had 1.197v left (average).
    • The Eneloop batteries had .869v remaining (average).

Performance wise…the Tenergy batteries absolutely blew away the Eneloop batteries! It was even close! Not only did the Tenergy batteries have over 35% more energy left in them, the Eneloop couldn’t even keep the light on.

Overall conclusion…Tenergy is by far clearly the better priced battery and better performing battery.


2009 - 2020 Copyright © AHTrimble.com ~ All rights reserved
No reproduction or other use of this content 
without expressed written permission from AHTrimble.com
See Content Use Policy for more information.

AAA Battery Evaluation : Eneloop vs. Tenergy

This article was first published in late 2017 and subsequently lost in the website crash. I was unable to retrieve it, I had to rebuild it from my notes and scattered bits and pieces. This article is the result.

Comparison/Evaluation of Rechargeable AAA Batteries – Eneloop vs. Tenergy
Panasonic BK-4MCCA4BA Eneloop AAA
Tenergy Premium AAA
Basic Comparison from product specs and after opening the package:· 
  • Eneloop claims more recharging cycles (2100 cycles vs. 1000 cycles)
  • Tenergy claims 25% more storage capacity (1000mAh vs. 800mAh)
  • Enloop shows more out of the package charge (1.306v vs. 1.260v)
Charging:
  • I used the same smart charger for both brands. Same charging cycle at the same time. Alternated the batteries in the charger trays. Used “refresh” cycle to drain and charge the batteries equally. Allowed to sit 1-hour after charging cycle:
  • Eneloop 1.4695v (average)
  • Tenergy 1.4195v (average)
Discharge:
  • I used a 3-battery tactical flashlight. Each flashlight is the same brand/model. Each flashlight was purchased at the same time. Test lasted 11 hours. Every 2 hours brightness was checked (subjective based on my visual assessment) and then the battery pack was switched to the other flashlight.
  • Remaining voltage –
    • Eneloop .924v (average)
    • Tenergy 1.027v (average)

Outcome Narrative:

Total cost of purchase:

Tenergy is the clear winner by a 85% – 245% margin in price alone.
Tenergy is the clear winner is cost per mAh rating, over 2 to 3 times more cost effective.
Conclusion: The Tenergy battery is significantly less expensive than Eneloop in every purchase aspect.

Total cost of usage:

Tenergy is 6% – 35% more cost effective is actual usage. (total cost of ownership)
Conclusion: The Tenergy battery is more cost effective.

Performance:

Tenergy is 38% more efficient in actual usage.
Tenergy provides 11% more residual voltage.
Conclusion: The Tenergy battery is a better performing battery despite it lower initial and post-charge rating.

Overall Conclusion:

Tenergy is the clear winner in the head-to-head AAA battery category.
The only category where Eneloop is the clear winner is the number of charge cycles.

Assuming that Enelopp’s claim of 2100 charge cycles is correct, but factoring in Tenergy’s 25% better charge capacity, you can buy 2 Tenergy batteries for 1 Eneloop. And you get 19% more charge cycles from the Tengery batteries overall, and you save 20%!

Tenergy is clearly the better buy and the better battery in actual usage tests.

Added Note:

  • Yes, the batteries tested were brand new, purchased at the same time off of Amazon.
  • I also went back and checked my 21 AAA Tenergy batteries that I’ve had stored over 4 years. Results:
    • All still tested out at over 1.23v. Loss of approximately .02v over 4 years.
    • Not a single battery had any sign of “weepage”, leakage, etc.


2009 - 2020 Copyright © AHTrimble.com ~ All rights reserved
No reproduction or other use of this content 
without expressed written permission from AHTrimble.com
See Content Use Policy for more information.

Antenna: Portable Dual Band (70cm & 2m) Radio Antenna

Antennanote: article first appeared in February 2015

One of the reasons I got into the Ham radio scene was to increase the effectiveness of handheld radios.  In my day job I use handheld radios a lot and they are critical to our wildland firefighting mission.  At work I can talk on a handheld for hundreds of miles across six counties.  I wanted similar capabilities in private life during emergencies, disasters or especially during “grid-down” when it comes.Desert

So I built a repeater using a Yaesu FT-8800r dual band mobile radio.  Along with a great repeater is a need for a great antenna.  And that antenna has to be proven reliable, sturdy, portable and something you can depend your life on.  So that was my next challenge, build an antenna to meet the repeater need but go beyond that as well.  This article covers that quest.  So let’s get going…

Mission –

General – To allow maximum performance on 70cm & 2m frequencies in the field via a highly portable, easily set-up, and sturdy antenna.

Primary – Use in conjunction with a Yaesu FT-8800R as a portable cross-band repeater (70cm & 2m).

Summary –

This portable dual-band antenna allows a user to attach the antenna to a handheld (via adapter cable) or directly to a mobile Ham radio. The antenna itself is a purchased wire antenna which is then mounted internally in ¾” PVC pipe. That section is then configurable with or without two (2) additional sections of 3” PVC pipe to vary the antenna height from 5’ – 15’ from the base.

Materials List –

DBJ-1 Designed by Dr. Ed Fong WB6IQN of UC Berkeley

DBJ-1 Antenna

  • The antenna, DBJ-1 J-Pole dual-band, designed by Dr. Ed Fong WB6IQN of UC Berkeley.
  • 1 section (10’) of Class 200 3” PVC pipe
  • 1 section (5’) of Class 200 ¾” PVC pipe
  • 1 3” threaded Class 200 PVC clean-out adapter, the inside diameter of the non-threaded end is 3”. See the picture in Step #7 for a better idea.
  • 1 threaded cap for the Class 200 PVC clean-out adapter. See Step #2 for a better idea.
  • 1  2” x 1-1/4” Class 200 PVC bushing. The 2” is male; the 1-1/4” is female.
  • 1   3” x 2” Class 200 PVC reducer. Both ends are female.
  • 3 or 4 swivel bales. See Step #15 for a better idea.
  • 30   1-1/4” wood screws with washers.
  • 1   ¼” carriage bolt, star lock washer, nut.
  • 2   2’ x 2’ pieces of ¾” marine plywood.
DBJ-1 Antenna Info –

SWR:  Less than 1.3 to 1 on both bands.
Gain:   +6dB over a rubber duck antenna

Steps –

Step #1 – The base is cut from 3/4″ marine plywood.  You want two pieces 24″ x 24″.

Step #2 – Take your 3” threaded drain clean-out plug. Cut square hole in the center of one piece of base material. It should look something like this…

Antenna-DBJ1build1

Step #3 – Place cap through hole so it looks like this…

Antenna-DBJ1build2Looks like this from the backside…Antenna-DBJ1build3

Step #4 – Now line it up and chisel out a small indent in the second board for the cap to sit in. Do not cut the hole all of the way through. Using the indent for the cap to sit in will give the base added strength and prevent the cap from turning. It should look something like this…

Antenna-DBJ1build4Step #5 –  Line the two boards up, make sure everything lines up correctly, put a generous amount of construction grade adhesive (i.e. Liquid Nails) between boards, clamp, then using outdoor screws, screw boards together.

Step #6 –  Using wood screws and washers secure the cap to the board. I used 1-1/4” wood screws. It is a good idea to pre-drill the cap where the wood screws will pass through to avoid accidental cracking of the plastic cap. The washers ensure that the screws, when tightened, will not crack the plastic cap.

Antenna-DBJ1build5Step #7 –  When the boards are securely “sandwiched” then use a ¼” bolt (I used a carriage bolt), star lock washer, and locknut. Drill a hole for the bolt through the cap bottom (centered) and through the lower board. Install bolt from the bottom through the boards, through the cap and secure with lock washer and nut. Be careful to not tighten the bolt/nut too much; you don’t want to chance breaking/cracking the plastic cap.

Step #8 –  Now you have the base ready for priming and panting. I suggest a high quality primer and then multiple coats of a high quality paint to seal the wood against moisture. I suggest you tape off the threads with painter’s tape prior to painting.

Step #9 – Using the 10’ section of Class 200 PVC pipe, cut the 3” PVC pipe in half. Cement a double-female joint to each section of pipe. Use a plastic primer spray paint; paint the pipe any color you wish. It is not necessary to paint the pipe, I just think it looks cooler painted. Allow for the paint to fully dry before installing the swivel bales.

Step #10 – In the 5’ section of ¾” Class 200 PVC pipe install the wire DBJ-1 antenna according to the instructions included with the antenna.

Step #11 –  Using the 3” x 2” PVC reducer connection cut a ¾” hole in the side of the reducer as shown.

Antenna-DBJ1build6Step #12 –  Using the 2” x 1-1/4” PVC bushing cement the antenna cap (with the PL-259 connector installed) into the 1-1/4” opening in the bushing. Then cement the 2” end of the PVC bushing into the 2” opening on the 3” x 2” PVC reducer. (When ready to use the cap will fit over the male end of the PVC base.)

Step #13 –  Paint the 5’ antenna section any color you wish. Painting is not necessary but it looks cooler if it is painted. Make sure you use a plastic primer prior to painting with the finish coat.

Step #14 –  After the paint is dry on the 3” x 5’ sections of PVC pipe secure 3 or 4 of the swivel bales to one section. You will install the swivel bales on the end that does not have the joint installed. Make sure you are sufficiently lower from the end of the pipe to allow the 5’ antenna section to fit securely and snugly onto this section.

Antenna-DBJ1build6Step #15 – Allow all painted surfaces to completely dry prior to initial use.

Installation Options –

You have three installation options:

Starting with the base…

Antenna-DBJ1build7

Option #1 – Install the 5’ antenna section directly onto the base.

Antenna-DBJ1build8Option #2 – Install the 5’ antenna section on one of the 3” x 5’ sections, and then install the 3” x 5’ section on to the base.

Antenna-DBJ1build9Option #3 – Install the 5’ antenna section onto the 3” x 5’ section with the swivel bales, and then that section on the remaining 3” x 5’ section. Then install the entire configured pipe/antenna onto the base.

Antenna-DBJ1build10Note #1: If you are going to be securing the antenna with Para cord, tie the Para cord onto the swivel bales prior to raising the pipes and installing onto the base.

Note #2: If you are concerned about the unit’s stability you can place sandbags or large rocks on the base to improve stability.

Note #3: I painted my antenna a combination of colors and textures that will help it blend in with the desert environment where I will be using it.


2009 - 2019 Copyright © AHTrimble.com ~ All rights reserved
No reproduction or other use of this content 
without expressed written permission from AHTrimble.com
See Content Use Policy for more information.

The humble flash-bang grenade pouch…

Military surplus flashbang grenade pouchnote: article first appeared in August 2015

I am always looking for really good gear. Especially really good and inexpensive gear. The flashbang grenade pouch is one of those pieces of gear. I have come up with a number of good uses for this sized pouch. But I think I am only scratching the surface. I will leave it up to your imagination to come up with more ideas.

The flashbang grenade pouch I am talking about is this one…

military surplus flashbang grenade pouch NSN 8465-01-515-7581The approximate dimensions are:

  • 2.5″ wide
  • 2″ deep
  • 5″ – 6″ tall (adjustable)

The pouch is made from hevy-duty Cordura nylon, has a strong nylon stealth buckle, and heavy-webbing and MOLLE II compatible straps. The pouch also has a drainage grommet in the bottom of the pouch.

These pouches can be purchased online for $4.25 – $7.95 depending on the website you buy from. Shop around!  I got the best deal on eBay for a bulk purchase of them.

Here are some examples of what you can use it for…

UV-5RA with regular/standard battery (L) and the option 3800mAh (R).

UV-5RA with regular/standard battery (L) and the option 3800mAh (R).

Standard UV-5RA fits with perfectly with the pouch flap covering the entire top of the radio.

Standard UV-5RA fits with perfectly with the pouch flap covering the entire top of the radio.

UV-5RA with the larger, 3800mAh battery. Pouch flap doesn't cover quite as much of the top of the radio. But it is still a great fit and the radio is very secure.

UV-5RA with the larger, 3800mAh battery. Pouch flap doesn’t cover quite as much of the top of the radio. But it is still a great fit and the radio is very secure.


CAT - Combat Application Tourniquet

CAT – Combat Application Tourniquet

CAT - Combat Application Tourniquet

CAT – Combat Application Tourniquet


Yaesu FT-60R

Yaesu FT-60R

Yaesu FT-60R

Yaesu FT-60R


Garmin GPS (60 series)

Garmin GPS (60 series)

Garmin GPS (60 series)

Garmin GPS (60 series)


I got you started…now figure out how you can use this great piece of gear!


2009 - 2019 Copyright © AHTrimble.com ~ All rights reserved
No reproduction or other use of this content 
without expressed written permission from AHTrimble.com
See Content Use Policy for more information.