 note: I think this is one of the single most valuable pieces of information you will ever read for a grid-down event. When the violence is knocking at your door you better understand this concept or you will get killed. Yes, it is that important and I am that serious.
I am sure everyone has heard the saying “I was out of the loop on that” or some variant. Generally it is meant that a person wasn’t aware of something that was going on. However, the origins of the saying is a fascinating story itself. It goes back to the early 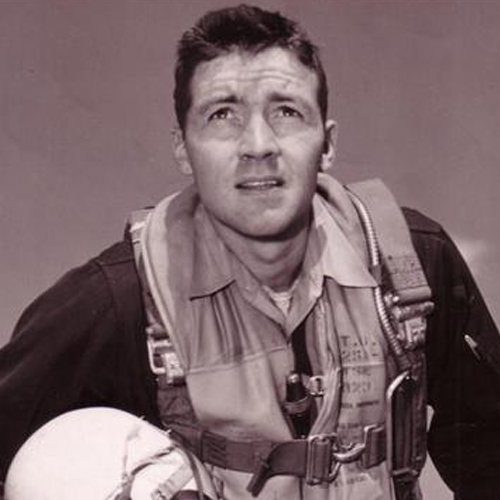 days of the Air Force and man by the name of John Boyd, a Colonel.
Col. Boyd developed this model to assist the training of military pilots. Dogfights occur at a very high speed in a three-dimensional environment. A pilot must not only have lightning fast physical reflexes, he must be able to out-think his opponent as well. To win a dogfight a pilot must be able to get his plane inside the decision loop of his opponent to line-up a kill shot…and do so without himself being shot down. It is a daunting task in the best of circumstances. And the speeds at which is occurs is unrealistic and unfathomable to most of us mere mortals.
Any high-stress, high-risk environment tends to be high-speed as well, or at least at critical points in time. A person must be able to function in that environment to the point of success. Failure to function successfully in these types of situations can lead to injury or death of yourself or someone else. Boyd developed a system that trains a person 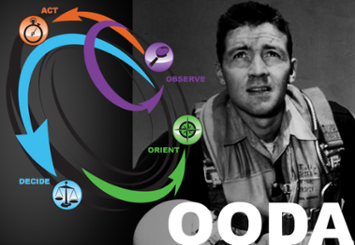 on success under stress, in high-risk environments. That system is all about acquiring information, processing that information, making a decision, and then acting on that decision.
The decision making model he developed is called OODA.
That is an acronym for; Observe, Orient, Decide, Act.
Broken down it means –
- Observation of the raw information on which decisions and actions are based.
- Orient the information to your situation and environment.
- Decide a course of action.
- Act quickly and decisively.
While it would be convenient to allow those brief explanations stand on their own, it is impossible if you want to truly understand how it all works together for success.
One of the best explanations of the complete OODA cycle was by Harry Hillaker –
“The key is to obscure your intentions and make them unpredictable to your opponent while you simultaneously clarify his intentions. That is, operate at a faster tempo to generate rapidly changing conditions that inhibit your opponent from adapting or reacting to those changes and that suppress or destroy his awareness. Thus, a hodgepodge of confusion and disorder occur to cause him to over- or under- react to conditions or activities that appear to be uncertain, ambiguous, or incomprehensible.”
What I am understanding Hillaker to say is fairly simple – Embrace the confusion and use it to your advantage to defeat your enemy. I think I have that understood pretty clearly but that explanation is purely for a military or tactical situation.
What about when there is no person as an enemy?
How do you even describe “enemy” is these terms?
For this discussion I will revert back to our discussion on “objectives” as the enemy. We must “win” in terms of meeting the objective. If we can’t claim a “win” then we “lose.” Losing means that our objective was not met. And success in this arena is based on achieving our objectives, hence “losing” is the enemy.
To review the 2-part series on “objectives and priorities” that appeared on August 8th and 11th.
Based on the foundation I just laid out where there is no person as an enemy, there is no option to turn confusion against our enemy. Confusion in this sense only hurts our team and hinders the successful accomplishment of our objective. However, we can easily state with certainty that seeing through, and/or eliminating, any confusion would make attaining our objective far easier. We can now agree that we only need to go half way on the confusion issue, remove it vs. install it on our non-person enemy.
In retrospect haven’t we already started down the path of confusion elimination?
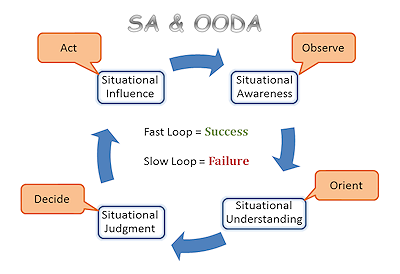
Back in Objectives and Priorities (Part #2), when we were given Leader’s Intent we can/did ask for clarification to ensure a solid foundation of understanding. On the other hand, if we are the one delivering Leader’s Intent we used the SMART model to clarify the task. So exactly what confusion is left to clear-up? If you look closely at the OODA Loop you will notice that there is a very close relationship between the “OO” and the Situational Awareness. In plain English the “Observe” and “Orient” matches perfectly with the concept of Situational Awareness (SA). If your SA is good, your OO functioning correctly as well.
 So why the need for both?
There is a vital need, the OODA loop outlines the entire process along with explaining the “why.” The “why” being defeating your enemy, or accomplishing your objective(s). I see the OODA loop as a bridge between two more detailed systems –
If you go back to Hillaker’s explanation there is a key part “…operate at a faster tempo to generate rapidly changing conditions…” That integrates a true sense of urgency into the overall process. The need to move at a sufficient pace to outperform your enemy. Is it not reasonable to assume that if you outperform your enemy that you win?
 But, what about dealing with an objective as the enemy?
When you consider the different aspects of an inanimate foe, the process can be both more difficult, and yet easier. When dealing with a person as a foe you have to assume many things about that person and hope you are right. A smart foe can do things entirely unpredictable which subsequently disrupts your SA and hence, the outcome. However, an inanimate objective can be almost as unpredictable, but it is lacking the ability to purposely be unpredictable. The end result is there are pluses and minuses to both situations, animate vs. inanimate foe. For this discussion we will focus on the inanimate foe, an objective.
Let’s review what the Swiss Cheese model of risk management looks like –
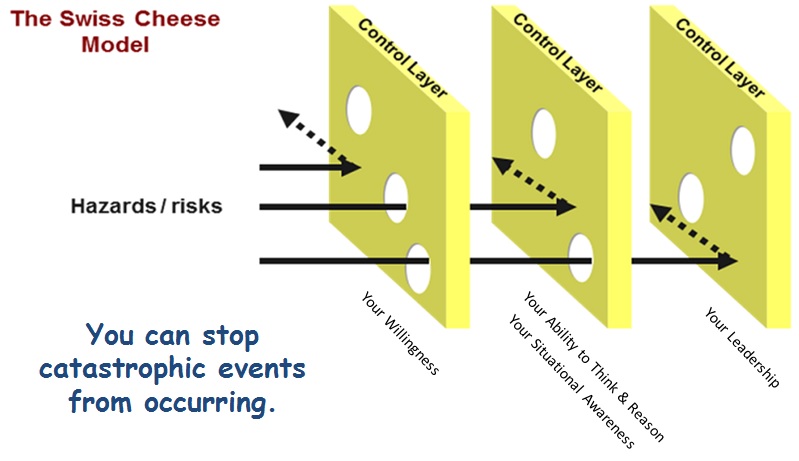 You have any number of opportunities to stop an incident from occurring. Plugging just a single hole in any slice of cheese prevents the incident from ever occurring.
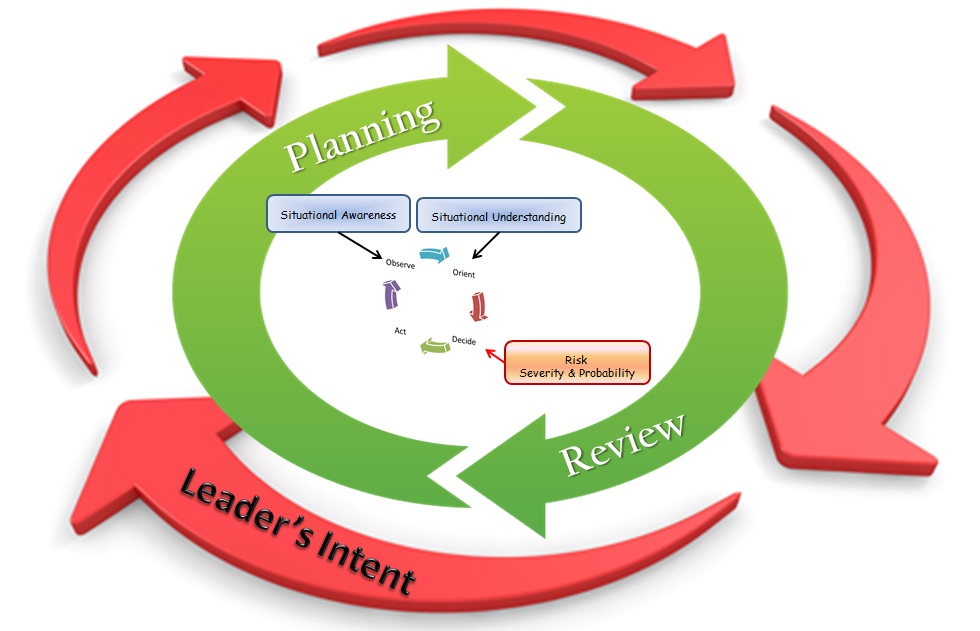
If you were to chart the OODA Loop process as consisting of a combination of Situational Awareness and Risk Management it would something like this.

Adding in Situational Awareness
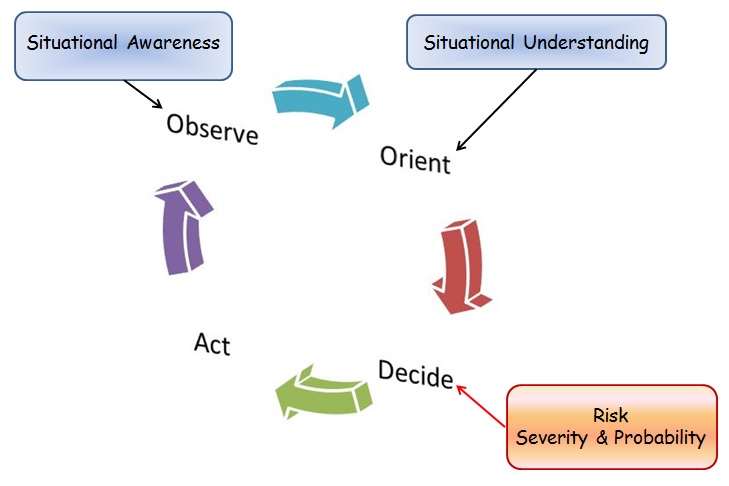
Then adding in calculating the probability & severity aspect of the risk.
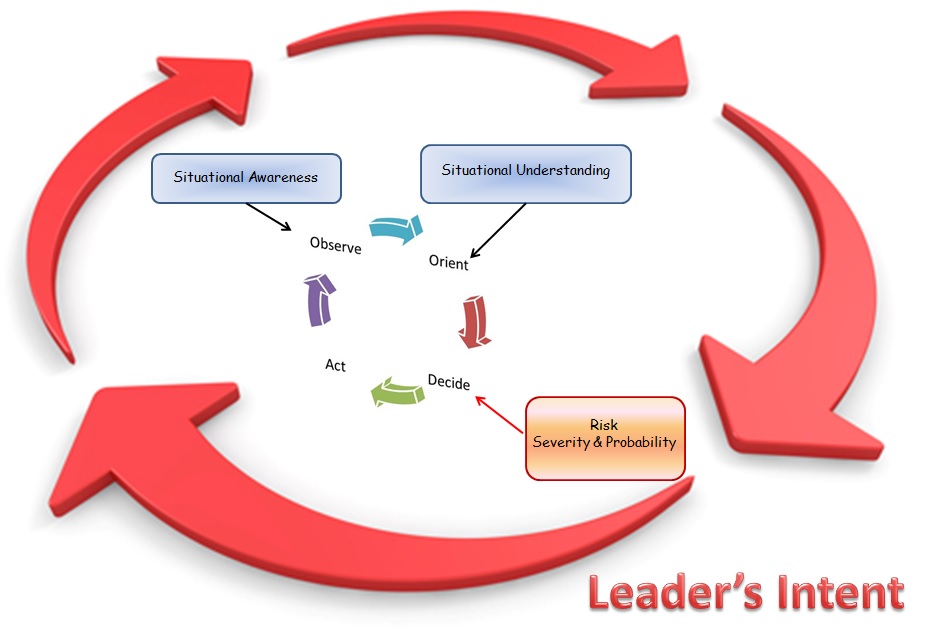
Here we see the OODA loop link two systems that were previously envisioned as “stand alone.” While both of those systems were valuable and applicable, they did form a complete picture for our purposes. However, there is a third system that is still missing that carries considerable influence, if not total control, over everything – Leader’s Intent.
While some could argue that Leader’s Intent would be one of the “filters” of the SA process I would disagree. I think Leader’s Intent drives all of the systems from the very beginning. Thus I propose the proper graphic representation of the system should look more like this.
 Nonetheless I still maintain that the graphic reorientation is still lacking a key piece. No doubt that you would accomplish the object, but in the graphic it is implied, not explicit. And, depending on the situation you may or may not be able to undertake planning process formally, it may have to be done “on the fly” and not in written form. I am of course referring to planning as a key element.
In my way of thinking Situational Awareness is a more complete system/process to define and accomplish the observe and orient of the OODA loop. And, Risk Management encompasses the decide and act aspect of the OODA loop. Clear Leaders’ Intent drives the whole loop in harmony. How does planning work into the process?
Planning is actually a combination of orient and act parts of the OODA loop with a heavy influence of leader’s 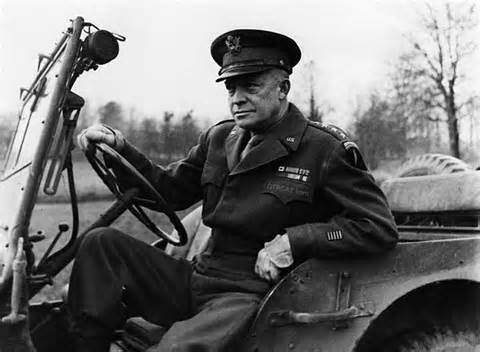 intent. Have no doubt that planning will be a key element of any success in accomplishment of an objective. However, General Eisenhower said,
“In preparing for battle I have always found that plans are useless, but planning is indispensable.”
What he was trying to get across through that statement was the fact that though the planning process we find the weaknesses, strengths, and alternatives to the environment in which we will operate. A good example of that is “combat loading” of ships. If you loaded a ship for an invasion such as D-Day the same way you would load a normal cargo ship, you would be doomed to failure.
Why? All the ammo would be loaded together in one area, all the trucks parked in another, tanks in another, Humvees it yet another area, etc.
As the invasion takes place do you need all the Humvees at one time? No. How about needing all the trucks at one time? No. And the same is true for tanks, ammo, medical supplies, etc. The military loads ships in a manner that the supplies come off in the order in which they are needed. You may only need 20 trucks at first, but you need 10 tanks before that, and 15 Humvees along with the tanks and trucks. But a sufficient amount of fuel, ammo, and medical supplies need to off-loaded with the appropriate vehicles. The planning process allows for the discovery of such issues and making the appropriate adjustments.
Another example would be the same situation of the actual invasion. The leader’s intent would be to secure town “x.” While in the planning process it becomes obvious which beach in the best to land on due to any number of factors. But, good planning demands that you have multiple alternatives. The same would be true for routes to get off the beach and to the town you are supposed to secure. Once again, in the planning process you are looking at maps that show the best/fastest way to reach the town. And yet again, you must have multiple alternatives in case your run into resistance or other obstacles with the primary route.
As the invasion unfolds different invading units run into problems getting off the beach for any number of reasons. However, since the planning process revealed multiple routes to the town, the local unit leaders can pick alternative routes as the battle unfolds. And, those choices can be made without running it up the chain of command because the optional routes are already in the plan…and approved. Hence, the local leader on the ground is still operating within the authorization given through leader’s intent.
Had there been no formal planning, the alternative routes would not have been identified ahead of time. The leader on the ground would have to discover the optional routes causing loss of time and jeopardizing successful completion of the objective.
Yet another revision of the entire process would look something like this…
 Do I have you confused by now?
How about…do I have your eyes glazed over yet?
That is obviously not my intention or objective.
What I do what you to think about is how to be successful when it comes to surviving after “grid-down” when all your prepping comes into play. But, surviving is a whole lot more than just beans, bullets, and band-aids! It is about how you become a successful prepper to become a successful survivor. And success depends on skills. No, not skill…SKILLS !
And you need to understand how to use systems such as OODA Loop, Situational Awareness, and Risk Management to improve your odds of success. If you can improve your odds of success in a grid-down situation, then it will be much easier for emergencies and disasters as well. But it all takes time, effort, and commitment.
2009 - 2019 Copyright © AHTrimble.com ~ All rights reserved
No reproduction or other use of this content
without expressed written permission from AHTrimble.com
See Content Use Policy for more information.