Evaluating Consumer Products: Facts, Fraud & Opinion

Article first appeared in May 2018. I had to do some editing for content, clarity, and grammar…and practically rebuild it from scratch when the site crashed..


WARNING!!! This article is written by a cranky, frustrated, crotchety old man that would rather be working on his cabin or house. Reading further is at your own risk.  And there is a lot to read…WAY too much. But, I think I am important and feel people want to know what I have to say. And yes, I suffer from delusions of grandeur 🙂

I read some posts from other websites over the last few weeks that have really gotten under my skin. And that continued this morning. It just kept gnawing away at me till I had to say something. And rather than cause contention referring to any particular website or on any particular article/thread on any of those websites, I thought I would write my own article on my own website. That way I could focus on a positive subject that could be more generally applied to the aforementioned subject and more useful too. So here goes…

Background –

I spent over 30 years in emergency services as a firefighter; over 20 as a structure firefighter, over 10 as a wildland firefighter. Great experience! Through my career I’ve worked with some fantastic people, and some real idiots. I have had some incredibly memorable experiences like saving an infant that was only a few days old. I have had some terrible experiences…getting blown up one time in a house fire, and another having to pronounce a daughter dead. I’ve worked on-scene by myself in Florida, and on a team of nearly 5000 people in Oregon. I have fought fire in 20 or so states, onboard three different ships, and on two continents. All of that experience has helped me with a couple of things; 1) understand the difference between quality gear and junk, 2) given me a wide and deep frame of reference, 3) forced me to develop a keen “BS meter” when dealing with people, 4) learning the utmost lesson of “define the mission” when it comes to gear and equipment. Of course there are other aspects of life I’ve learned via my career but that is another conversation for another day…hopefully when I am less cranky.

While I wasn’t on-shift fighting fire I became a computer programmer and database administrator. I started back in the 80’s on the original Apple IIc and Intel 8086 platform…I even did some programming on an TRS-80 Model II. And of course we won’t talk about learning to program using IBM punch cards. All of that programming experience taught me to use logic, be extremely accurate and precise in my work when it was needed. One mistake and it didn’t run right. As that side of my career developed I learned “process engineering”. And that was an amazing set of skills to acquire that helped me in everything I did later in life.

For prepping…what this website is all about…I started prepping in the late 70’s, and really cranked it up to a whole new level about 15 years ago. How “cranked up”? Well, let’s just say my DW and I don’t have much to worry about for years and year and years if the grid falls apart.

Now, marry up all of the above and I feel confident in my ability to evaluate gear and equipment. Further, there is always an overarching principle to testing…valid and reliable. I won’t go into all of that but it just ensures that how you are testing/evaluating something is actually honest and true and accurate.

And yup…that is where the title of the thread came from. Too much, the majority actually, of evaluation of prepper gear comes from fraud and opinion and not enough from fact. So I figured I would write this article and maybe help some folks muddle through what gear to buy and what to avoid.

Why is that important? Because someday your decisions on what gear you bought might make the difference between life and death…your life or the lives of your family. So it is important to me…if I can help even in the smallest way.

And here comes the most valuable piece of information and fact of this whole article…all of this that I write today is MY OPINION. Yup…my opinion and my opinion completely and entirely. It is simply my viewpoint…worth exactly what you are paying me for it.

Facts –

Are facts actually “facts”? Ah, yes…and no. Sorry. Facts are fickle creatures. What can be true under one set of circumstances may not be true under another set of circumstances. Manufactures of products, including prepper gear, will only do testing, who’s results are released to the public, that shine well on their product. If their product doesn’t look good in one test environment, it is common for them to change the environment to show favorable results. So, that means I never, ever trust manufacture’s claims without independent, unbiased validation/verification. Doesn’t mean they lied as such, just means they have a vested interest (money) in placing their product in the best light possible.

Same goes for business owners who sell products. Actually, they have an even more vested interest in making sure the product sound good. If not, they and their families suffer financially…big time. So, any claims by a salesman or retailer I automatically dismiss.

Example: Years ago I wanted to buy life insurance. I bought a whole life policy from a reputable company and a really nice salesman. Happy! Well, some years later I wanted more life insurance. And found that it would be too expensive for me to afford at the time. A friend of ours talked to me about options other than whole life. He showed me a bunch of facts that made whole life look like nothing more than a scam. I did my independent research and he was right…whole life is a terrible, terrible product for life insurance. It only benefits the insurance company to any real degree and the salesmen financially…vs being in the best interests of the consumer. I bought a different product, term life insurance, cashed in my whole life policy, and was way ahead of the game financially and life protection wise for my family were I to die. Does that mean the salesman was dishonest (i.e. a criminal)? Not necessarily. But, the company surely was. And maybe the company sold the salesman a line of BS when they trained him and offered him a fat commission check to sell a vastly inferior and expensive product.

My point…while the company and salesman provided “facts”…they were only facts in the exact situation that they explained…when that was only about .000000001% of reality. So they weren’t true/honest facts in a way. They were very deceptive facts. But, yes…facts.

When you hear some folks talk about testing something, beware! I’ve done a lot of testing in my day. And depending on the test environment and the test process, they could be showing you only what they want you to hear.

I did some battery testing over the years. I took great pains to do “field testing” vs “laboratory” or “theoretical” testing. And there is a huge difference! I always dismiss theoretical testing. There is absolutely no relation to real life usage at all. Laboratory testing is often extremely accurate and very factual. But, to get those results, the testing only can be conducted in a laboratory. Those results can’t be replicated in the field. That leaves field testing, real-life testing. For me, that is the only true means of testing something…especially prepper gear/equipment.

Back when I was programming I learned quickly that I could get my code to work as required. But, the testing personnel would get a hold of it and it would fail. After this happened a few times I got together with them and had them show me how they tested the code/program/system. I was amazed! I remember saying “Why would you do that? That’s ridiculous!” And come to find out…that is how end-users would actually do something. Oooppppssss…my bad! Once I began testing my own code that way, real-life scenarios, did my code become top tier. So field testing as real-life end-users is the only way to really test something accurately and competently.

Misdirection is deception. This is a little more subtle…and yes, factual…although it can be very, very deceptive. Let me explain…let’s say you are looking to buy a widget. And you know what you want that widget to do. You find a widget that appears to be exactly what you want. But, then a salesman or company says…”Wait! Our widget will do XXXX! So it is a far better product.” That pitch might be enticing…might be, but probably just a slick sales pitch. To determine if it is actually a better product you have to decide if the so-called enhanced feature is actually something that makes a difference to you and to you defined mission for that equipment.

Example: Low self-discharge (LSD) batteries are the latest fad. If you are talking a non-rechargeable alkaline/lithium style battery you want a long shelf-life. Duracell is an excellent example of a 10year guaranteed shelf-life battery. But, LSD batteries refer to rechargeable batteries. You might be tempted to buy LSD batteries because it sounds cool. But, does the salesman or company explain that LSD batteries are inferior to a similar capacity non-LSD battery? Probably not. An LSD battery will not have the same capacity as a non-LSD battery that is rated the same mAh. Why? The same design that slows the discharge of the battery while it sits on the shelf also impedes the discharge of the battery when you are using it…thus, the battery is inferior. Is the company or salesman not telling the truth? Actually, they are probably telling you the truth but not telling you all of the facts. And then again, maybe they don’t always know all of the facts to tell you. So I look at this particular issue this way…I want the best performing battery when I am using it. I could care less about its performance while it sits on the shelf…that shelf-life thing means nothing to me. I want the battery to perform its best when it is in my tactical light or running my night vision. That is the priority…the mission. Not only does that mean LSD batteries have zero advantage to me…but are a huge disadvantage to me.

And here is the primary point in my case for “facts”…

You have to be able define the mission for the gear you are researching.

That means being able to clearly and competently say “I want this piece of gear to do X under conditions Y & Z.” If you can’t define the mission you can never identify the important facts that relate to the piece of gear you are considering purchasing.

Summary for this “fact” section:

  1. Clearly identify the equipment’s mission. Know exactly what you want it to do before you start to research it.
  2. Don’t believe anything a manufacturer, company, or salesman tells you until you can verify through an independent and unbiased source. A source that isn’t just repeating material that originates from the manufacturer, company, or salesman.
  3. Don’t trust anything but field testing by reliable, unbiased sources that you trust.
  4. Don’t be afraid to research something yourself and become educated.
Fraud –

I consider there to be two kinds of fraud…intentional and unintentional. The first comes from a scumbag, dirtbag, ne’er-do-well, criminal, piece of crap. They only care about their own interests…and that interest is almost always money. In my opinion these guys need quality time with a baseball bat…and I am not talking a softball game. The latter kind of fraud , unintentional, normally comes from someone who is well intentioned but uninformed. They have been taught, or learned, information that just isn’t true. They pass that along and they aren’t really concerned about what is best for the consumer (you). They are not willing to take the time to properly research what they are, talking about selling, or they may lack the intelligence to understand what they are saying is wrong, or at least not the whole truth.

Unintentional fraud normally comes in two flavors; outrageously false or not the entire truth. Both can be just as devastating to the consumer. Beware of both!

I won’t spend any time on the “outrageously false” scenario…you can figure that out. I will talk to the “not the entire truth” aspect of fraud and how it can be just a harmful.

Let’s say I want to buy a truck. I have defined the mission, rugged off-road use in rough terrain, under a load. I have a number of choices. Yup, the three major brands will claim they can operate in those environments. All of those claims are true. But, are they true to what you need to meet the mission for your truck? Having run a fleet of trucks for 20 years that require exactly the mission I stated there is only one logical choice. One brand has a great motor, probably the best, but the frame is light-weight and doesn’t hold up to rugged off-road. Undercarriage, including suspension, is very prone to failure in those kinds of conditions. Another is a fantastic road truck, smooth riding, comfortable, loaded with luxury options. And it falls apart under rugged off-road usage. The third option doesn’t have the best engine, but plenty good enough. Has a great transmission, but probably not the best, but good enough. It isn’t the most comfortable or the most luxurious vehicle, but good enough. Where this brand I am referring to excels is in its ability to hold up far, far better to hard rugged off-road use while hauling or towing a load. It meets the mission extremely well, far better than the other two.

So where is the fraud? No intentional fraud in my opinion. But, talk to a salesmen and their brand of truck is the best…always. Their job is to sell their trucks. They won’t focus on your mission needs…they focus on their paycheck and use their training to do so.

Another unintentional fraud example: let’s say you want to buy a water filter. You have clearly defined what you want. You are looking at several models. You decide between two for your final decision. Manufacturer “A” talks about all their testing and what it does and how great it is. It sounds really great! But, unknown to you, or the vendor you are thinking of using, the testing that “A” has done is all in the lab and not under real field conditions. Although they can produce lab results that speak glowingly of their product…the results come from the lab they paid to test it. However, manufacturer “B” has tested their unit in the muddy waters of Africa where it is used extensively…and they publish those results. And two independent competent testing organizations have tested it…unpaid…and prove the claims of the manufacturer. So which do you buy? Especially if “A” is the media-hyped and more popular brand of water filter! Is there fraud involved?

Summary of this “fraud” section:

  1. There are two types of fraud, intentional and unintentional. Both can ruin your purchase.
  2. Don’t believe manufacturers or vendors or salesmen…without quality, independent, unbiased verification of claims.
Opinion –

Dang!! This is the touchy part…but oh so important part.

Everything is opinion! There are no facts when it comes to evaluating prepper gear. Why? All testing is subjective. That means the person interpreting the results of the tests, or performing the tests, can sway all/any of it to meet whatever they want to promote. Not everyone nefarious of course, but many do, and all can.

The worst “opinion” is “group think”. That is where a whole group of folks feels the same way about something…and it isn’t necessarily true/accurate. You see it on prepper websites a whole lot. Someone starts it by saying “X is great!” Then someone else says, “yes, X is incredible!” then another and another and another…till everyone is saying “X is the best of the best and the only real option!” Than then some poor shmuck comes along and says, “Hey, I looked into it and X isn’t the best, Z is much better and less expensive”…Boom! …hammer time!

So, just because a whole group says something is the best or right, doesn’t mean that it is. I remember a saying somewhere that when you have truth on your side you are never outnumbered.

This “group think” hazard is particularly true in organizations such as 
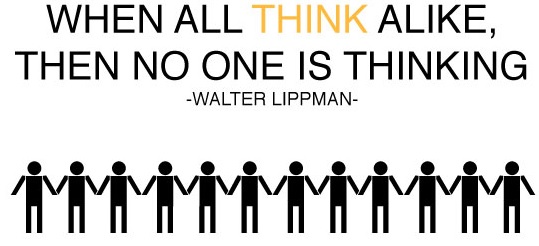
the military and other hierarchical organizations. If the top of the organization says something is true, then everyone else normally wants to fall in line, be loved, not draw undue attention to themselves, not rock the boat, etc. I can’t tell you the number of times I have talked to firefighting peers and they feel “Y” about something. We go into a briefing and the boss promotes “X”. And my buddies never raise a question or objects or utter a voice of concern. Why? Human nature.

My dad told me more than once…If everyone is falling off the cliff, don’t follow them.

Here is the trap I fell into recently…

I wanted to buy a generator. I already own a Honda EU2000i. A fantastic machine, best on the market, everyone who owns one loves them…including me. So naturally I wanted to buy another Honda. Makes sense, right?

Unfortunately to meet my other mission requirements I simply couldn’t afford the Honda unit that would meet those needs. And not afford it by a wide, very wide margin. So, I looked around, read reviews, researched according to sound principles. And found a unit. Ran it buy a few folks on another website. Many disagreed with my decision and urged me to buy a Honda regardless of the cost. However, one gave me a reality check. Dang him! Don’t you just hate it when someone bursts your bubble and talks sense? So, back to doing research…thankfully. I ended up buying a Champion meeting enough of my mission requirements and extremely well priced. Good thing or bad thing?

Well, it meets my wattage power needs. It meets my “clean power” needs. It is capable of running on propane although I have to add the kit to it. But, it didn’t have electric start…FAIL! But, I bought it anyway. Why was it a fail? Because my Honda is a one-pull engine…every time. And everyone knows that only Hondas are one-pull engines. Right!?!

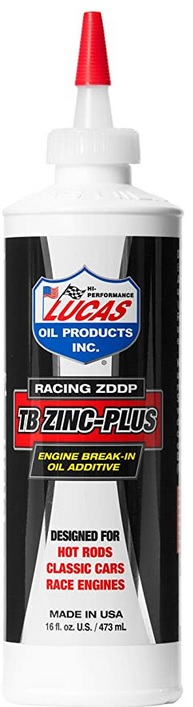
So I get my Champion…for a fraction of the price of a Honda. I fill it will oil, add some Lucas zinc additive, put some TruFuel in it, set the choke…and I am ready to pull it 4 – 6 times to start it. I mean after all, it isn’t a Honda…right?

First pull, brand new, first time with gas in it, first time with oil in it…BINGO!!!! It fires right up. Amazing…a fluke to be sure…yeah, right.

This is the break-in period so I am following their protocol exactly. About an hour into the process it shuts down. Dang! It’s not a Honda and here come the problems. Ah, it ran out of gas. So I gas it back up expecting it to take a couple of pulls to get it going again but hoping for one pull. Pull, nothing. Pull, nothing. Pull, nothing. And I am now convinced I am a loser and bought a substandard piece of loser machine. I am kicking myself. And then I look down…oh, turn the on/off switch to the “on” position. Pull, start…purring along just fine. 5+ hours later the machine is running perfectly under load.

Oh, but the Honda freaks out there are…”Yeah, but the Honda will last 2 – 3 times longer than the Champion!” Maybe, probably, perhaps. But I can buy 6 Champion generators for the price of the equivalent Honda. So did I do OK buying a non-Honda? Or not buying an electric start?

Avoid “group think” like the plague in everything…but especially when it comes to prepper gear!

But, there is a responsibility that comes with that…you must be able to think on your own. Yeah, again, sorry. And it helps to be able to employ “critical thinking” skills as well.

Should you become a “non-group thinker” and have a mind of your own…that means become an independent thinker.  The only problem is…be prepared to suffer at the hands of the “group”…you may find yourself not being liked, appreciated, or loved. You may be subject to immediate shunning or worse. And heaven forbid you cross the leader of the group. Then hell-fire will rain down on your head…you challenged their precious opinion and position…whether you are right or not will make no difference. But one fringe benefit…you will discover there are other independent thinkers out there…and they can be some pretty cool people…and they won’t be sheeple.

But don’t despair at all…every once in a while someone might thank you for advice or information you gave them. It will make you all warm and fuzzy inside and let you know life is worth living…even though you have walked through hell-fire.

Summary of “opinion” section –

  1. All evaluation of prepper gear is ultimately only opinion. Because the tester can manipulate the testing environment and outcomes, or simply cherry pick facts to match the narrative they wish to deliver.
  2. Think for yourself, and that means do your own research.
  3. Avoid “group think” like it is Satan’s fan club.
Summary –

I’ve been truly blessed in my life in many ways. One of those ways is folks sending me cool gear to test. They hope that my review will be positive and they will sell more widgets. After having written three prepper novels they think that the accompanying, albeit very limited, notoriety will somehow make them money. How sad they think that way. I have no horse in any race (or dog in the fight) when it comes to doing reviews. I simply want quality real-life information out there for my fellow preppers. Unfortunately, not everyone comes from, or agrees with, that perspective.

Use your discernment…A number of years ago I was testing a certain type of equipment. I kept producing and posting my results, and someone kept throwing a different product out there, ranting on about how their product was so much better. I say “their product” because that is the line they sold. Not only didn’t any of my testing validate anything they were saying, it was just the opposite. I found their product to be very, very expensive compared to other options. And top if off, their product was at least 1 – 2 technology generations behind the much less expensive alternatives. But their brand was all the rage in popularity due to group think.

Shortening the story…they sent me the product for free. I tested it and the testing validated all my previous results…it was an inferior product. That isn’t the point really. They gave me the product free of charge to keep for personal use after testing. Now, did they think that giving me the product would “buy me” into promoting their product? I don’t know. But, as I was finishing up the article on it, I had this rush of feeling to pay them for the product. It was the weirdest feeling…and ugly…the only time I ever got that feeling in reviewing products that had been given to me. I knew that I couldn’t trust them, I knew they were putting out false and misleading information, I knew that…well, they were not someone I wanted to “owe”. I sent them the full asking price of the product the next day in cash…the dark feeling went away.

What the heck? What does that have to do with anything? It means this…1) listen to your instinct, 2) listen to that still small voice, 3) act on those feelings. But, remember…normally those kinds of feelings come only after you have researched and pondered on the issue for yourself.

The summary of the “summary” section –

  1. You can figure out stuff on your own if you are willing to do the work.
  2. Listen to your instinct.
  3. Be wary of others (manufacturers, vendors, salesmen), they may not have your interests as a priority.
  4. Don’t believe anything I just told you. Figure it out on your own.

And, now…two and a half hours later I want to go back to working on the blueprints of the extension of the cabin that I will be staying in while I build our house that we will retire in. Well, technically I am already retired…but my wife isn’t. And technically, the “cabin” is also our “bug-out property”. And technically, I love doing any of that kind of work vs writing articles like this. But, I felt this was important enough to write about…and well worth the loss of the time in my life.

And since I am such an amazing self-sacrificing individual to do such a humble ministering thing…I am now going to reward myself with a warm gooey cinnamon bun covered in icing and butter with a huge class of ice-cold whole milk. Yum!!!!!

One final though…this is all my opinion on “Facts, Fraud, & Opinions” when it comes to evaluation and reviewing prepper gear. Take it with a grain of salt.

OKAY…one final, final thought…it is pure fact…100% fact…not opinion…that a warm gooey cinnamon bun covered in icing and butter with a huge class of ice-cold whole milk absolutely rocks!!!


2009 - 2020 Copyright © AHTrimble.com ~ All rights reserved
No reproduction or other use of this content 
without expressed written permission from AHTrimble.com
See Content Use Policy for more information.

Searching for a New Generator

This article appeared a couple of years ago but was lost in the “crash”, I am rebuilding it from notes with some editing.

So I am looking for a higher capacity generator than my Honda U2000i.

Here are some things I am looking for:

  1. Affordable
  2. 4,000 – 5,000 running watts.
  3. Dual fuel (gasoline & propane).
  4. Electric start.
  5. 30a RV plug.
  6. 2 x 110 – 120v household outlet (15a or greater).

Here are some things that I would like:

  1. Quiet run technology.
  2. Inverter power

Here are some things that would be icing on the cake:

  1. 240v outlet
  2. Remote start.

After the house is done the unit will probably sit in a corner of the shop somewhere gathering dust and not used much. Maybe a back-up to my solar system. Or rather, a back-up to my back-up. My Honda will be my first back-up.

I did think about a “companion” to my Honda EU2000i, effectively doubling my power capability. But I decided against it due to other considerations.

I also wasn’t real worried about noise…I have my Honda EU2000i for “stealth” running but I also don’t want to be heard in the next county over…or maybe even at the next property over.

So after a lot of searching and comparing and reading reviews I went with the Champion Model #100302 4000-Watt Open Frame Inverter.

The good, bad, & ugly:

  1. Afford it at $565.
  2. 3500 running watts…500 – 1500 watts lower than I was looking for.
  3. Not factory ready for propane, but a conversion kit exists,
  4. Not electric start but all reviewers claim 1 – 2 easy pulls and it starts Evey time.
  5. 30a RV plug
  6. Two 15a 3-prong household style outlets
  7. Quiet run technology
  8. Inverter style
  9. No electric start
  10. No remote start

Here are the specs and info on the unit…

  • Advanced Open Frame Inverter Design – 50% quieter and 20% lighter than a traditional Champion 3500-watt generator, plus our Economy Mode feature saves fuel and extends engine life,
  • No GFCI Outlets
  • Quiet Technology and Extended Run Time – 64 dBA is great for RVs, tailgating, your next project or home backup, with 4000 starting watts and 3500 running watts for up to 17 hours run time on gasoline
    Clean electricity for sensitive electronics
  • RV Ready with a 120V 30A RV, plus two 120V 20A household outlets with clean power (less than 3% THD) and 12V DC outlet with dual USB adapter
  • Parallel Ready – Increase your power output by connecting up to two 2800-watt or higher inverter or digital hybrid with the optional Parallel Kit
  • Champion Support – Includes 3-year limited warranty with FREE lifetime technical support from dedicated experts.
  • No Voltmeter.
  • Voltage: 120V AC and 12V DC
  • Start Type: Manual
  • Engine: 224cc Champion OHV
  • Fuel: Gasoline
  • Quick Touch Panel – all controls on one panel
  • Economy Mode – save fuel, extend engine life

I followed the break-in procedure to the letter. I used a hair dryer for the “load”, using the various wattage settings on the hair dryer to successively increase the load on the generator for each break-in phase. I also changed to the high altitude carburetor jet. The customer service folks were very helpful getting that to me for free.

With the initial addition of the crankcase oil I added a tablespoon of Lucas Oil TB Zinc Plus. Most oil today has zinc processed out of it. But, zinc is a really good oil additive that helps lubricate an engine…especially helpful with small engines to extend their life.

After the initial break-in I used fully synthetic oil. I also use Lucas Oil TB Zinc Plus with every engine oil change.


Update #1 – About a month after the generator purchase…

I wavered on buying the wheel kit or not. I’ve never been a big fan of those cheap, mostly useless, wheels on things like generators, etc. They never seem to be right for what I want to do. But, I had to be able to move the generator around easily since I will be using it at my house-building job site and later when I need to roll it out as a back-up power supply. So I had to do something.

Then I remembered being at a nursery and using a cool cart to move my plants around. So i researched it out and found this…

It cost $127 but I felt it would be worth it. I was right. When I was done mounting the generator to the cart my rig looks like this…

For the first two weeks I used the generator at the job site. It powered everything from air compressors to AC units. I used it from 6 – 12 hours per day, every day.

Here are my findings:

  1. The generator was worth every penny!
  2. It never failed to start on the first pull.
  3. It ran everything I plugged into it.
  4. It is better on gas than I thought.
  5. I would mount the generator in the middle of the cart next time. It is off-balance mounted so far to the rear of the cart.

I am immensely pleased with the generator! I think it is a fantastic unit and will hold up just fine if I do my part to change oil, etc.

Just for the record…I always had been a Honda Guy. I felt nothing was better or could even compete with a Honda. I have to admit…I was wrong. Well, at least so far.

Honda doesn’t make a 4kw inverter generator so I can’t make a comparison. But, I can tell you this…Honda’s 3kw (25% less power) costs about $2300…yup, over 4 times more than my Champion. So I can’t complain. Yes, that means I can own 4 Champions, have more power, and have paid less than a single Honda.

And now here is what I am thinking…I am considering buying a second Champion unit. Champion makes a parallel kit to hook them up and effectively double the output to 8kw of power. Not only would I have massive power generating capability I would have a back-up for my essential needs.

And yes…That means I would have about $1200 or so invested in 7kw of power. And yes…If I went Honda that means I would have spent over $4000.

Final thought…I am pleased with my Champion generator! I think it was a very good investment. It does everything I want it to. I think it was money very well spent. And I would do it again. Actually, I am thinking I will.

2009 - 2020 Copyright © AHTrimble.com ~ All rights reserved
No reproduction or other use of this content 
without expressed written permission from AHTrimble.com
See Content Use Policy for more information.

TIP: Lucas Oil TB Zinc Plus for Small Engines

This “tip” came to me from a very experienced, completely competent, marvelous small engine mechanic.

Small engine application – 1 table spoon per engine oil change. Most oil today has zinc processed out of it. But, zinc is a really good oil additive that helps lubricate an engine…especially helpful with small engines to extend their life.

Vehicle application – Lucas Oil TB Zinc Plus is a zinc additive for engine oil. Its designed for engines with no catalytic converter in the exhaust. This product is also used as an engine “break-in” additive for newly built engines. For non-race, vehicle applications, one bottle will usually treat two oil changes. Some race-engine applications require the entire bottle. Classic cars (depending on oil capacity) require approximately 2,100 PPM (Parts Per Million) zinc in the oil.

Note #1: The is meant for 4 stroke crank cases. In a 2 stroke, you don’t want any non-combustibles in the mixture as it will gum up everything, and likely damage the motor.
Note #2: diesel oil should have the higher zinc content that is required, such as Shell Rotella 15w-40. You can still use this Lucas product, just don’t over do it on quantity.

Note #3: It does not thicken the oil.


2009 - 2020 Copyright © AHTrimble.com ~ All rights reserved
No reproduction or other use of this content 
without expressed written permission from AHTrimble.com
See Content Use Policy for more information.

Feedback & Comments: 3/29/2020 – 1

AH Trimble Feedback and CommentsIn regards to the Just Water Filter information I posted on 3/27 (click here > > IMPORTANT ! – Monolithic Water Filters  )

  • Duana writes…

“These are the filters my group here in Texas has been buying for several years. I love them!!”


  • Scott writes…

“Are these as good as Berkey brand filters?”

I responded…

In my opinion they are as good or better…and far less expensive!
My research of laboratory results shows it removes 85 – 90% of all insecticides, herbicides, pesticides. It removes 96 – 99% of metals. It removes 99.999 – 100% of all the ugly virus and bacteria junk. It removes 98% of all particles greater than .2 microns. It even removes Anthrax! Berkey filters run about $120 per pair. Just Water filters can be bought for about $40 each. Substantial price difference! And the Just Water filters are to be installed in regular buckets…even plastic trash cans! You can install one filter or 10. The more filters the higher the flow rate.

These filters remove:
> 99% Arsenic 5 and 99% Arsenic 3 (special order)
> 99% Hydrogen Sulfide (H2S)
> 95% Chlorine and Chloramines
> 99% Taste
> 99% Odor
> 98% Aluminum
> 96% Iron
> 98% Lead
> 90% Pesticides
> 85% Herbicides
> 85% Insecticides
> 90% Rodenticides
> 85% Phenols
> 85% MTBE
> 85% Perchlorate
> 80% Trihalomethanes
> 95% Poly Aromatic Hydrocarbons
> 99.999% of particles larger than 0.5 micron (Staffordshire University Labs) (includes Anthrax)
> 99.7% of particles larger than 0.3 micron (Staffordshire University Labs)
> 98% of particles larger than 0.2 micron (Staffordshire University Labs)
> 100% Giardia Lamblia
> 100% Cyclospora
> 100% removal of live Cryptosporidium (WRc Standard)
> 100% removal of Cryptosporidium (NSF Standard 53 – A.C. fine dust – 4 log challenge)
> 100% removal of E. Coli, Vibrio Cholerae (Johns Hopkins University)
> 99.999% removal of Salmonella Typhil, Shigella Dysenteria, Kiebsiella Terrigena (Hyder Labs)

And this filter system comes with a great list of laboratories that certify how good it is:
National Sanitation Foundation (NSF) Standard 42
National Sanitation Foundation (NSF) Standard 53
ISO 9002 Quality Standard
USA AEL Laboratories
USA Analytical Food Laboratories
USA Johns Hopkins University
British 5750 Quality Standard
England’s Water Research council (WRc)

Send Me Your Feedback & Comments…

← Back

Thank you for your response. ✨


2009 - 2020 Copyright © AHTrimble.com ~ All rights reserved
No reproduction or other use of this content
without expressed written permission from AHTrimble.com
See Content Use Policy for more information.

> > IMPORTANT ! – Monolithic Water Filters

I received word that Monolithic is no longer selling the ceramic water filter system. And that is true.

Read more about the ceramic water filters I am talking about [click here]

But…no fear!!!!

I did some follow-up and the filters were actually made by a company in Texas. I spoke with the owner of that company this morning and received some fantastic information. The filters and systems are still available. And more products than I originally knew about.

They are almost sold out of the 4″x4″ filters but are holding back 30 units that can be purchased directly. And Wise Foods still have some in-stock. [click here]

If you are a church group, non-profit organization, or doing a group buy for preppers you can purchase them direct. Go to JustWater.me [click here] and speak with Ron directly through the contact links on the home page. I spoke with Ron and he was very encouraging and willing to help folks out to acquire the filters. He sounds like a solid Christian man, a Baptist that has been providing water filters to needed areas around the world for decades. Please let him know that AH Trimble sent you!

One thought…the normal filter that I use and recommend is the 4″x4″ but they are almost out of stock on that one. But, they make a 2″x10″ filter that does the exact same thing and works just as well. So don’t hesitate to buy and use that filter till the 4″x4″ filters are back in larger numbers.

They also make an add-on filter that removes radiation. And another filter that removes salt. Both add-on filters also work via gravity feed! You can learn more at the website JustWater.me [click here]

So there you go…BACK IN BUSINESS !

The actual name of the ceramic water filters is Just Water Ceramic Filter. Talk to Ron…he can get you back to a place of safety with your water situation.


LED Lenser T-Square 240 Lumen Tactical Flashlight

880229 LED Lenser-240 lumens T square Flashlight note: article first appeared in December 2015

Back in January of this year I did a review on a tactical flashlight that I have been using for a number of years now. It is the LED Lenser V2. I absolutely love that flashlight! It has done everything I’ve ever asked of it and then some. It has never failed me, that is saying something.

The V2 was always plenty bright enough, tough as nails, fit my carbine’s vertical grip perfectly and was just an all-round perfect tactical flashlight. It was so good actually that I made it my family’s all-purpose flashlight. Yes, that means we standardized on it.

Then LED Lenser discontinued manufacturing it. But, they supposedly replaced it with a new and improved version. I am always leery of “replacements”, they never seem to be as good. This review is all about the “T Square” replacement version (model # 880229) of the LED Lenser.

The mission:

“A single flashlight that is capable of operating in the most demanding of tactical environments, bright enough to see a minimum of 100 yards, and battery efficient.”

Here were the flashlight restrictions and requirements:

  • Metal & tough enough to handle any reasonable field or tactical handling for our family/group.
  • Lightweight & compact enough for pocket use.
  • AAA or AA batteries.
  • Water resistant enough to handle any rain and momentary submersion.
  • Bright enough for any tactical weapon usage. Minimum beam distance 100 yards.
  • Narrow light beam.
  • Fit any 1” light mount.

880229 LED Lenser 240 lumen T square FlashlightThe flashlight specs:

FEATURE
V2 (original) T-Square (new)
Lumens 104
  • 240 high beam
  • 25 low beam
Lighting Modes 1 (2) High & Low Beam
Beam Distance 180 yards
  • 197 yards high beam
  • 60 yards low beam
Length 4.5” 4.5”
Diameter 1” 1”
Weight 3.6oz 3.56oz
Batteries 3 x AAA 3 x AAA
Housing Aluminum Aluminum
Water Submersion Rating IPX4 IPX4
Finish Semi-Gloss Black Matte Black
Burn Time 4 hrs
  • 4 hrs high beam
  • 25 hrs low beam
Switch
  • Momentary on
  • Constant on
  • High beam – Momentary on
  • High beam – Constant on
  • Low beam – Momentary on
  • Low beam – Constant on

I’ve owned this line of flashlights for a very long time. I think I had one of the first V2’s that hit the market. I really like the way they feel, and how sturdy and dependable they are. The first model had a slick/smooth switch cap in the end of the tube. I am not talking “slick” as in a good thing, I am saying there was no positive grip to it. Then they upgraded to a nice button with checker boarding in the rubber. That really made this flashlight a winner.

So, I open the box, excited as always anytime I get a new product to review, and what do I see? This stupid orange target on the switch button cap. I mean bright orange and it looks just like a clay pigeon. I hate that!

LED Lenser 880229 T square FlashlightOK, that relieved a little stress. Can anyone in their right mind tell me why a company would go with a bright orange anything on a tactical flashlight? I mean seriously…do they think we can’t find the button without it being bright orange? And another bad thing is the button cap is now back to being “slick” as in slippery.

Well, that is the downside. Everything else about this flashlight rocks!

The finish on the flashlight is better than before, less reflective. I also found that the finish added to my ability to hold onto the tube. This is especially helpful when your hands are wet with body fluids or something similar.

LED Lenser T square Flashlight 240 lumens 880229One of the first things I noticed, after the bright orange crap, was a distinctive red band around the inside of then lens right below the flashlight’s lip. I liked the “look” of it but had no idea what the purpose or advantage would be. So I kept looking at it from different angles. Low and behold I figured it out. While it may be unintentional it is interesting. I held a V2 model up to the new model and saw that from the side view the red band inside the lens drastically reduced the amount of light seen from the sides.

LED-Lenser-240TsquareFlashlight-004aYeah, think that one through for a minute. If you are trying to reduce your night-time profile you want to use red light. But for most tactical purposes you want to keep your overall location pretty much to yourself, right? So there you are in a warehouse, the middle of the night, using your new 240T on low beam. The red reduces the amount of light seen from the side and reduces the other guy from being able to get a solid “fix” on you. Sure, they can see your beam out in front of you but it is hard to spot the origin of the beam. The red simply helps keep you more covert.

Well, while I was playing around with that idea I tried shining one light on the front of the other light’s front. The light without the red in the lens reflected back brightly. The red lens lights barely reflected at all. So another nice feature at covertness.

Here is the biggest change to the new 240T light…the button switch. There are multiple positions now for the switch. The V2 had a partial depress would give you the beam that would turn off as soon as you let up the pressure on the switch. Fully depress the switch and the beam would stay on until you fully depressed the switch again. The new 240T has a high beam and a low beam light.

You activate the light just as before, but this time when you partially depress it the first time you get the high beam. Next time you partially depress it you get the low beam. Same goes for full depression of the switch for constant on. You have to do the depressing quickly for the switch to go from high to low.

What I mean is it alternates between coming on with the high, then the low beam. But it “resets” after about 5 seconds to come back on with the high beam.

So I have mixed feelings and opinion about the whole high/low beam thing. The low beam keeps your projected light much closer in and significantly increases burn time. And that is a really nice thing. I think the vast majority of my flashlight time is more closely associated with low beam needs than high beam capability.

I wanted to verify that Amazon had them for sale. While I was looking at the product to validate it, I noticed that there was a review with a “one star” rating. So here is the 1-star review, “When i received I saw different than this in the picture, and when I was using did not work.”

Yeah, I don’t put any value to that review whatsoever. It reads like they are from Russia. I think it was a “plant” to run down the product vs. what someone who actually bought and used the flashlight. I have bought a bunch of these flashlights over the years; never, not once, did they arrive broken or misrepresented. Actually, I have yet to break one of these flashlights or even burnout a bulb.

Other than a couple of subtle differences, the newer version flashlight is as rock solid as the V2. And I love the V2!

Final note, the flashlight carries the name “Leatherman” and I believe this is a marketing thing only. I don’t think this is a true Leatherman designed, engineered, and manufactured product. But, that being said, it is still a quality piece of gear.

My recommendation…”BUY!”  I did…multiple times.

Buy It !

Amazon leatherman LED Lenser T2 T square FlashlightTip: The LED Lenser tactical light fits perfectly in a pistol magazine pouch.LED Lenser in pistol single mag pouch


2019 Copyright © AHTrimble.com ~ All rights reserved
No reproduction or other use of this content 
without expressed written permission from AHTrimble.com
See Content Use Policy for more information.

LED Lenser V2 Tactical Flashlight

LED Lenser Flashlight V2note: article first appeared in January 2015

Let me start this review of the LED Lenser V2 by describing what I was looking for in a flashlight.

The mission was:

“A single flashlight that was compact, lightweight and bright enough to standardize on a single brand & model.”

Here were the flashlight requirements:

  1. Metal & tough enough to handle any field or tactical handling.
  2. Lightweight & compact enough for pocket use.
  3. AAA or AA batteries.
  4. Water resistant/proof enough to handle any rain and momentary submersion.
  5. Bright enough for any tactical weapon usage. Minimum beam distance 100 yards. Narrow beam.
  6. Fit any 1” light mount.

To sum it all up – This flashlight does the job in every aspect, excels at each requirement.

So here are the technical details –LED Lenser Flashlight V2

  • Length: 4-1/2”
  • Diameter: 1”
  • Weight: 3.6oz
  • Tough aluminum housing with checker boarding for sure non-slip grip.
  • Uses 3 AAA batteries.
  • IPX4 water resistant rating (it’s not designed as a submersible light but is water resistant under pressure).
  • 94 – 104 lumens (brightness) in a narrow beam that can reach nearly 180+ yards.
  • 4 hour constant burn time with medium quality batteries.
  • Finish: Black matte

I first started using this brand/model of flashlight nearly 8 years ago and I’ve never been disappointed. Actually, I’ve been CAA Comand Arms foregrip flashlightthrilled with it! It is a great size for my pants pocket and fits any flashlight holder on a spare belt mounted spare magazine holder that I use. I use a Command Arms Accessories Flashlight Holder Grip Adapter on my AR and this light fits it perfectly. The light shines a very bright narrow beam of light that exceeds my expectations of a tactical light. The light is not so bright that it will washout my vision in the dark but plenty bright enough for me to do whatever I need to with it. The distance the beam goes is amazing for such a little unit running on AAA batteries.

My Duracell batteries will last well over two years in the light depending on how much I use it. The battery carrier/cartridge is absolutely high quality, as is the entire housing. I felt the quality and close tolerances as soon as I began to unscrew the battery cartridge. This flashlight is a top-quality piece of equipment.

The checker   boarding on the body is substantial but not uncomfortable, they struck a happy medium. It has never slipped in my hand under any conditions, wet or dry. The newer models have a thumb switch that has ‘nubs’ on it as well to ensure that your thumb won’t slip off. And speaking of the switch, it does have the momentary-on capability or the ‘click-on’ for a constant light.

This flashlight has replaced all my other flashlights except my big 4 x D-cell Mag light that I keep under the front seat of the truck. You won’t need another flashlight (other than a ‘tire check’) once you’ve tried out this keeper, you’ll love it! Use with absolute confidence.LED Lenser Flashlight V2

The price on this can vary from about $28 – $40 out on the Internet so shop around. I’ve bought mine (6 of them now) off of eBay.

Note: If you are going to submerse your tactical light for any length of time you might not want to search elsewhere or waterproof the Lenser yourself. I don’t think it would hold up too long underwater but I haven’t done any conclusive testing on it for that particular mission.


2019 Copyright © AHTrimble.com ~ All rights reserved
No reproduction or other use of this content 
without expressed written permission from AHTrimble.com
See Content Use Policy for more information.

Princeton Tec Tactical Quad Headlamp

Princeton Tec headlamp reviewnote: article first appeared in May 2016

I can’t tell you how much I enjoy, no, truly love my original model Petzl Tactika XP headlamp. It is exactly what I want a headlamp to be. But, why am I talking about a Petzl when I am reviewing a Princeton Tec headlamp? Simple, the original model Petzl Tactica XP is the standard by which I will, I must, judge all other headlamps.

Original Petzl Tactika XP

Original Petzl Tactika XP

Sooooooo right about now you are saying to yourself, “Why doesn’t AH just buy himself another original model Petzl Tactika XP headlamp?”

Well, I would if they still made them. Yup, Petzl (in all their stupidity) discontinued making that little gem a couple years ago. True, they still have a Tactika model but I already did a review on that new model. Yeah, it sucks compared to the original model. So I have been on a quest ever since to find a headlamp that is just as good, maybe even better. The Princeton Tec Tactical Quad is the latest contender.

As always…the mission –

“To provide personal lighting capability for night operations in a tactical or camping environment.”

Requirements & Restrictions –

  1. Must be water resistant.
  2. Must be rugged.
  3. Must provide foolproof for “red lens” operations.
  4. Must operate on AAA batteries.
  5. Should be camouflage or flat earth color.
  6. Must have headband operation capability.
  7. Should have helmet mount capability.
  8. Should contain the lamp and batteries in the same housing.

With all of that in mind I began searching for an acceptable substitute for my old Petzl. This Princeton Tec Tactical Quad model stuck out to me as possibly meeting all my criteria and it looked like it was positioned at very reasonable price point as well. What really caught my attention was the red lens that operated similarly to the Petzl as well as being the right color and compact in size.

The headlamp arrives and right off the mark I see that the housing is not the best quality plastic. There is a gasket to protects the inside components from moisture but it requires tightening a thumb screw to tighten it down. And, there is an option to use a screwdriver, but that might be a problem. What happens when someone tightens it with a screwdriver and you don’t have a screwdriver when swapping the batteries?

The four LEDs are plenty bright enough but they cast a semi-focused wide light pattern. And that pattern sends light too much to the sides for my liking. Although it is pretty focused in the middle of the pattern. I want the light to be tightly focused out in front of me. I am not worried about a “wide” light pattern, I want to see what is out in front of me. The leftover or light-bleed will allow my eyes to pick up details peripherally vs. really bright light. I don’t need the headlamp intentionally sending out a wide pattern or for everyone and their brother to see it.

PrincetonTec-002So I am not crazy about the white light pattern very much but it is acceptable.

Where this headlamp really shinned (no pun intended) was the red lens light pattern. It is really nice, great pattern, and another nice feature was the red lens, you can tell that it is in place making it tough to accidentally light up the area in white light.

The red lens simply slides up into place.

The red lens simply slides up into place.

Princeton Tec red lensSince the headlamp has three intensity settings you can adjust as needed. The picture above is at the high intensity setting.

Another really nice aspect of the headlamp is the band. It is a decent piece of expandable material that appears to be top quality.Buy It !

At $42+ online, it is at the top of my acceptable price range. But, I still give it a “buy” recommendation…but barely and only if you really need a headlamp and can’t find one anywhere else. Wait till you hear about it’s brother…the Princeton EOS model…Sweet:)


Amazon-PrincetonTec


2019 Copyright © AHTrimble.com ~ All rights reserved
No reproduction or other use of this content 
without expressed written permission from AHTrimble.com
See Content Use Policy for more information.

Multitool – Ozark Trail 12-in-1

Oarktrail 12-in-1 MultiToolnote: first appeared in July 2016

Son of gun! So I was in Walmart the other day and passed by the sporting goods counter. Low and behold what did I see? A multitool that looked pretty decent. But, that isn’t what grabbed me…the price pulled my eyeballs out of my head.

I thought the price applied to something else, but I had to ask, “Are those multitools actually priced $3.97?”

“Yes sir they are,” was the associate’s reply.

I bought 10. Yeah, 10…right there, right then…on the spot.

I got home and buyer’s remorse started kicking in. I kept wondering are they worth it, should I have waited, will they be a cheap piece of crap? All of those questions were floating around in my head. I couldn’t wait to get home and get some testing done.

Well, I could go on and on about this mutlitool, but there’s no point. Here is my summary –

  • Is this a cheap piece of crap? Nope.
  • Is this going to last my lifetime? Nope.
  • Is this going to get work done? Yup.
  • Is the knife blade sharp? Yup.
  • Is the saw blade sharp? Not really, but it does cut.
  • Do the screwdriver blades work and fit screws correctly? Yup.
  • Does the file work and appear to be decent? Yup.
  • Does the bottle opener work? Yup. (But who uses a bottle opener anymore?)
  • Does the can opener work? Yup.
  • Are the tools easy to get open from the handle compartment? Not real easy but they open.
  • Do the tools snap and lock into place? Nope. But neither do my higher end multitools either.
  • Does the wire cutter actually cut wire? Yup. Just don’t try to go too big. I did 12ga with no problems. And it cur zip ties just fine as well.
  • Do the pliers pieces line up correctly and their faces flush? Yup. Surprisingly so actually.
  • Is this equal in quality to a Leatherman, SOG, or Gerber? Nope.MultiTool-Ozark-001

Bottom line – Buy this freaking multitool !

Here’s why I did…I needed ten of them. I am responsible for a 10-person response team for our church’s emergency preparedness. I’ve put together kits for each person. So when they show-up I can hand them a kit and they have some basics; knife, radio, flashlight, writing tablet, pen, etc. Now I have added a multitool to the kit. And I spent less than $40 doing so. Yup!!!

So, is a SOG, Leatherman, or Geber better? I think so. But they also cost a whole heck of a lot more money too. So, is the Ozark Trail worth the $35 Gerber? Maybe, probably not. But the Gerber is not 8 times better than the Ozark Trail but it costs 8 times more. So use the Ozark Trail until it breaks…throw it away and get another one out of storage. Repeat 6 more times as needed.

If you want to get a multitool in the hands of each family member, each group member, or just have a supply on-hand this is the way to go. I have no problem recommending this to you…especially at this price…$3.97!!  So go to the sporting good’s counter at your local Walmart and look for it. The picture at the beginning of this article and it will show you exactly what to look for.


2019 Copyright © AHTrimble.com ~ All rights reserved
No reproduction or other use of this content 
without expressed written permission from AHTrimble.com
See Content Use Policy for more information.

Antenna: Portable Dual Band (70cm & 2m) Radio Antenna

Antennanote: article first appeared in February 2015

One of the reasons I got into the Ham radio scene was to increase the effectiveness of handheld radios.  In my day job I use handheld radios a lot and they are critical to our wildland firefighting mission.  At work I can talk on a handheld for hundreds of miles across six counties.  I wanted similar capabilities in private life during emergencies, disasters or especially during “grid-down” when it comes.Desert

So I built a repeater using a Yaesu FT-8800r dual band mobile radio.  Along with a great repeater is a need for a great antenna.  And that antenna has to be proven reliable, sturdy, portable and something you can depend your life on.  So that was my next challenge, build an antenna to meet the repeater need but go beyond that as well.  This article covers that quest.  So let’s get going…

Mission –

General – To allow maximum performance on 70cm & 2m frequencies in the field via a highly portable, easily set-up, and sturdy antenna.

Primary – Use in conjunction with a Yaesu FT-8800R as a portable cross-band repeater (70cm & 2m).

Summary –

This portable dual-band antenna allows a user to attach the antenna to a handheld (via adapter cable) or directly to a mobile Ham radio. The antenna itself is a purchased wire antenna which is then mounted internally in ¾” PVC pipe. That section is then configurable with or without two (2) additional sections of 3” PVC pipe to vary the antenna height from 5’ – 15’ from the base.

Materials List –

DBJ-1 Designed by Dr. Ed Fong WB6IQN of UC Berkeley

DBJ-1 Antenna

  • The antenna, DBJ-1 J-Pole dual-band, designed by Dr. Ed Fong WB6IQN of UC Berkeley.
  • 1 section (10’) of Class 200 3” PVC pipe
  • 1 section (5’) of Class 200 ¾” PVC pipe
  • 1 3” threaded Class 200 PVC clean-out adapter, the inside diameter of the non-threaded end is 3”. See the picture in Step #7 for a better idea.
  • 1 threaded cap for the Class 200 PVC clean-out adapter. See Step #2 for a better idea.
  • 1  2” x 1-1/4” Class 200 PVC bushing. The 2” is male; the 1-1/4” is female.
  • 1   3” x 2” Class 200 PVC reducer. Both ends are female.
  • 3 or 4 swivel bales. See Step #15 for a better idea.
  • 30   1-1/4” wood screws with washers.
  • 1   ¼” carriage bolt, star lock washer, nut.
  • 2   2’ x 2’ pieces of ¾” marine plywood.
DBJ-1 Antenna Info –

SWR:  Less than 1.3 to 1 on both bands.
Gain:   +6dB over a rubber duck antenna

Steps –

Step #1 – The base is cut from 3/4″ marine plywood.  You want two pieces 24″ x 24″.

Step #2 – Take your 3” threaded drain clean-out plug. Cut square hole in the center of one piece of base material. It should look something like this…

Antenna-DBJ1build1

Step #3 – Place cap through hole so it looks like this…

Antenna-DBJ1build2Looks like this from the backside…Antenna-DBJ1build3

Step #4 – Now line it up and chisel out a small indent in the second board for the cap to sit in. Do not cut the hole all of the way through. Using the indent for the cap to sit in will give the base added strength and prevent the cap from turning. It should look something like this…

Antenna-DBJ1build4Step #5 –  Line the two boards up, make sure everything lines up correctly, put a generous amount of construction grade adhesive (i.e. Liquid Nails) between boards, clamp, then using outdoor screws, screw boards together.

Step #6 –  Using wood screws and washers secure the cap to the board. I used 1-1/4” wood screws. It is a good idea to pre-drill the cap where the wood screws will pass through to avoid accidental cracking of the plastic cap. The washers ensure that the screws, when tightened, will not crack the plastic cap.

Antenna-DBJ1build5Step #7 –  When the boards are securely “sandwiched” then use a ¼” bolt (I used a carriage bolt), star lock washer, and locknut. Drill a hole for the bolt through the cap bottom (centered) and through the lower board. Install bolt from the bottom through the boards, through the cap and secure with lock washer and nut. Be careful to not tighten the bolt/nut too much; you don’t want to chance breaking/cracking the plastic cap.

Step #8 –  Now you have the base ready for priming and panting. I suggest a high quality primer and then multiple coats of a high quality paint to seal the wood against moisture. I suggest you tape off the threads with painter’s tape prior to painting.

Step #9 – Using the 10’ section of Class 200 PVC pipe, cut the 3” PVC pipe in half. Cement a double-female joint to each section of pipe. Use a plastic primer spray paint; paint the pipe any color you wish. It is not necessary to paint the pipe, I just think it looks cooler painted. Allow for the paint to fully dry before installing the swivel bales.

Step #10 – In the 5’ section of ¾” Class 200 PVC pipe install the wire DBJ-1 antenna according to the instructions included with the antenna.

Step #11 –  Using the 3” x 2” PVC reducer connection cut a ¾” hole in the side of the reducer as shown.

Antenna-DBJ1build6Step #12 –  Using the 2” x 1-1/4” PVC bushing cement the antenna cap (with the PL-259 connector installed) into the 1-1/4” opening in the bushing. Then cement the 2” end of the PVC bushing into the 2” opening on the 3” x 2” PVC reducer. (When ready to use the cap will fit over the male end of the PVC base.)

Step #13 –  Paint the 5’ antenna section any color you wish. Painting is not necessary but it looks cooler if it is painted. Make sure you use a plastic primer prior to painting with the finish coat.

Step #14 –  After the paint is dry on the 3” x 5’ sections of PVC pipe secure 3 or 4 of the swivel bales to one section. You will install the swivel bales on the end that does not have the joint installed. Make sure you are sufficiently lower from the end of the pipe to allow the 5’ antenna section to fit securely and snugly onto this section.

Antenna-DBJ1build6Step #15 – Allow all painted surfaces to completely dry prior to initial use.

Installation Options –

You have three installation options:

Starting with the base…

Antenna-DBJ1build7

Option #1 – Install the 5’ antenna section directly onto the base.

Antenna-DBJ1build8Option #2 – Install the 5’ antenna section on one of the 3” x 5’ sections, and then install the 3” x 5’ section on to the base.

Antenna-DBJ1build9Option #3 – Install the 5’ antenna section onto the 3” x 5’ section with the swivel bales, and then that section on the remaining 3” x 5’ section. Then install the entire configured pipe/antenna onto the base.

Antenna-DBJ1build10Note #1: If you are going to be securing the antenna with Para cord, tie the Para cord onto the swivel bales prior to raising the pipes and installing onto the base.

Note #2: If you are concerned about the unit’s stability you can place sandbags or large rocks on the base to improve stability.

Note #3: I painted my antenna a combination of colors and textures that will help it blend in with the desert environment where I will be using it.


2009 - 2019 Copyright © AHTrimble.com ~ All rights reserved
No reproduction or other use of this content 
without expressed written permission from AHTrimble.com
See Content Use Policy for more information.