Well, kind of an interesting morning at the range. Let me explain…
I actually didn’t go to the range at all. I have a place I like to go in the desert, its remote but close enough to town not to be a long drive. It is all boxed in with high canyon walls all around. It is quiet and I am always alone unless I take people with me. So that’s where I headed…and I am glad I did.
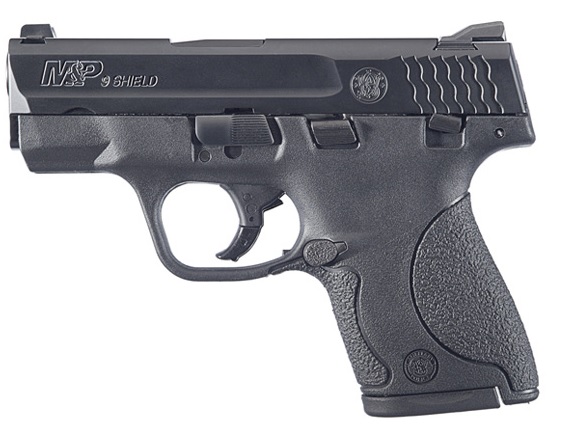
Alright, so I drop the tailgate to my pickup and layout all my shooting gear. I had brought 220 rounds of 115gr Winchester FMJ ammo with me. That stuff is nothing fancy but the price is right and the brass is reloadable. I really wasn’t trying to become an expert shot with the Shield, I just wanted to run the rounds through it to see how it performed and get through the “break-in period” with it.
Let’s cover all of it…the factory magazines that came with it were a decent quality. If I did my research right, Mec-Gar makes them for S&W. With the pistol came a 7-round mag and an 8-round mag. The 8-rounder has a little pinky finger extension on it. Both mags were a little stiff at first but broke-in just fine. I did notice that even at the end the 7-rounder was a little stiff getting that last round in as I was loading, but it wasn’t a big deal at all.
The first round of any new gun I send down range is always an interesting one for me. My head always wonders what might happen. I wasn’t surprised or startled by the first round at all. It just went “crack” and the tree stump splintered. Same thing for each round for both of the first mags.
After about 100 rounds I started to pay more attention, snapping up from a low-ready, changing my stance, aim, not aiming, and trying different positions on the trigger with my finger. What I did notice were a few things –
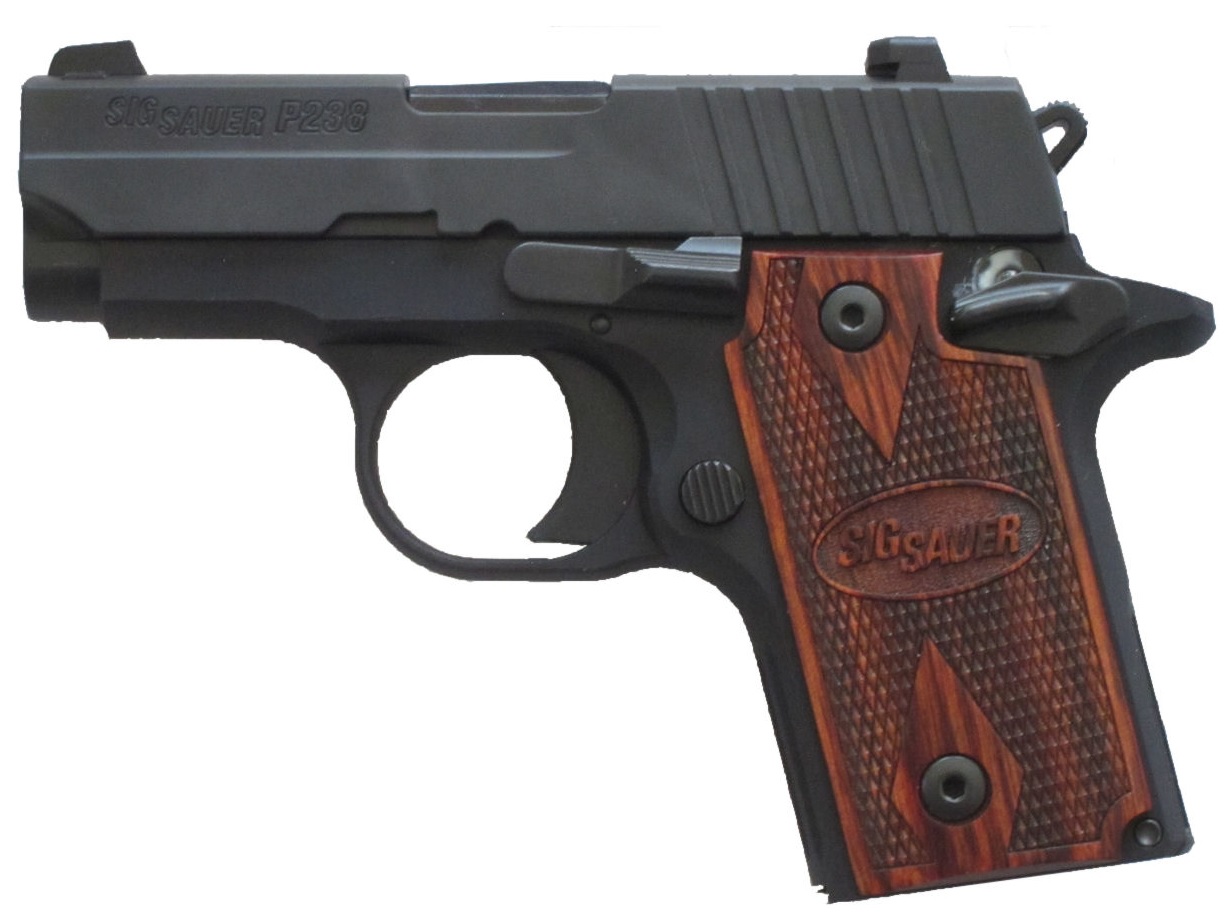
- I tended to want to put more of my finger over the trigger than I normally do. I figured out it is because the Shield is small compared to my Sig 1911 Ultra-Compact or my Sig 226. So my big paw wanted to envelope more of the gun than it is designed to handle. So I had to consciously work at keeping my trigger finger where it belonged.
- I noticed I was shooting a little to my left pretty consistently. When I really slowed down and was taking each shot seriously I noticed that I didn’t have a natural sight picture with the pistol. I can work through that with range time and getting the right feel for the gun…hand position vs. aim point.
- The Shield is much smaller in my hand that any other gun I have with the exception of the Sig 938 I have.
- It was simple, easy, and second nature for each follow-up (second) shot. Even with a small, lightweight gun the second shot was very easy to manage.
Once I had shot up 200 rounds I got out the 15 rounds of misc rounds I had brought. I mixed in those rounds with a few of the remaining Winchester rounds I still had left. Ran them, no problems. Then I got out the good stuff, the 147gr Hornady XTP rounds that I absolutely love. I feel these are the undisputed best round to run in a 9mm pistol. I loaded them up mixing them in with the remaining 115gr Winchester rounds.
It ran like “crack” “crack” “thump”. The “crack” were the 115gr rounds, the “thump” was the 147gr round. There was a noticeable difference in the feel of the gun on top of the sound. The 147gr rounds were ones that I had reloaded myself and they are a little on the hot side since I run them through my full-frame Sig226. The Shield handled them just fine. Even the second shot was no issue at all.
After about an hour and 250 rounds later, I have to say I like the Shield. The 7-round magazine leaves my pinky finger dangling. But for some reason it quite naturally tucked right under the grip and was no issue. The 8-round magazine removes any issue at all. The 18º grip angle is just right for me. The grip is a little small for me, but it is entirely doable with no issues. I do like the 8-round mag grip better, it feels more natural, and I think I have better control on the pistol with it. That being said, I am perfectly fine with the 7-round mag grip with no complaints.
A few more technical observations –
- No failure to feeds.
- No failure to ejects.
- Two failures to go completely into battery.
- No misfires.
- No magazine feed issues.
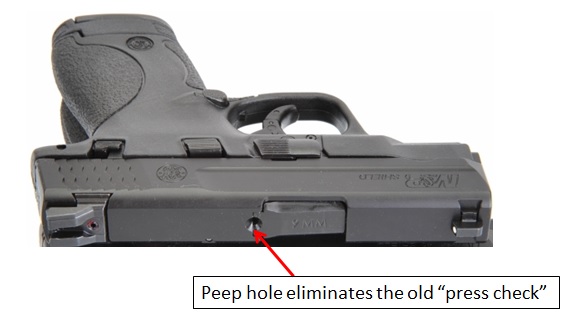
I want to explain the battery failure issue I mentioned. There is a thumb button slide release. But, don’t think for a minute you are going to be able to use it…you simply can’t. Yes, I know you are supposed to release the slide by “racking” but I just wanted to test the release. The release button is simply too tight and stiff to allow it to be used under normal circumstances. Overall, it is a good thing, forces you to into good habits no matter how resistant you might be. I think the two failures to go completely into battery were my fault. They occurred early on and I just feel I didn’t have enough “snap” to my racking the slide. I will keep my eyes on that one and report more later.
I did a medium and long distance test fire on it as well. At a medium distance, about 80’ the gun was plenty accurate enough. Without really trying I was grouping 12” – 18” with one flyer. When I went to 100 yard distance I found I was able to pick up the aim point pretty quickly. I would have no problems trying to engage someone at 100 yards if I had to. I would have to slow my shots down a bit, but it is perfectly doable.
The trigger reset is clean. There is even an audible “click” when it resets. However, in a gunfight I am not sure that you would hear it. I only heard it because I use Howard Leight electronic ear muffs. There is a “feel” when it resets but I hard a hard time feeling it. Next time at the range I will slow down and really work the gun to become proficient. I will let you know if it becomes any kind of an issue.
I did a glove test on the pistol as well. Unless you are using a “golf glove” (i.e. thin leather) you might struggle getting your trigger finger inside the guard. I could do it but it felt a like fumbling at first…and later as well.
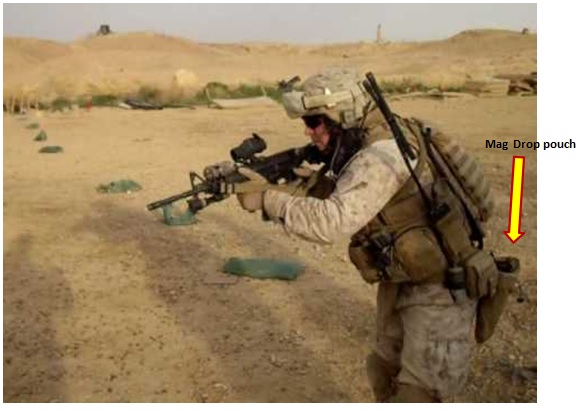
Then I had to remind myself…this isn’t a battle gun. This isn’t something I am going to strap onto a drop-leg rig and head into some pitched firefight. This is a CCW EDC pistol. It is designed to be highly concealable, highly reliable for carrying on your person every day.
One thing I will point out that is fairly weird, maybe it is just me. I do a lot of shooting and I have a decent variety of pistols. But, I have never had a problem retrieving a spare magazine to place into a pistol that I was shooting (magazine swap). Seriously, I’ve never had a problem…period. With the Shield three times I brought the spare mag up reversed. As I tried to repeat the error it boiled down to the base plate of the magazine. It is just kind strange to anything I am use to. The base plate itself stick out to the front and to the rear of the magazine so there is no easily distinguished forward position. I think this is just a “me thing” and I will get over it with practice and consistent handling of the mags. I didn’t have the problem with the 7-round mag…but it doesn’t have the strange base plate that the 8-rounder does.
I wrapped up the range time and headed home…after picking up my brass. I felt very pleased with the Shield and I felt 100% confident that I could carry it as my EDC piece and not worry a bit.
When I got home I cleaned it. I gotta tell you, it was the easiest pistol I ever stripped down. It was simple, easy, and very fast to clean. While I can’t say I enjoy cleaning guns, cleaning the Shield was no big deal, fast, and easy. And that is good enough for me.
At that point I made the decision that this was going to become my new EDC…period. I liked it, it packed plenty of punch, was light, really concealable and just what I was looking for. So the next step…
I ordered four different holsters for it –
-
- Outbags LOB3P
- Galco SG652B Stinger
- Blade-Tech Revolution Klipt
- Desantis Mini Scabbard
Why those holsters? Because I did about four hours of research online to find the holsters that I feel are most likely to me what I am looking for. I will write an article on that once my testing is complete. And yes, I will have a recommendation as well.
I ordered another 8-round magazine. I figure that since this pistol was meant to be more highly concealable I would carry the 7-round mag in the pistol on my belt. That gives the gun the smallest possible “print.” But, my two spare mags will both be 8-rounders vs. 7-rounders. Yeah, I know…only two rounds of difference. But I keep thinking that I would rather have two too many rounds, than two too few rounds. That is just me. And why two spare mags? Because you never know how long the gunfight might be or how many bad guys you might be dealing with.
One thing I had to do…just had to. When I was ordering the spare mag from the supplier…right there just two tiny ads over was a 10-round magazine option. Yes of course I bought that one also. I just couldn’t resist! Come on, if 8-rounds is good…10-rounds really rocks! I will return and report on that as well.
I know I talked about two other issues; 1) night sights, 2) trigger job. At this point I see absolutely no reason for a trigger job. Yes, I might change my opinion later on, but for now I am perfectly fine with the trigger it has. I am almost struggling with getting the night sights or not. I was just fine with the way it was at the range. But, the sun wasn’t its normal desert brightness nor was I am attempting to shoot in low/no light conditions. I will probably go with the night sights but not just now. I am more interested in another day at the range really working the gun and finishing the break-in. I am also going to enjoy figuring out which holster is best suited for it. I am hoping that one holster really stand outs.
So there you have it…all of my initial impression of the Shield are positive and I think this is going to be as great CCW EDC gun. And I will be writing at least one more article covering all the new stuff I test.
2009 - 2019 Copyright © AHTrimble.com ~ All rights reserved
No reproduction or other use of this content
without expressed written permission from AHTrimble.com
See Content Use Policy for more information.