
 note: first appeared in July 2015
I am not a Ham radio “geek” but I do have a couple Ham radios and I like using them. One thing for certain, when an emergency, disaster, or “grid-down” strikes…radios will be essential. I mean “essential” not because they are a radio, but because communications will be absolutely necessary in those situations.
Along with the actual radio you have to have a quality antenna for your rig, that should go without saying. But what about power?
As with all my equipment I define a mission. The mission for this project is:
“Provide sufficient power to allow the limited use of a radio for at least 15% of any given 24-hour period. During which transmission power usage will be approximately 40% of that time period.”
Notice that the time period required to keep the radio operational is less than four hours of actual run-time. That may not sound like a lot but it could be significant when available power is at a premium. Stated in a little more “plain English” I want to be able to run my radio about 3.5 hours per day. And of that run-time I want to be able to transmit almost 1.5 hours. Based on the calculations stated in the mission, I need a 34 ampere hour capacity battery and the capability to recharge it.
And while I may have generator capability available to recharge the unit, I want it to be solar rechargeable. But, I don’t want it “tied” to a solar panel set-up. I want to be able to interchange whatever solar system I have or can come across to recharge the unit.
I also don’t want it overly complicated and not “multiple-mission” capable. This unit is strictly for powering a Ham radio and the ability to recharge it via generator or solar. Can it do other things? Of course. But those are side-benefits.
Here goes with the components –

For the storage box that will house everything I am going with a military surplus .50cal ammo can. It is a good size, very sturdy, and air/water tight. But most importantly it just seems to be the right size.
Once I picked out the box itself I was able to start looking into batteries. Obviously I wanted a “deep cycle” battery vs. a “cranking amps” battery. And the best/cost effective deep cycle batteries on the market right now are AGM style batteries in terms of how long they will keep a charge up. I won’t go into AGM details or why it is better; that’s way too technical for the scope of this article. That will be the focus of a later article just on that subject. But for now just know that I went with a deep cycle AGM battery. I wanted as many ampere hours as I could possibly get, but the box space was my limiting factor.
I spent probably 10 hours online looking at different battery manufacturers reading about the dimensions of different batteries and other details. I thought I had a battery identified correctly and ordered two. They arrived quickly, appeared to be solid, quality batteries. And of course, as you might guess, they didn’t fit.
I had rounded up the width measurement of the box, and the batteries had a very small lip on them that was not included in the technical information of the battery stating the actual width. Combine the two very small variances and the batteries would not fit side-by-side in the box I had planned. Fortunately, they were the same batteries that I had identified for another project so all was not lost. So, hours more searching online till I finally gave up. Good news is we have a 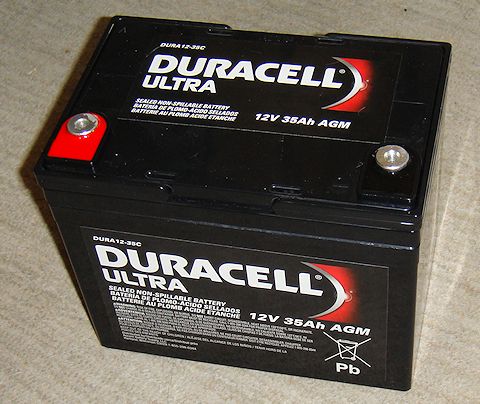 BatteriesPlus store in town so I grabbed the box and headed to the store. Ten minutes later I was walking out the door with a great battery, the Duracell Ultra 12v 35Ah AGM, model # DURA12-35C.
I was pleasantly surprised to have 35Ah capacity in such a small package. And remember that, based on my usage requirements, I needed a 34Ah battery or larger. You never know when the extra 3% capacity will be the one transmission you get out before the battery dies. Yeah, sorry a little melodramatic but you get my point.
So here are some technical facts on the DURA12-35C:
- AGM technology (absorbed glass matt)
- 12vDC SLA (Sealed Lead Acid) Battery Battery
- 35Ah
- U1 Group Size battery
- Handles offer easy lift & carrying
- Speedy connection with 6mm female threaded terminals
- Size: 7-3/4″ L x 5-1/8″ W x 6-1/2″ H
Now here is a point of the box design that I struggled with just a little bit. I wanted to keep the integrity of the box intact. In other words I don’t want anything going through the box walls. That will keep it water and air tight. But I need to be able to have a set of Anderson Powerpoles to hook up a line to the radio and I need a set of Anderson Powerpoles to connect the solar charging unit to the box to keep the batteries charged up. And I want a voltmeter to keep track of the battery.
I have seen over the years that the more points you have that are vulnerable, the more likely you are to have a failure. So every breach of the boxes integrity is a potential failure point. But there is also the convenience factor as well; the box has to be easy to use.
 This is where compromise and trade-offs come into play. I decided to go with the Anderson Powerpole Chassis Mount. This gives me a sturdy mounting system for two sets of Anderson Powerpole
 ![]() connections (power out, charging in). The Anderson Powerpole Chassis Mount is available through Powerwerx.com
connections (power out, charging in). The Anderson Powerpole Chassis Mount is available through Powerwerx.com
While the box is no longer water or air tight, I think it will fall into that category of “good enough.” While it won’t keep water out, it will resist rain. And while it isn’t airtight, it will keep most of the dirt and dust out. I am thinking that when I complete the install I will look for ways to seal it up on the inside to make it more resistant to rain and blowing dirt/sand.
To track the battery voltage condition I went with the Powerwerx Panel Mount Digital Volt Meter. It has a nice blue 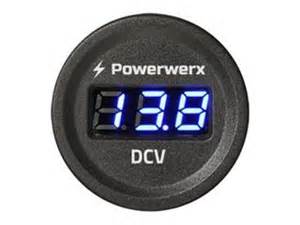 display and I’ve used them before. Again, available through Powerwerx.com
 ![]() Nice little high-quality units. But this volt meter will be mounted inside of the box not mounted on the exterior. To do that I would have to drill a 1-1/2” hole through the box sidewall and I am just not ready to make that size failure point.
Nice little high-quality units. But this volt meter will be mounted inside of the box not mounted on the exterior. To do that I would have to drill a 1-1/2” hole through the box sidewall and I am just not ready to make that size failure point.
I will have to fabricate a couple of “hold-downs” to keep the battery in-place. I will also have to fabricate a panel on which to mount the volt meter. I will integrate them just to make everything sturdier. And I will probably have to do a “bolt-through” or two to make it all stable. But I will try to keep those integrity breaches to a minimum.
To protect the electrical circuit I will use a Powerwerx ATC Style Fuse Holder 10ga with 1/4″ Ring Terminals and Anderson Powerpoles. The fuses are common, readily available and I can even pinch them from a vehicle if I need to.
There is a wildcard as far as interior components are concerned, LVD (low voltage disconnect). Overly discharging an AGM battery seriously reduces its life span (number of charging cycles). So you only want to draw it down to a certain voltage level. Based on the voltage stats of the Yaesu FT-8900R radio, the radio can operate down to about 10 volts before it shuts off. However, that is too much battery discharge under normal conditions for an AGM battery. Refer to the chart to see how the “depth of discharge” can serious reduce the number of times you can recharge the battery.
 Now, I can do one of two things to overcome that challenge:
1) Monitor the volt meter for a reasonable discharge depth, say 12.32 volts. And when the battery hits that level I manually turn off the radio till the battery is recharged.
2) Use a LVD unit that will automatically turn off the radio when a pre-set voltage level is reached. And it will also turn the power back on to the radio when it reaches a safe charge level once again. I am evaluating several different LVD units; one reasonably priced, the other is considerably more expensive. You can guess which one is probably better suited for this application. But I will provide more when my testing is done and I’ve made a final decision.
So that is it, no more guts for the power box than what I have outlined above other than the wiring. I will be using all 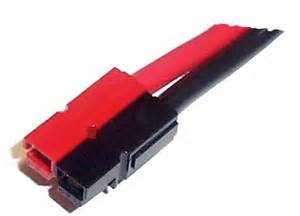 10g wire to ensure that the maximum current can be carried throughout the system. And, I want to make sure that I don’t overheat anything and burn it all up. As for connecting the wire to components I will once again be using Anderson Powerpole connectors for everything. This gives me a whole lot of options and flexibility. And most of all, when things get bad I can pull different pieces of my projects out to repair other more critical equipment. And I can do it with a minimal of effort, damage, and installation effort.
Solar Power –
I have already decided on two solar charging options:
Option #1 – A single panel system from GoalZero, Boulder 30 panel with the Guardian 12v charge controller. 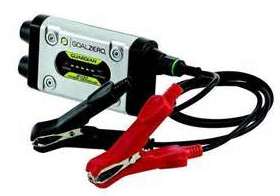 The charge controller has a built-in PWM Lead-Acid and supports up to 90W solar panels. It also has LED Status lights for the charging status and battery. Some technical specs on the panel –
Rated Power: 30W
Open Circuit Voltage: 18-20V
Cell Type: Monocrystalline
Weight: 6.5 lbs
Dimensions: 21″ x 18″ x 1″
Optimal Operating Temp: 32-104 F
Certs: CE, FCC
Options #2 – A Glow Tech dual panel, portable system 60 watt folding solar kit, with folding stand, and integrated charge controller. Features of the Glow Tech system:
• High efficiency monocrystalline solar panels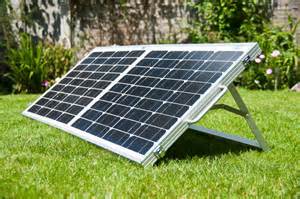
• Suited for flooded, gel, AGM, or calcium batteries
• Low iron tempered glass resists breakage
• Durable folding frame, so you can tilt the panels toward the sun
• Built-in PWM charge controller
• Bonus! Includes fabric storage bag
• Spring-loaded carrying handle
• Solar panels are weatherproof and sealed to withstand the elements
• Includes cables pre-wired for easy hookup
• 25 years warranty on the solar panels
Technical Info:
• Rated Power Output: 60W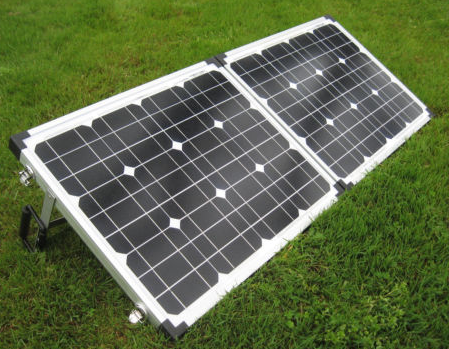
• Optimum Operating Voltage [Vmp]: 17.5V
• Optimum Operating Current [Imp]: 3.43A
• Open Circuit Voltage [Voc]: 21.7V
• Short Circuit Current [Isc]: 3.82A
• Normal Operating Cell Temp [NOCT]: 47±2°C
• Maximum System Voltage: 1000 vDC
• Series Fuse Rating: 10A
• Operating Temperature: -40°C to +85°C
• Application Class: Class A
• Cell Technology: Monocrystalline Silicon
• Folded Dimensions (approx.): 22¼” x 17¾” x 3″
• Unfolded Dimensions (approx.): 43″ x 18″
• Total Weight (approx.): 19lb 7oz

2009 - 2019 Copyright © AHTrimble.com ~ All rights reserved
No reproduction or other use of this content
without expressed written permission from AHTrimble.com
See Content Use Policy for more information.

Pingback: Yaesu FT-8900R Go Box & Power Box Together | A.H. Trimble - Emergency preparedness information for disasters and grid-down
Pingback: Heavy Power Cable for 12vDC Power Boxes | A.H. Trimble - Emergency preparedness information for disasters and grid-down
Pingback: Yaesu FT-8900R Go Box – Part #1 | A.H. Trimble - Emergency preparedness information for disasters and grid-down
Pingback: Portable Power Box – Part #2 | A.H. Trimble - Emergency preparedness information for disasters and grid-down