
 Welcome to Part #2 of the Victron Energy Lynx PowerIn article!
In Part #1 < click here to read Part #1 > I shared a bunch of information, here in Part #2 I will show you how I attached a Class T fuse and how I turned a PowerIn into a fused distributor/connection point.
The battery side of this is pretty simple –
Adding a Class T fuse to the PowerIn.
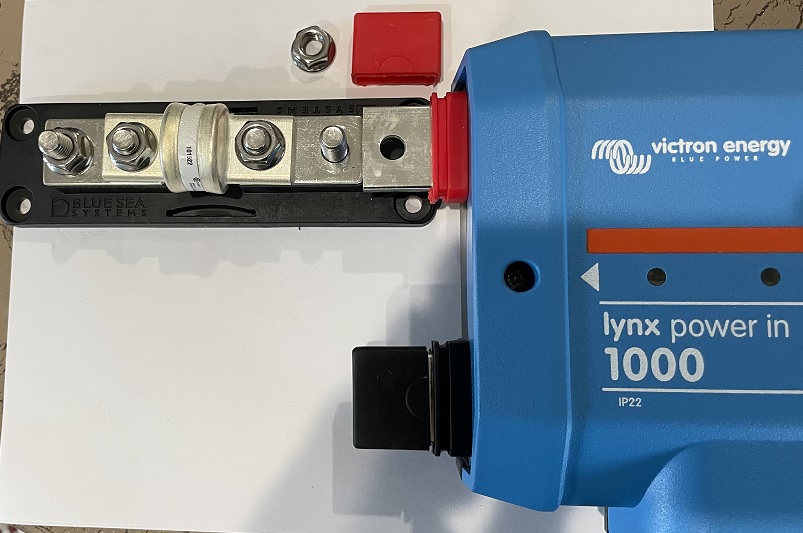
The PowerIn external terminal hole is 8mm, the Class T fuse is 3/8″ stud. Yup, won’t work. I drilled out the external terminal with a 3/8″ drill bit.

Once I had it drilled out, it fit nice and snug.

Added the Class T fuse holder plastic protective cover and all was good. The cover protects any accidental contact with the terminals. Yes, I used a Bluesea Class T fuse…you can’t get much better quality than Blesea.
On the distribution side of things it can used a bit differently –
I have two charge controllers and two inverters that need hooked into the system.
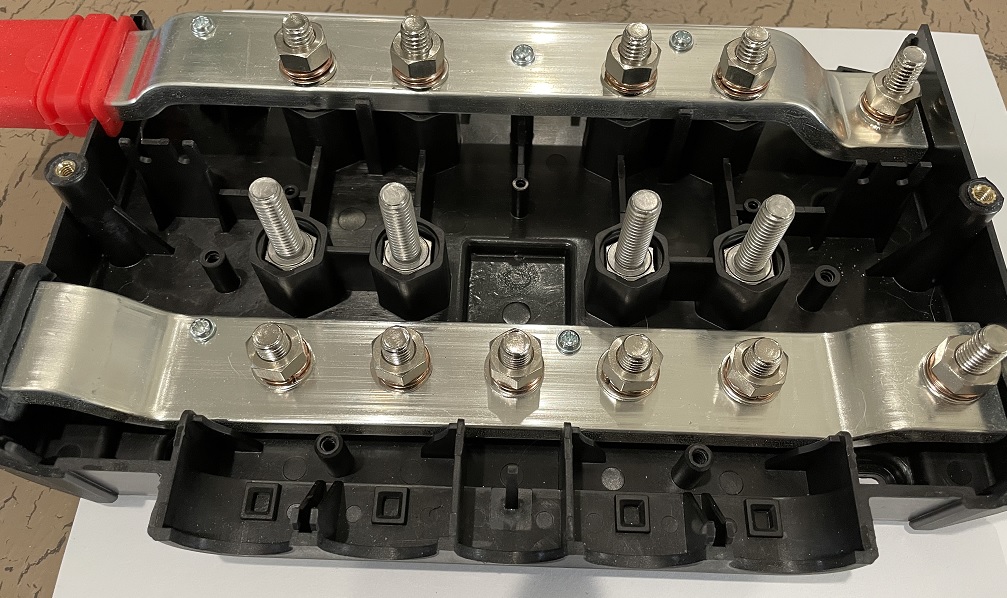
 I could have used a Lynx Distributor, but it costs $66 more and I didn’t need the monitoring capability, nor the pretty lights on the cover. But, I did need fusing capability. So here is a great “hack” for you…you can turn a PowerIn into a budget (a.k.a. “poor man’s”) Lynx Distributor with 4 simple additions…nuts, washers, and bolts. Here is how you do it…
PowerIn Hack –
First thing, buy:
- Four (4) M8 x 25mm Hex Head Screw Bolt, Fully Threaded, Stainless Steel 18-8, Plain Finish
- Eight (8) M8 Hex Nut M8-1.25, 65mm Height, 304 18-8 Stainless Steel
- Twelve (12) 316 Stainless Steel Flat Washer, Plain Finish, Meets DIN 125, M8 Hole Size, 8.4mm ID, 16mm OD, 1.6mm Nominal Thickness
- Four (4) M8 Copper Split Lock Sealing Ring Spring Washer Fastener
Important note: Use stainless steel and copper only as mentioned. Do not use any regular steel, etc.
Next…
 Then place the four M8 bolts in slots as pictured…
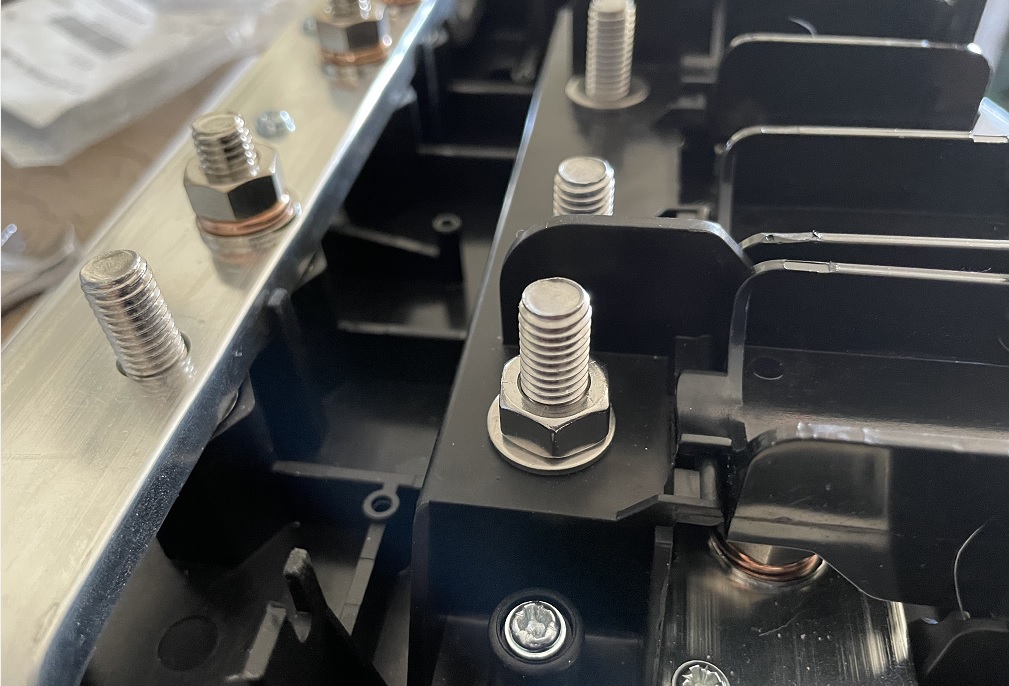
 Then place a stainless steel washer on each bolt as pictured…(the washers reinforce the bottom part of the plastic to prevent damage to the plastic when you reinstall it).
 Next you will replace the plastic cover and insert/tighten the 4 retaining screws that you previously removed.
Then add another stainless steel washer and stainless steel nut as pictured…(the washers again strengthen the plastic from damage, the nut raises the working surface to a level point for the fuse).

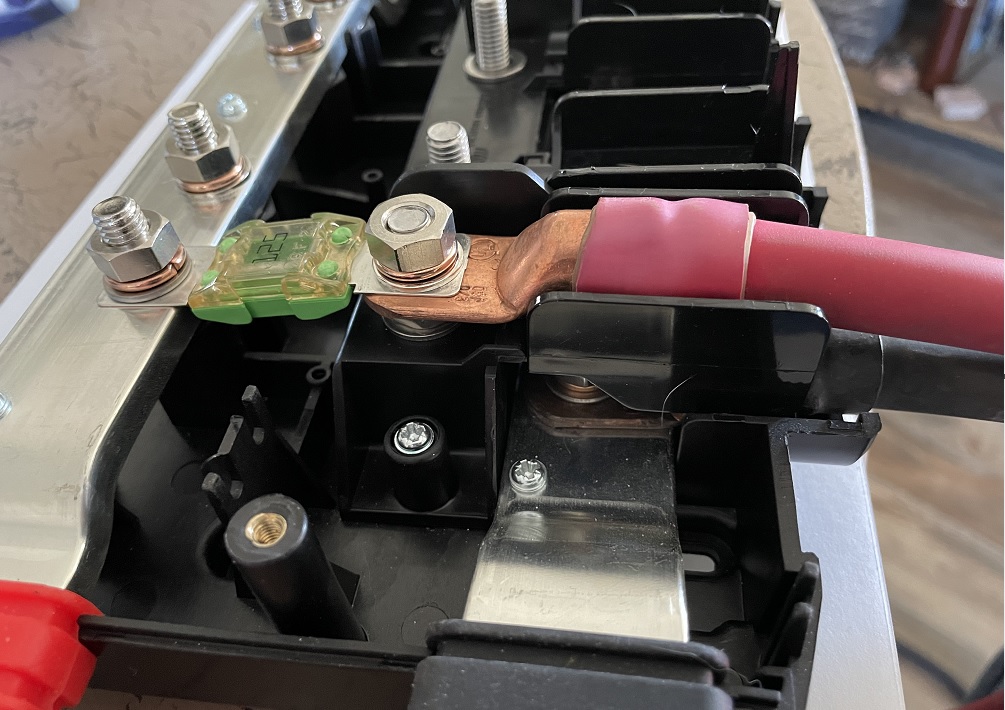
 Then you can add your lugs and fuses…

PowerIn with hack completed, fuse installed and both positive and negative wires installed.
Important Note: There are other websites who do kinda the same hack…but they mostly get it wrong. They do not add the nut on top of the washer that sits on top of the plastic piece and before the fuse & lugs. Not putting that nut on creates a very disjointed angle for the fuse that could damage the internal fuse connections.
So there you have it…a Lynx PowerIn has many uses including that of a stripped down, economical Lynx Distributor.
 Let me know if you have any questions!
Related Articles –
Send me your thoughts, ideas, comments, questions, and concerns…


 2009 - 2023 Copyright © AHTrimble.com ~ All rights reserved
No reproduction or other use of this content
without expressed written permission from AHTrimble.com
See Content Use Policy for more information.

I love this website
LikeLiked by 2 people
Thank you very much, I sure appreciate that…I really do!
And I love folks who come to the site and find value here.
AH
LikeLike
Okay
LikeLiked by 1 person
Pingback: Victron Energy Lynx Distribution System – Lynx PowerIn Part #1 | A.H. Trimble - Emergency preparedness information for disasters and grid-down