Lessons Learned – Garden 2023

  1. Soil is Everything!

I put together some nice raised bed planter boxes…good call on my part. But, what really made the difference was the super high quality soil I made up for those boxes. Plenty of compost, mostly compost actually. And mostly organic fertilizer to help amend the soil even more.

  1. Gotta go Vertical

When you limit yourself on space, as I did with the raised bed planter boxes, you still gotta have space for those plants. I learned that next year I will trellis cucumbers, pole green beans, snap/snow peas, and maybe my small sweet watermelons.

Added benefit…I can grow less sun tolerant veggies under the trellis framework. I will be using the 16’ cattle panels for the trellis work.

And I am going to try tomatoes on cattle panels as well. The tomato cages don’t work for me. I tired wood frames and string this year…fail! So I will try the cattle panel method next year and see how that goes.

  1. Quality not Quantity

I did plenty of planting this year…wanted to see what and how plants would grow with the new system. Yeah…planted too much for sure. Next year I am adopting the “square foot” system and going for just what we eat on a daily basis.

Yup…that means one, ONE, a single zucchini plant!!!

  1. Squash can take over Everything!

So my wife loves squash…butternut, straight neck, etc. So I made sure I planted plenty of it…WRONG! That stuff took off and I can’t the pick-up truck now. On a sad note it took out some of my new raspberry bushes…just choked em out.

Next year the squash gets planted on the outside of two sides of the garden and it will be ‘trained’ to go for the outside chain link fence for some vertical space.

  1. Water Timers

I put it a pretty decent drip and soaker irrigation system. Had to run the soakers during the daylight hours to keep up with the plants and evaporation. This coming year I will have about twice the raised bed boxes and the watering will need to be rotated to ensure the right amount of water getting tot he plants. Timers will be a must to ensure that everything is getting watered regardless of my attention or not.\

I am also planning on ‘grouping’ my boxes so that plants that needed similar watering can be grouped together on the same timer.

  1. Fence

I mentioned in a previous year’s article that one of my dogs thinks organic fertilizer pellets are nothing more than appetizers. So I put up a flimsy wire fence to keep her out of the garden area. Oooooopppppppsssssss…she is smarter than me…she learned she can just push her nose into it and it separates. She then has access to all of the little nuggets goodies she thinks I left just for her to gobble up.

  1. Ground cover between boxes.

I guess I should call this something more appropriate…”Weed/Grass Control”.

You can guess by the title that I will be putting down landscape cloth between the boxes to suppress all of the weeds and grass that invariably will do as well, or better, than the plants in the planters. Downside…I could’ve sold it for hay.


Related Articles –


 2009 - 2023 Copyright © AHTrimble.com ~ All rights reserved
No reproduction or other use of this content 
without expressed written permission from AHTrimble.com
See Content Use Policy for more information.

Plan B, Plan C, and Strawberries…

So let’s do this in reverse order…strawberries first. But stick around for the Plan B & Plan C part…or jump directly to it.

You know there is always method to my madness 🙂

Strawberries –

Last spring (2022) I put in an amazing small strawberry patch, 8 plants total. Did a great job of prepping the containers, getting compost for a local source, and setting in the plants correctly with love and care. They all died.

Yup, the compost was too ‘hot’…meaning the compost hadn’t sat long enough and was extremely high in nitrogen. Yeah, the new plants ‘burned up’ and died…basically chemical burning from the nitrogen.

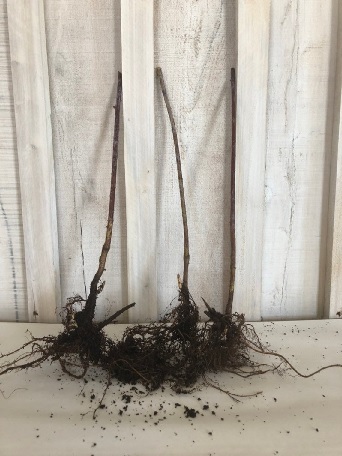
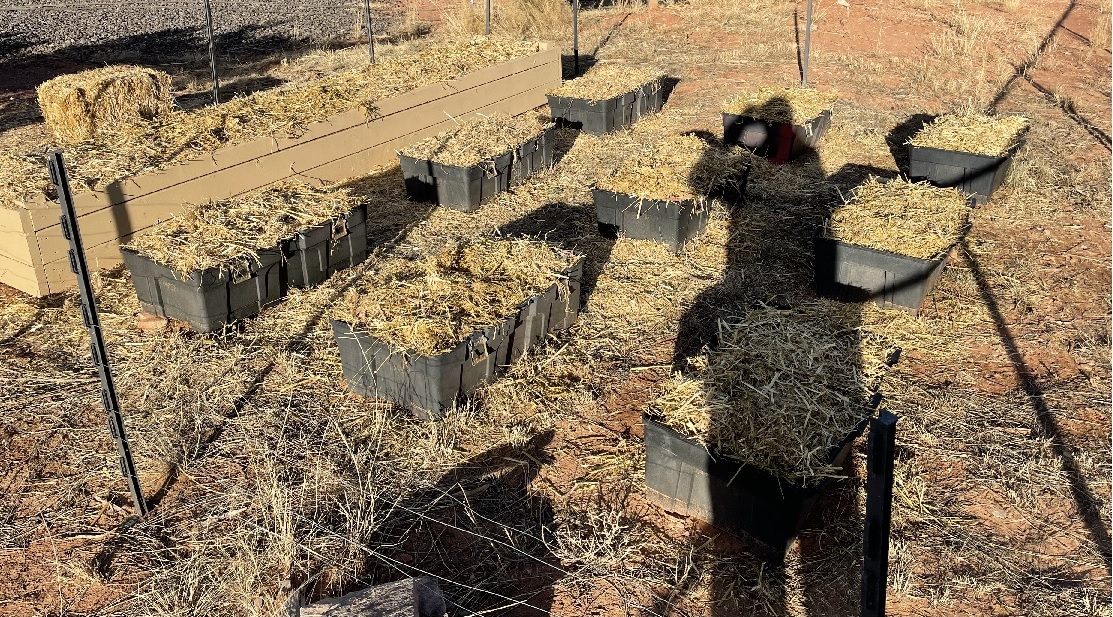
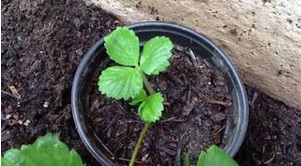
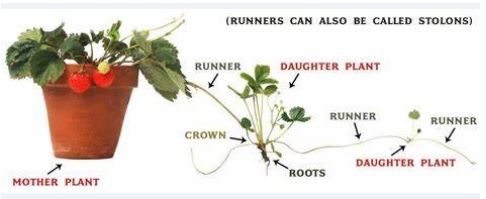
So for 2 weeks I flushed the boxes with lots of water and got the nitrogen out, planted 6 plants, and they flourished like crazy. I wasn’t looking for berry production, I just wanted to get strong healthy plants to produce lots of runners to create a large patch. And it worked well. I think the final count by the end of fall was 52 great looking plants ready to hibernate for the winter after I mulched them in.

Then spring hit and I was patient and didn’t ‘unmulch’ them too early which resulted in a great looking strawberry patch with 50+ plants ready to give us plenty of big, juicy, sweet berries. That amount of plants would produce about 25 – 40 pints of berries if all went well. ‘If’ being the operative word…and it didn’t.

I am switching my gardening style over to water-soluble fertilizers…mostly fish emulsion based, but others as well. So, early in the spring it was time to give my plants a good start with fertilizer to bring em up right…a nice dose of fertilizer. Each plants already had a nice bunch of berries started and it looked to be a bumper crop. And that was fine with me because I love strawberries!

I won’t go into all the details but it was a heavily weighted nitrogen fertilizer and I put too much mixture on each plant. Within 10 days all of the berries that had been on the plants were dead or completely gone. Well, with the exception of the 5 berries that I picked, each the size of a marble.

So what happened? Uh, strawberry plants don’t like a bunch of nitrogen…at all…especially in the spring with fruit on the plant. So I had to do some research on the best way to fertilize strawberry plants. Yeah, I know what you are thinking…you’re right.

Generally speaking, I will be using a 10-10-10 water-soluble fertilizer…and apply it after the plants have produced its fruit but well before fall sets it, probably about late August. This will give me strong healthy plants, plenty of runners if I need them, and the plants will be ready for the next year. If the plant flowering looks too thin and spotty I will add bonemeal as needed to the soil and water it in generously.

But what does that have to do with Plans B & C?????? Ahhhhhh yes. Remember I was expecting 25 – 40 pints of berries earlier this spring. Yeah, well, didn’t work out so well did it? But what does that actually mean?

25 – 40 pints of strawberries means 3000 – 4700 calories, 180 – 285 grams of dietary fiber, and most importantly…5300 – 8400mg of vitamin C. OK, the absolute heaven of eating them as well…meaning to help stave off food fatigue. So how would you replace that in a grid-down prepper scenario?

Plan B & C, etc. –

Late last August we had a hail storm hit us…destroying our garden completely. And I just shared how I screwed up the strawberry patch this year. Fortunately for us we are not in a grid-down prepper situation or in dire need to eat from our garden last year, or depend on our strawberries this year. But what if it had been different…and we were dependent on both?

My point, we would have been fine. We have sufficient and appropriate food storage to handle a worst case scenario. We would not have starved and we have enough supplies to replant a garden.

So it looks something like this:

  • Plan A – Buy our food at the store just like normal.
  • Plan B – Supplement store-bought food with garden produce.
  • Plan C (hard times) – Plant larger garden and reduce store-bought food. Barter food with neighbors as needed and appropriate.
  • Plan D (hard times, limited store available food) – Plant much larger garden, supplement with food storage, utilize green house for additional food production. Barter food with neighbors as needed and appropriate.
  • Plan E (very hard times, no store available food) – Plant seriously larger garden, supplement with food storage, utilize second green house for additional food production. Barter food with neighbors as needed and appropriate.

Will my plans work? I have no idea with complete certainty. I do know that without a plan I will fail. But my plans do give me a framework to build on. Starting with Plan B I have to acquire gardening skills and supplies. With Plan C I have to have considerably more garden supplies plus multiple years worth of seed bank. Plans D & E require that I have either built, or have the supplies to build, two greenhouses. That gives me a clear path on what to buy, when, and either store the supplies or produce with them.

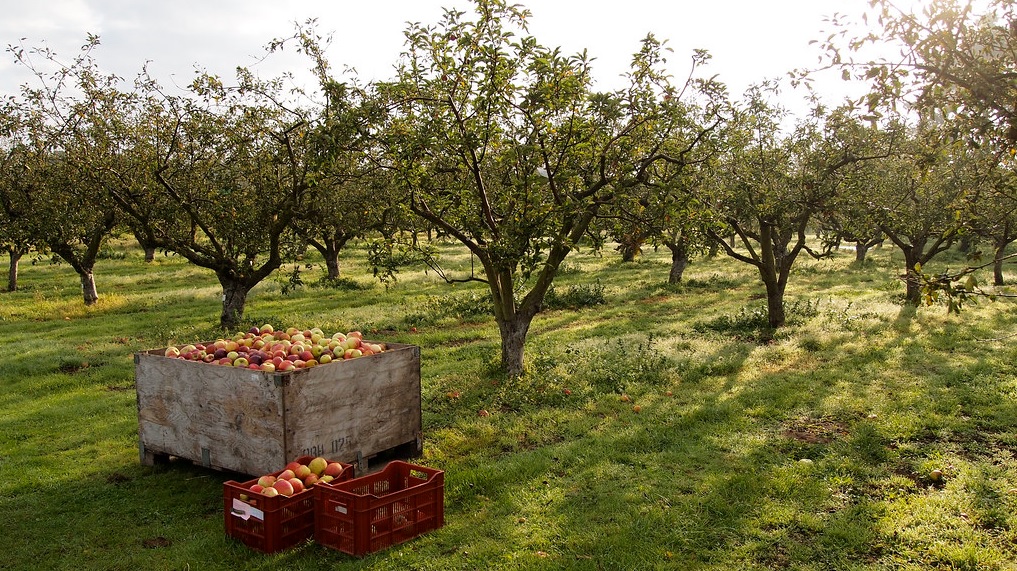
Something to think about…for a family of four, to have a large enough garden to feed yourselves you are realistically looking at about 2 acres of well planned, good quality land. Put in your head about 1-1/2 football fields of garden. Yup, that is about what you are looking at on average. Yes, you can go vertical, do ‘square foot gardens’, greenhouse gardening, etc.

My point is this…have you done enough planning to put in over a football field of garden? If not, how long will your food storage last your family? And no, I didn’t ask if you had already put in a huge garden, I asked if you’ve done enough planning to do so.

When it comes to long-term food storage the general rule of thumb is one case (6 cans) of #10 cans of food is enough food for one person for one month. How many cases of food do you have? A family of four would need 48 cases of #10 cans of food stored…properly stored. How many cases of food do you have? Are they all stored in one place such as your house? What happens if your house is flooded, burns down, or is vandalized?

Plan B & C: Generally Speaking –

prepper ics planing section long-term and special projects planning branch responsibilitiesThe point to this article is get you thinking about back-up plans. And back-ups to your back-ups…with every aspect of prepping.

Consider self-defense tools (i.e. guns & Ammo). First, do you have some? Second, are they all stored in the same place? What is your plan if your guns are confiscated or stolen? What happens if they have a part that breaks?

Is all your ammo in one place? What if it is destroyed, stolen, or confiscated? Can you reload your spent brass?

What I am asking you to do is simple…review your plans. What is your Plan A? Do you have a Plan B…if so, what is it? Do you have a Plan C…if so, what is it? Does you family know what your plans are and how to execute them?Basic emergency preparedness for emergencies, disasters and grid-down. Plan Planning

And this review process applies to ALL aspects of prepping!

If you need a guide to help you through this review the 7 Common Risks & Threats to help get you organized in this effort. Another helpful guide would be to review the ‘layering’ aspect of prepping in regards to the 7 Common Risks & Threats – Layering.

Summary –

In April of this year I wrote that I believe that it all falls apart by the end of 2024…ALL of it! < click here to read the article > No, that is not a 100% certain revelatory fact. It is what I see coming based on the cumulative of current events as of April 2023…and as of today as well.

I am thinking it would be a pretty good idea with you and I were ready for that ‘fall’ of America. That way we can protect our families and communities/congregations as best we can. And it could be very, very ugly in this country by then. Then again, it might be all roses and butterflies with pink unicorns for all. But at least you would be ready if it is not that fantasy land and no one gets a unicorn.

Do you have to be perfect in your planning and prepping? That goal is impossible, let alone remotely realistic. But you can do your best and together we can do this!

PLan for bugging out and bugging in. failure to plan will bring failure and that means death or injury to you and your family.


Related Articles –


 2009 - 2022 Copyright © AHTrimble.com ~ All rights reserved
No reproduction or other use of this content 
without expressed written permission from AHTrimble.com
See Content Use Policy for more information.

Time to be thinking spring…garden, orchard, & berry patch!

Yup, yesterday morning got me thinking about spring…garden, orchard, berry patch…YEA!

I’ve been putting it off because of weather, mud mostly, but yesterday was one of my most favorite times of spring (ok, late winter)…pruning my fruit trees.

I spent a couple of hours hacking away at my apple, peach, cherry trees like a man in love. Okay, that sounds a bit oxymoronish I know. But I am pretty harsh when it comes to pruning. Now remember, several of my trees are only coming into their third year, the other 4 are only starting their 2nd year. The single most important goal for new trees…setting really, really good root system. The #2 goal is as strong a trunk as you can get.

#3 is great shape…meaning strong branches, well-formed and correctly placed. To get the branches and shape right…I am pretty brutal when it comes to pruning…at least when the trees are young. I think the main idea…keep the center of the tree as open as possible to allow plenty of light in to ripen the fruit. And of course you want to ensure strong branches to begin with…and that means directing as much of the tree’s energy to producing those strong branches.

So the late winter, dormant, pruning is done. Now, I have to find the right location and dig 4 more large holes (3’x’3) for the 4 dormant apple trees my neighbor gave be last year. They have been sitting in a planter pot just waiting for me to not be lazy and get them in the ground. Maybe Saturday…we’ll see.

But the most fun yesterday…planting 30 dormant raspberry bare-root starts. One of my buddies, and a good neighbor, has a huge raspberry and blackberry patch. He offered some of his canes that had grown outside of his patch…duh, of course I took him up on the offer. We dug up 30 really good looking canes, some of which already had the new starts hiding in the ground several inches below the surface.

He also turned me on to a new product called Agri-Gel. It’s a formulation that absorbs and holds water to roots. The swollen crystals adhere to plant roots, reducing transplant shock. Safe, nontoxic, easy to use. Useful for garden seedlings as well as woody plants. Highly recommended for brambles and conifers. Let’s see if I can tell a difference.

I already had my holes dug, had filled them several times with water to get the surrounding area saturated with water. Remember, I live in a dry part of the country, starting out with moist soil is a must. I didn’t use the native sandy soil. I did a mix of my local compost plus Grow King composted steer manure. No added fertilizer at all in the hole to start out. Brambles should not be planted with fertilizer, wait till they are well established before fertilizing.

I saturated the holes really well with water after planting. I will do a light & loose layer of weed-free straw as a mulch today. I will also cut back the canes to 6” – 12” above the surface. Remember, it is not the old canes that will produce the fruit…it will be the new shoots that come up that will produce the fruit.

I checked on my strawberry patch when I was done. Some of the protective winter straw mulch has gotten a little thin but is still protecting my plants. I am not quite ready to uncover them yet, some cold weather still ahead. But they are close, within a month I am pretty sure. I will look for the new growth on the plants, then they get uncovered…should the weather look promising.

I am behind the curve on building my new above ground containers for the garden this year. I am just running out of time each week. I have already scrapped the cattle panel green house due to lack of time. But, I won’t ignore the planting boxes…and you know why…we must grow food this year!

So how are your garden, orchard, and patch projects coming along?


 2009 - 2023 Copyright © AHTrimble.com ~ All rights reserved
No reproduction or other use of this content 
without expressed written permission from AHTrimble.com
See Content Use Policy for more information.

Garden: Winterized Strawberries

My strawberry venture has been an interesting one this year to be sure. First, I started out and killed the initial 8 strawberry plants…$32 down the drain! But I learned not to trust others when it came to my food. Or rather, I learned to trust my own judgement and to do things right no matter what. In case you don’t remember…the compost I used initially was still really chemically hot with nitrogen. It burned the roots of all my new plants.

After having watered the boxes several times a day for multiple days I bought 6 new plants and went at it again. Success!!

Then expanded the patch with “daughter” plants and more boxes, then expanded it again with the mega box. But finally, it was time to put the plants to bed for the winter. I do this to prevent damage to the plants themselves during the cold and freezing months of winter. Fortunately we don’t have severe winter weather here so I can let the plants go till late November and still get growth out of them.

Granted, this is the first year doing so here on the glamstead so we will have to wait till spring to see how it worked out. But, it should work out fine since I did my research for this particular area…including speaking with experienced gardeners. And if you want to ensure success for your patch in your area…check with the locals as well…you will be very glad you did.

First thing I do is clear out any dry, brown, or diseased looking leaves and stems. I smooth out the mulch and then water the plants/boxes thoroughly.

Next comes at least 3″ of straw on and around the plants.

And yet another reason to not fill the box up to the top with dirt…leave room for things like mulch and winter straw. Now, nothing left to do till spring 🙂

Oh, final tally on the patch…6 plants have turned into 42 plants. The mega box has plenty of room to expand the existing 12 plants with 12 more “daughter” plants at the end of next growing season. Giving me a total of 54 plants from 6 starter plants. Not bad math if you ask me.

Yup, I will keep you posted on how things go in the spring.

And yes, I will still be doing more gardening work during the winter. I am getting ready to plant 15 raspberry plants/canes in January. A neighbor/friend of ours offered for us to dig up some of his seasonal runners. Sweet! I will post and article on that “bare root” planting project as well.

And yes, you should be thinking about raspberry and blackberry planting for this winter as well. I am telling you flat out…get your food production capability to a point where it will at least be a reasonable supplement to your family’s overall food consumption. You will be healthier, you will save money, and you will be preparing your skill-set for when you might well need gardening to keep your families bellies full and alive.

And along with way…you will feel a true sense of peace and calm that comes with tending a garden and watching yourself take part in life…real life.


Related Articles –


 2009 - 2022 Copyright © AHTrimble.com ~ All rights reserved
No reproduction or other use of this content 
without expressed written permission from AHTrimble.com
See Content Use Policy for more information.

Garden: Orchard Fall Maintenance

January 2021 I started our fruit orchard…with 3 trees. So no, the picture to the left is not our orchard, just a nice picture to make you feel good and impress you.

We started our orchard with 2 apple trees and 1 peach tree. In January 2022 we added 2 sweet cherry trees and 2 more peach trees. One of the peach trees didn’t make it.

All of the above were bare root stock and this was my first real attempt at planting bare root stock and it went well. I should share that experience with ya’ll in another article. In March my neighbor was planting a large orchard…122 trees in all. I helped him and when all was done he was out of space and had 4 apple trees left over; 1 in it’s own planter/container, another planter/container had 3 apple trees in it. All trees were a little on the puny side. He gave them to me for helping. Nice! And unexpected…a blessing.

I transplanted the single tree shortly after I got home and it is doing really well. The container/planter with the 3 trees I kept in the pot. They weren’t dormant and I knew that I would probably kill all 3 if I tried to untangle their roots and plant them. So, I kept them on the east deck and took really good care of them. They are all doing well and I will transplant them once they go dormant this winter…after I untangle their roots.

My maintenance system/process is fairly simple and based on the growing conditions here at our place. I will write more about planting them, but for now I will speak to my “maintenance” process. After the windy season, usually mid to end of June, and again in the fall after the weather turns cold but well before they lose their leaves, I perform the routine. And, I only plan on doing so for the first 2 – 3 years the trees are in the ground. After that, the tree will only be tended/maintained as needed.

This is my second article using this new article system with LibreOffice suite…basically from my Impress presentation (PowerPoint equivalent) program into pictures for posting. Then adding a link at the bottom if anyone would like to download the basics in PDF format. So here you go…

< click here to download the PDF file >


Related Articles –


 2009 - 2022 Copyright © AHTrimble.com ~ All rights reserved
No reproduction or other use of this content 
without expressed written permission from AHTrimble.com
See Content Use Policy for more information.

GARDEN: Strawberry Patch 2022 Fall Update

OK, this is a new kind of post for me. Yes, it is about our strawberry patch, that stays the same. What is different is how I produce it.

Recently, about 2 weeks ago, I upgraded from our old laptop computer to a new unit. Our old one was running system software and programs from 16 years ago. Yeah, ancient stone tablets…I know. The main problem was the old laptop keep heating up and shutting down…losing work in the process. We didn’t have a lot of choice, had to upgrade.

Along with the computer upgrade I wanted to get away from Microsoft products…that meant leaving Microsoft Office…Yea! After a whole lot of research I decided on LibreOffice suite. It basically looks and acts just as Microsoft Office…but it is free! I have been using it for two weeks, and there is a small learning curve, but it is working out great.

So, I am using LibreOffice Impress (Microsoft Powerpoint) to take photos, adding narratives, and then producing JPEG pictures for the actual post. Then I take the Impress presentation and create a PDF file to attach to the post so folks can download it should they desire to do so.


So now on with the strawberry info…

I have been working on our strawberry patch all summer. My goals were to: 1) establish the original 6 plants in the most healthy state as possible, 2) increase the size of the patch for next year. Goal #1…done! The original 6 plants are in fantastic shape and produced a ton of runners. From those runners I was able to start a whole bunch of “daughter” plants.

So the first round of transplanting yielded 15 plants that I put into 5 more containers. That project can be looked at in a previous post < click here >. Once I got those plants transplanted I was able to start 10 more “daughter” plants. That was successful…and I mean it went really well and the new plants looked great! But I was out of containers and I wanted to test my new raised bed concept.

Next year we are going with raised bed gardening. We tried “post hole” and it just didn’t work out. We ruled out conventional gardening due to the soil and HUGE amount of amending we would have to do…simply wouldn’t make sense from a work or cost perspective.  So we wanted to try container and raised bed styles. This past summer we tried container gardening and it went well. But, I could tell it wouldn’t be practical for any kind of large gardening…meaning, we simply couldn’t grow enough food in containers. But, it would work for something like strawberries. The last of the strawberry patch plants gave us the opportunity to test our raised bed plans.

The last of the plants would go in a 2′ (wide) x 12′ (long) x 14″ (height) that I would build myself. I didn’t want the planters to be complicated, expensive, or difficult to build. So I went with four 2″ x 6″ x 12′ along with some scrap 4″ x 4″ that I had laying around. Yeah, I don’t throw out any lumber anymore…its worth way too much money and comes in useful down the road. I went with a 14″ tall bed, 10″ – 11″ will be soil, then a little bit of wood chips on top, and enough space to allow the water to not flow off and cause erosion problems. I only needed the stacked 2×6’s for a total of 11″ height since strawberry roots only go about 6″ – 9″ deep.

I decided on 2 stacked 2″x6″ boards because they were about 2/3rds the price of a single 2″x12″ board.

FYI…”experts” have opinions on the ideal soil depth in raised beds ranging from 8″ – 11″. Problem is there is no one ideal depth for soil. The depth of the soil is strictly dependent on the plant type…and it varies quite a bit…6″ – 18″ more or less. Here is a chart to give you an general idea…

And even with the chart you can make adjustments…such as with tomatoes. You can actually plant tomatoes horizontally. Since water uptake is the main need for tomatoes they don’t generally care about how the roots are arranged, just the fact that they can get enough water into the plant.

So here are the specifics of the project. You can click each picture/graphic to enlarge it. At the end of the article you can click the link to download PDF file.

Page 1 –

Page 2 –

Page 3 –

Page 4 –

Page 5 –

Page 6 –

< click here to download the PDF file >


Related Articles –


 2009 - 2022 Copyright © AHTrimble.com ~ All rights reserved
No reproduction or other use of this content 
without expressed written permission from AHTrimble.com
See Content Use Policy for more information.

TIP: Canning Jar Lids – BUY ‘em!!

Think about it for just a minute…if you want to eat one jar of food per day and you want to have a year’s supply of food, that means you need 30 dozen canning jars. And that my friend means you need to have 30 dozen canning jar lids…and that is just for one year’s worth of food. That’s a lot of lids.

Now, another thought…what happens to all of those canning jars that other folks have right now, filled with food, and stocked on their shelves, after they empty them and eaten the contents? Meaning, next year when they go to can their garden goodies and they have no lids? Or, about the 2nd year of an extended “grid-down” event and they have no more lids?

My point…buy lots of canning jar lids! Look, if you have the lids then you can use your jars. No lids means no usable jars for canning.

I started the habit that each time I go in Walmart to shop, regardless of the item(s), I always buy a box of canning jar lids (12). Most of the time it is regular mouth, sometimes large mouth. Occasionally I will buy the box that contains 12 lids and 12 rings. The rings I have might go bad via rust, etc. But, I think to myself…if things are bad, a person has jars without lids or rings…then I might get a pretty good trade out of it and end up with a bunch more jars. Or conversely, they have an item or skill that you need…trade your rings and/or lids for what you need.

If you have plenty of cash laying around and you want to invest in a durable, practical item then lids and/or rings are a pretty good option if you ask me. I would only buy Ball or Kerr lids and/or rings if realistic. But, I also don’t have a problem with Golden Harvest. Yes, you can buy lids online at places like Amazon. I have heard and read that most of the Ball or Kerr lids purchased on Amazon are actually counterfeit.

Just a thought…When it works out budget-wise (meaning occasionally), I also buy a case (12pk) of canning jars at Walmart when I am there. I may not need the jars right then, but I will need them eventually. Yup, I will either use them to can next year’s garden produce…or, I will use them for barter when the time is right. Either way, I am putting up a valuable commodity to be used later. So far, since May, I’ve bought an extra 10 cases of canning jars…without any noticeable financial pain. Look at it as a “precious metal” without any metal involved. And maybe, just maybe, in the future they will be more precious than precious metals.


Related Articles –


 2009 - 2022 Copyright © AHTrimble.com ~ All rights reserved
No reproduction or other use of this content 
without expressed written permission from AHTrimble.com
See Content Use Policy for more information.

TIP: Canning Jar Lid Size

This is going to be a very subjective, possibly controversial, topic. Why? Personal preference for many folks.

If you are into canning you know there are two basic size of canning jar types. No, not pints and quarts…there are a lot more sizes than that. I am talking about the size of the “mouth” of the jar…regular mouth and wide-mouth. Simply put…the wide-mouth is slightly large in diameter than the regular mouth. No, I am not going to give exact measurements…no need to, that is not my point for this post.

So what is the point? Money.

A 12pack of regular mouth lids are $2.97 at Walmart, 12pack of wide-mouth lids are $3.90. Yup, that is 8cents a lid more for wide-mouth vs regular mouth. Big difference?

Let’s go with eating a jar of food per day from your pantry, that’s 30 dozen jars per year, 360 jars. That’s almost a $30 difference in cost…meaning you can buy 10packs of regular mouth lids with that savings. Now, think about having 3 years supply of lids on hand, giving you enough time to wait out an extended supply chain problem…or a grid-down issue. Saving that $30 for each year of lids you buy gives you a four year supply of lids vs 3years supply!!

Yes, I know…there are lots of folks out there that prefer the wide-mouth jars for ease of use, I get it, I really do. And there are folks out there where $30 isn’t a big deal…I get that too. But I am talking about folks who think $30 is a big deal…or $90 is a big savings (if you are talking a 3-year supply).

And just a reminder…don’t forget to have some extra rings laying around as well.


 2009 - 2022 Copyright © AHTrimble.com ~ All rights reserved
No reproduction or other use of this content 
without expressed written permission from AHTrimble.com
See Content Use Policy for more information.

GARDEN: Our Strawberry Patch – Fall

In addition to Pepsi I am a addicted to strawberries…yup, I love em! You will always find an open can of freeze dried strawberries in the cabinet for use on my Special K. This past spring I did a strawberry planting in containers.  I was going to write an article about the experience but simply kept putting it off. Now, months later, I am once again out in the patch working on my strawberries. And I definitely wanted to write about yesterday’s experience. But, to understand yesterday, you gotta understand last spring.

However, I can’t find a single picture of my spring strawberry planting at this time. So on with the work I did yesterday…

I ended up with two containers of strawberry plants, 4 plants in one, 2 in the other. Here is a picture of the container with 4 plants…

Note: When I planted the original strawberry plants in the spring I made sure to not let the plants bear fruit. I pinched off blossoms as soon as I saw them, I wanted strong roots, healthy plants, and lots of runners…not fruit. However, 3 berries did ripen and they were delicious. My goal was not to eat fresh strawberries the first year…I wanted to seriously increase the size of the patch. And that would give me WAY more berries to eat next year, and the year after, and the year after…

Last month I had taken 10 of the small plant containers that I had used this spring for new garden vegetables purchased at Lowes. I had filled them with potting soil and stubbed strawberry plant runners (daughter plant) into them to root them. Nine were successful in rooting, one just didn’t cooperate. And there were several that had rooted themselves on their own that I would transfer those as well.

I had more containers now that the garden had basically died out, mostly from a lot of damage from the hail storm we experienced. So I moved those containers over to the patch, freshened the soil in them, repaired two cracks, and got to work.

For the nine that had rooted I simply planted them as I would new plants purchased from the store. I planted them at the correct depth, then pressed the soil around them to form a slight indented ring around each plant. I then placed about a tablespoon of an organic fertilizer around each plant, pressed it into the soil, and watered it in really well.

In our area we have to water regularly and the water will evaporate fairly quickly due to low RHs and wind/breeze. To help prevent rapid drying of the soil I placed about 3/4” layer of GrowKing steer manure compost over the entire surface of the container. Then about a 1” layer of wood chips on top of that. This allows for plenty of air movement and for water to seep into the soil but slows down evaporation.

As you noticed I only put 3 plants in each box vs the 4 I did this spring. I wanted them to have a little more room to grow and expand. Yeah, MORE berries 🙂

When all was said and down I ended up with 15 new plants in the larger containers. In addition I have another 15 small containers set-up to root additional runners. Hopefully when it is all complete in a couple of weeks I will have 36 strawberry plants from the original 6. And that my friend means lots and lots of berries next year!

My neighbor came over in the middle of me working and started asking questions. One in particular I thought would be appropriate to share here. “Which runners do I decide to use?” Well, first off I only use runners that are strong and healthy looking, not puny or dry looking or skinny runners. Then I only use the bud closest to the main plant. I cut off the runner past the bud I am using, I don’t cut the runner off from the plant. The bud has to get its nutrients from the mother plant until it has established its own roots. When I stick the runner bud into the small container in which it will root, I make sure it is well into the container, and then I back-fill it with the GrowKing compost. 

To know when the bud has sufficiently rooted I gently tug on the bud plant, if there is resistance then I know the roots have sufficiently grown to where they can be transferred into the permanent container. If there isn’t resistance and the bud still looks healthy I simply add a little more GrowKing, water, and put it back to try and root again.

Next year I will take one of the permanent boxes from this past season and allow them to produce runners vs fruit so I can replace damaged plants and expand the patch some more. IMHO…you can never have too many strawberries!

I gotta ask…what are you doing to feed your family next year? Any garden plans? Any fruit trees? Any berry patches?

Garden: Let’s Talk a Minute…


 2009 - 2022 Copyright © AHTrimble.com ~ All rights reserved
No reproduction or other use of this content 
without expressed written permission from AHTrimble.com
See Content Use Policy for more information.

Garden: Hail and Starvation

About two weeks ago we had a really bad hail storm hit us. Two miles away…nothing. Here…really bad.

So to make it simple to understand…we lost our entire garden…everything! The hail was the size of marbles and came down with such a velocity that it punched holes in the leaves of plants such as our beans and cucumbers. It pulverized our squash and peppers. The newly germinated fall squash plants…beat into green mush. Only the strawberries survived intact…relatively little damage.

So what does that tell me…what is the Lesson Learned for this experience?

Had we been depending on our garden for all of our food…we would be starving now! Yes, starving…as in dying without anything to eat.

Yeah, that was pretty startling. Our philosophy has always been to have enough food storage on hand to get our garden up to speed to feed us. So maybe the first year the garden would still be too small and our experience too young for it to be a sole source of food…but it would supplement our food storage to a great degree. Then maybe by the second or third season we would be pretty much self-sustaining out of our garden. Oooooppppppssssss!

What if that third year was the next year that a devastating hail storm hit and wiped out the garden? What if that was the year that our food storage was down to a few #10 cans left on the self?

Not a pleasant thought!

So we are doing a couple of things:

  1. We are going to use a “sunshade” material that handled the hail without issue. It will be ready to deploy on the garden at the first indication of, or prediction of, hail.
  2. We are going to look at a rationing plan for our food storage to try and stretch it out as long as possible. The goal will be to cover more growing seasons.
  3. If/when the SHTF we will use more garden produce in our diet to increase the length of our food storage usage.
  4. We will add another heirloom seed bank to our preparedness.

Note: Hail did some damage to the fruit trees as well, it tore off leaves. If there had been fruit on the trees I am sure it would have destroyed most, if not all, of it. Fortunately the trees are fist or second year and no fruit was set and no major damage to the trees themselves.

Mother nature is a powerful force…you can’t stop it…but you can prepare for it.

 2009 - 2022 Copyright © AHTrimble.com ~ All rights reserved
No reproduction or other use of this content 
without expressed written permission from AHTrimble.com
See Content Use Policy for more information.