note: article first appeared in October 2015
In the first article of this series I explained how humans “see” things, talked about what stands out, and where humans naturally don’t look. I also went into a couple examples of “narrative” and how that factors into humans’ ability to spot other humans.
If you haven’t read that first article that was posted day before yesterday I would suggest that you do. It will make reading this article easier for you.
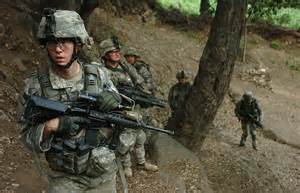
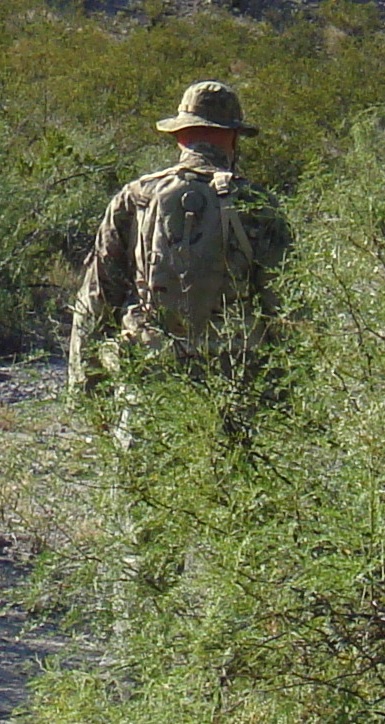
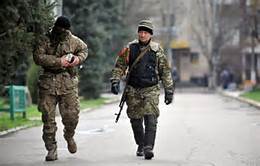
In the second article of this series I began to show how different camo clothing really make a man harder to see. No, not invisible or some movie set fantasy land stuff, but real-life staying alive stuff. I ended that article with a picture of the guy from the back. And I pointed out how even a plain strap could draw the eye in to “seeing” something outside of the “narrative.”
If you haven’t read that second article that appeared yesterday I would suggest that you do. It will make reading this article with the continuation of the adding different gear easier to understand.
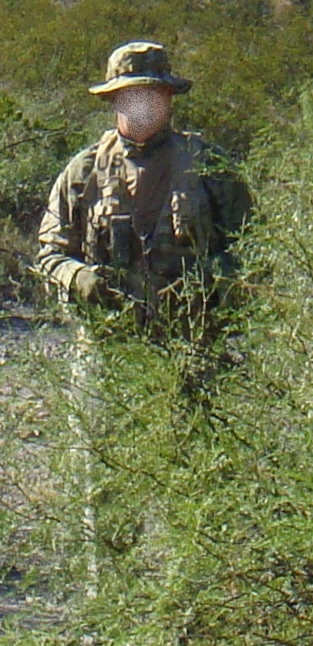
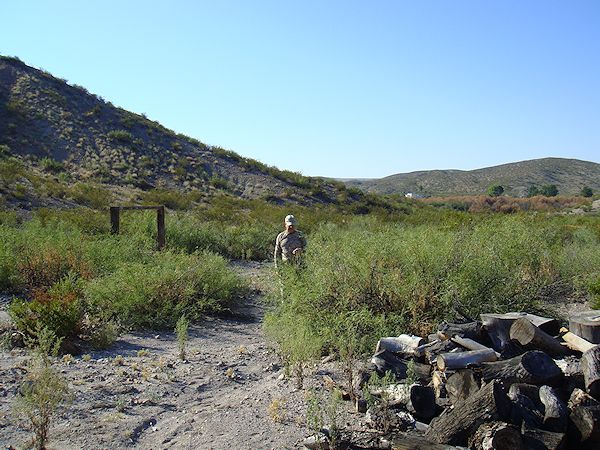
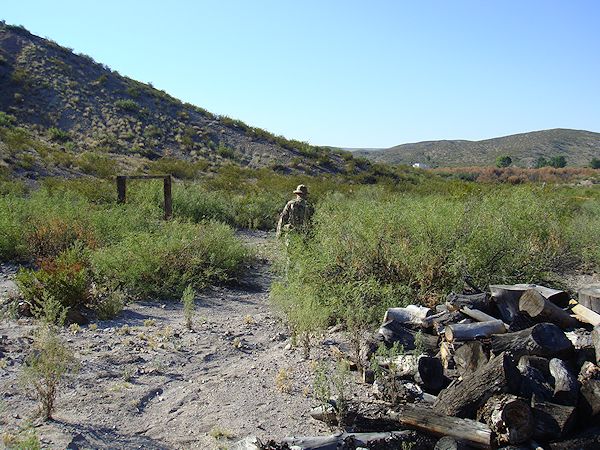
I am a big fan of the 5.11 Tactical Multicam TDU Rapid Assault Shirt. I will be doing a review on the shirt in the coming weeks so I won’t go into the details here. But I want to show the difference between that shirt and a regular BDU shirt.
Example #1 –
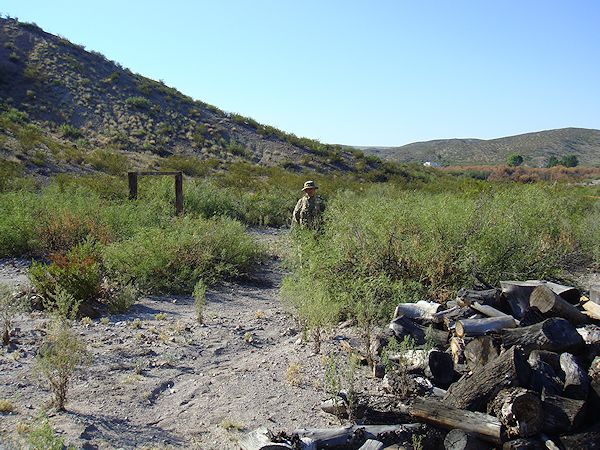
 Example #2 –
 Did you eye pick up on anything? Did your mind say something is different, more noticeable?
 The guy is wearing a 5.11 Tactical Multicam TDU Rapid Assault Shirt. The shirt has a material that helps the torso stay cooler. But there is no camo pattern in that part of the shirt, just a plain dark earth colored material. While it may make the person marginally easier to see, don’t worry about it. That area of the shirt is normally covered up with the tactical vest as seen in the picture below.
 In the next set of pictures there is another very subtle change that took place. Can you spot it? Don’t look too closely. Look away for a second and then look back and allow your eye to quickly assess what it is.
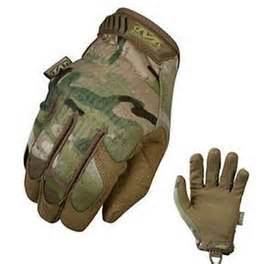
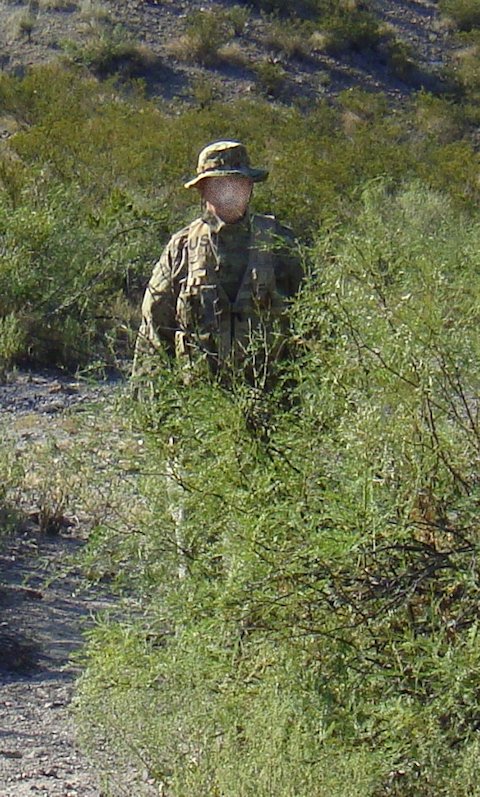
Did your eye pick up on anything? How about the man’s gloves? In the first picture (left) he is wearing black gloves with tan trim. In the second picture (right) he is wearing the same brand of gloves but in a multicam pattern. Every little bit helps.
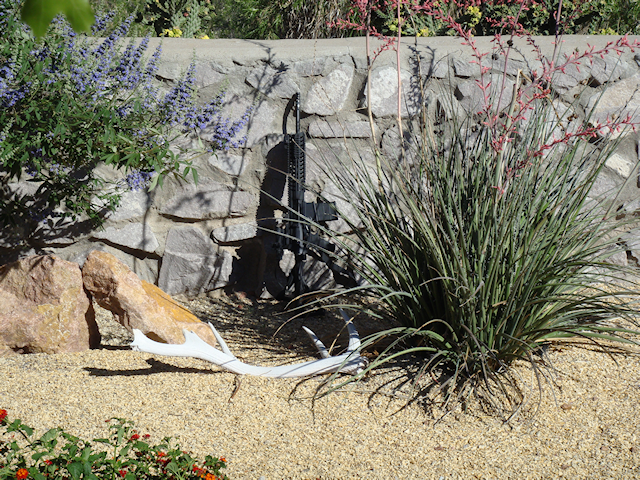
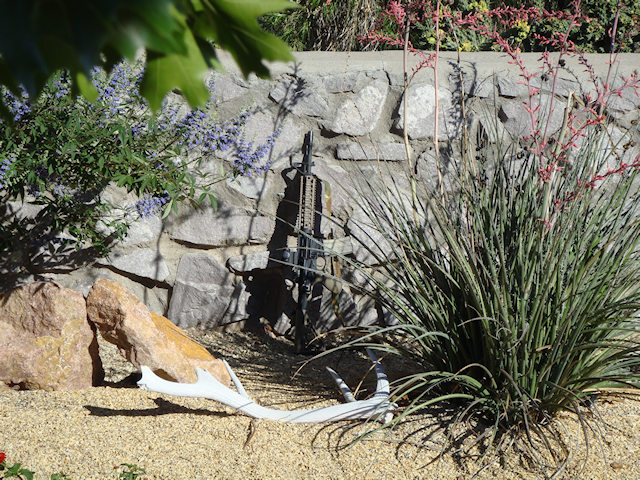
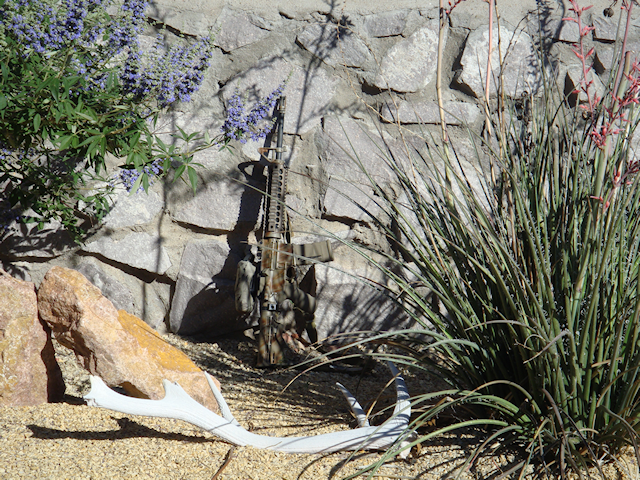
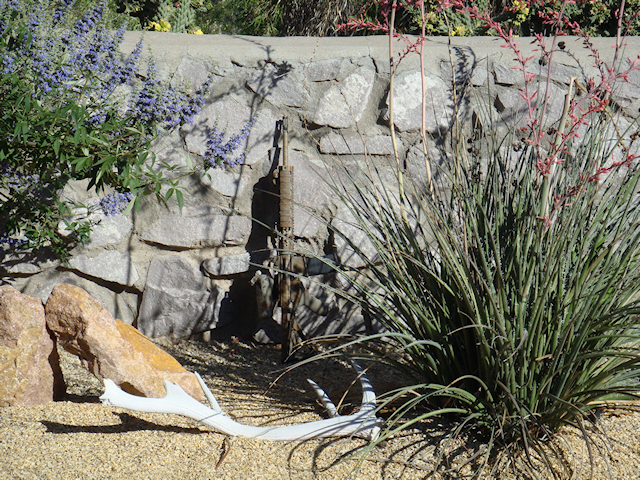
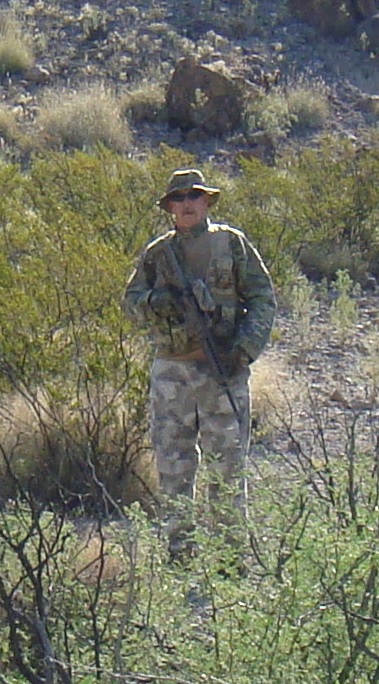
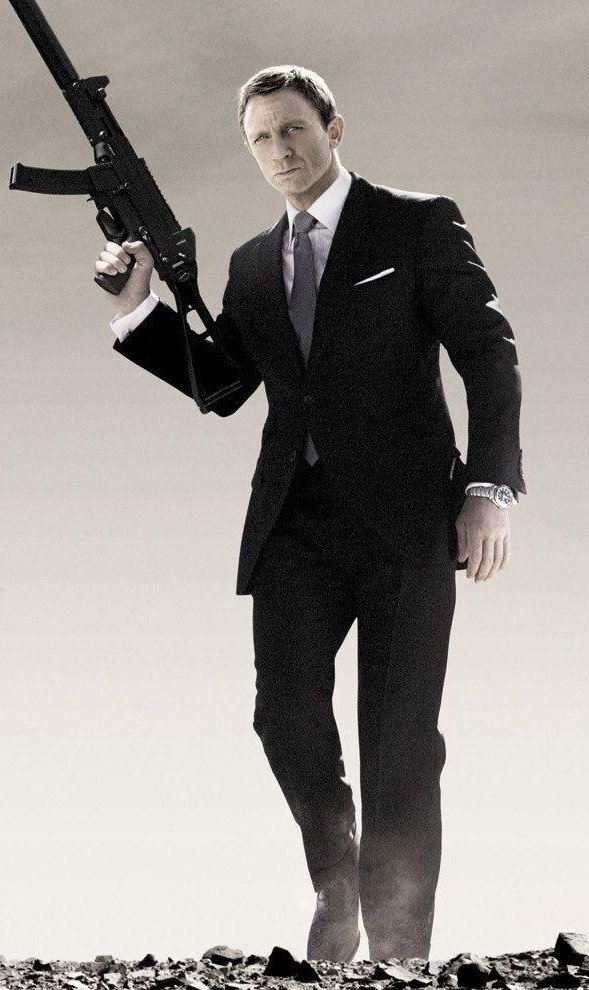
In the next picture the guy now has an AR-15 slung on his front. I won’t show you a “before” vs. an “after” picture of this. Why? I want you to really understand all the details as to “why.” But first, why do you think it is very hard to see his “black gun” (AR-15) with his camo on?
 Well, you would know the answer if you had read my article titled “Looks Do Matter” that appeared about a week ago. The article goes into great detail why you don’t want your gun “black.” Take the time to read the article and you will then understand why you don’t see this guys AR-15.
Clothing Details –
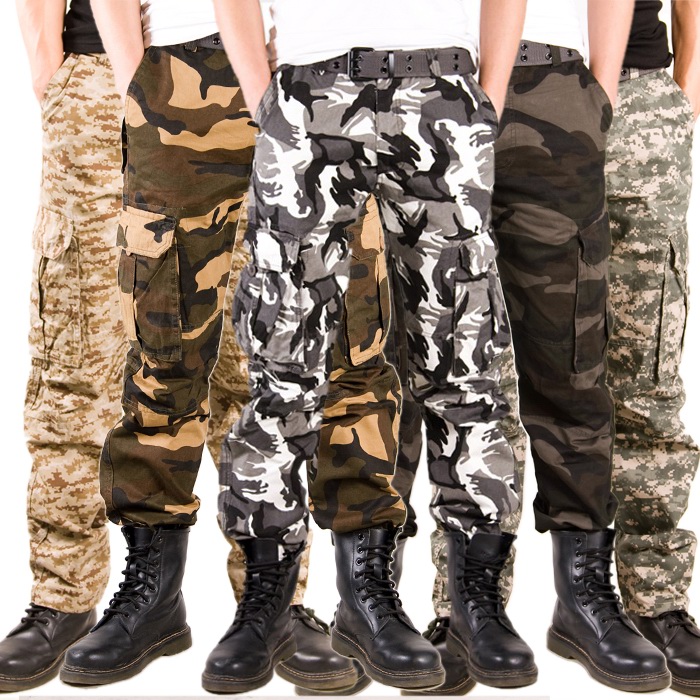
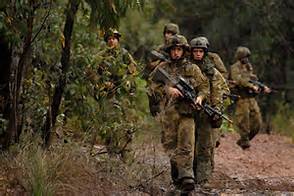
First – The pants. They are A-Tacs (UR). They show no distinct pattern, are lighter colored with plenty of slight variations. They look much like the rocky, sandy ground in the desert.
 Second – The shirt. It is a multicam pattern. Look at the bushes that populate the various pictures. Notice the colors and the shapes of those colors? Does the multicam pattern mimic the environment?
 Third – The hat. It is mutlicam as well. Does it look like the tops of the bushes? Do the colors match the bushes? The shapes of the colors match the bushes as well? Does the shape of the hat change the shape, or profile, of the head?

Fourth – The Gloves. Also multicam. In all the cop shows and movies when a cop is trying to arrest a bad guy what do they most often yell? “Show me your hands!” We naturally want to see a person’s hands; it is in a person’s hands that weapons reside.
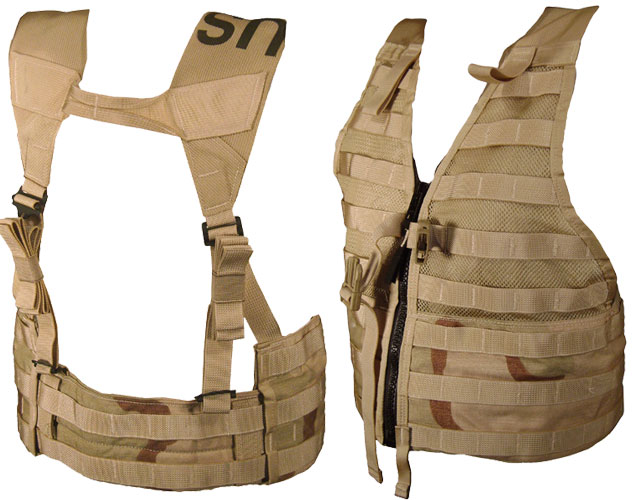
 Fifth – Tactical vest. What color do you think it is? If you guessed that it has multiple colors you are right. The basic vest is a 3-color desert pattern. The pouches are varies patterns but mostly multicam. What does that add to the overall situation?

Sixth – The weapon. read more about that…
All the camo clothing you wear and the camo weapon you carry won’t make a bit of difference if you are stupid. And part of being stupid is not knowing how to not be seen. So far we’ve only talked about clothing, then just a little bit on weapon color. In the fist article I did mention shadows. And in the second article I talk about bushes, etc. So let me touch on that just as we are closing out this series of articles so you can see it all coming together.
But let me make it really clear, this is for the grid-down, non-special forces, ordinary guy. If you have any kind of advanced training you will chuckle at this next section. But I am including it to give the average person a potential advantage over the untrained guy.
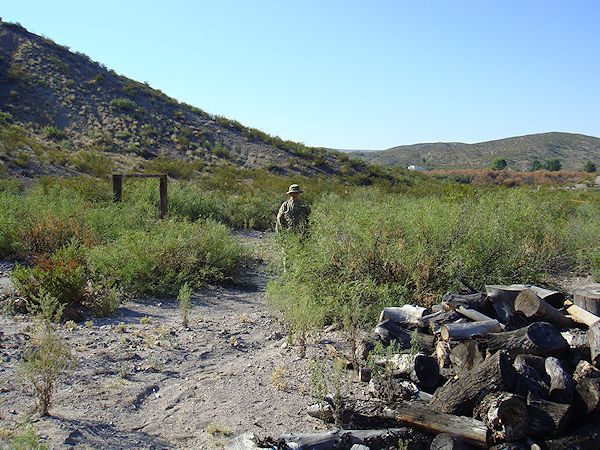
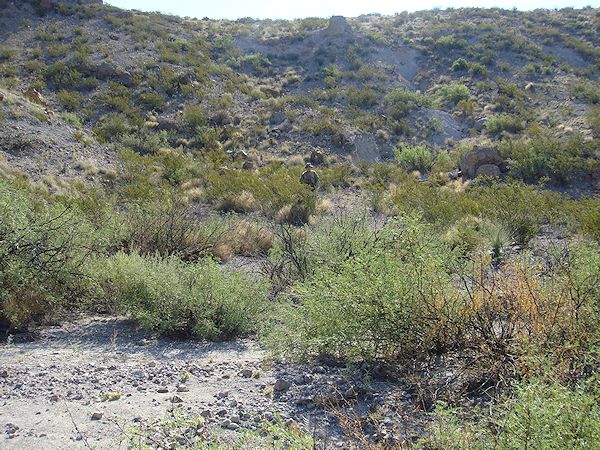
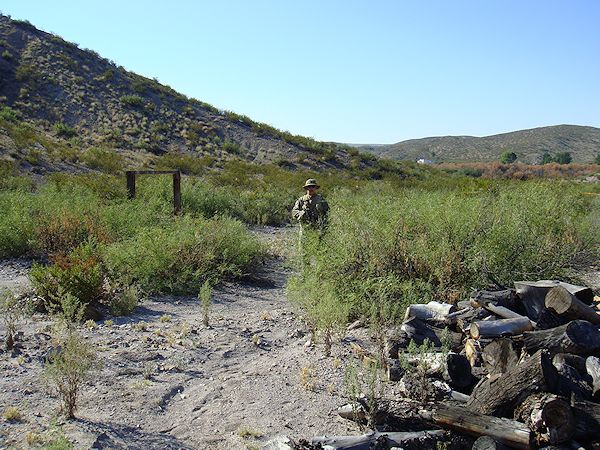
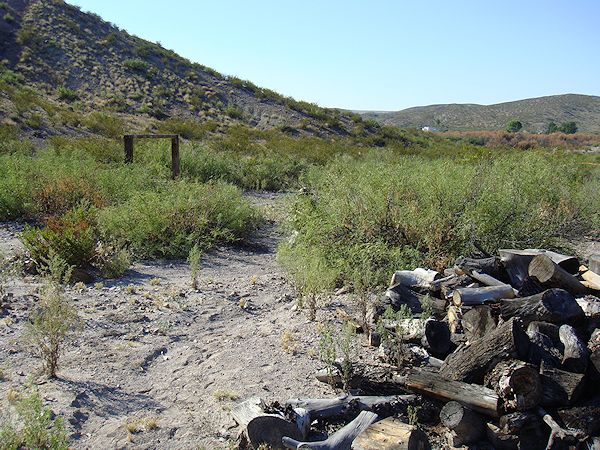
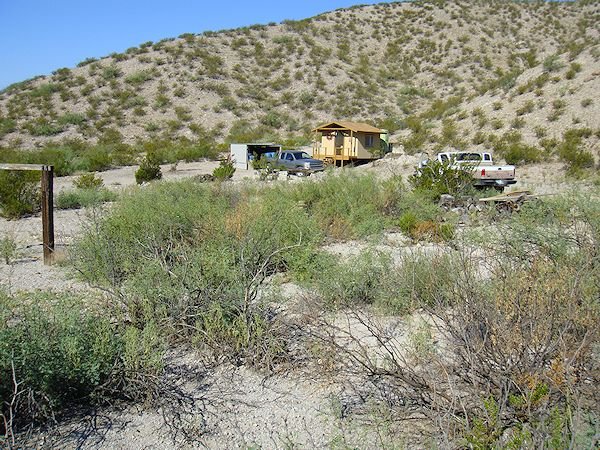
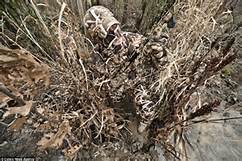
Where is the man in the picture below?
 Here he is. All he did was kneel down for the previous picture.
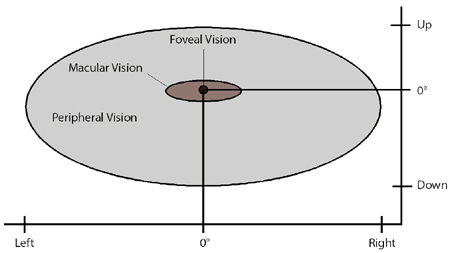
 The idea is to blend in with the environment. The mind’s narrative is seeing a desert environment with sand, rocks, cactus, brush, etc. Great! Your job is to not interrupt that narrative, play into it. You want to give nothing for his “Foveal vision” to pick up on. So you must learn to use your camo clothing and gear combined with the environment.
Even with your mind trying to pick out the bad guy it is hard to do. You are trying to force your mind to spot bad guys. But what is your mind subconsciously trying to do? Your mind is trying its best to create the narrative that you are in the desert southwest, there is sandy soil with occasional rocks present, along with bushes that have green leaves on them.
That being said, quite naturally, anything that blends into the narrative, the mind will try and accept as normal and not a threat.
That is where you want to be if you are the guy in camo clothing trying your hardest to not be seen.
If you are the guy trying to not get ambushed you are trying to force your mind to spot anything, anything at all, that might be out of place that could pose a threat. Even the smallest thing such as shoes.
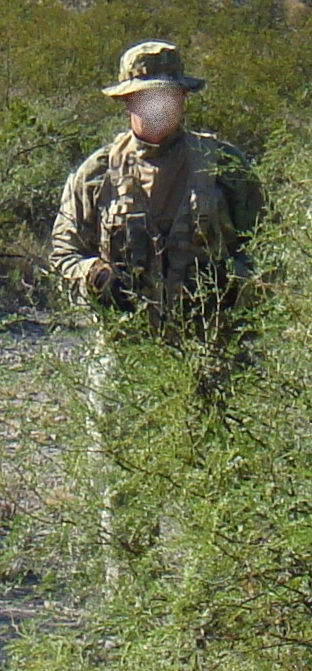
This is the same guy, same location, but from only 10′ feet away…
 Now, only 5 feet away…
 Now, here is a 15′ view but from different angle, only 45 degrees different.
 Huge difference! But, why?
Now continue to add another 45 degree change in viewing angle…
 Would the people in the cabin in the background be able to spot him?
How about now? Same guy, same location see from about 50 yards away. Can you see the guy at all? He is in the same exact location as the picture above.
 Let me point him out to you…
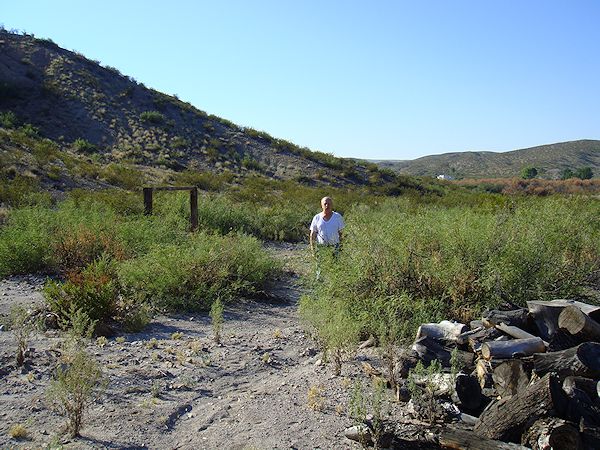
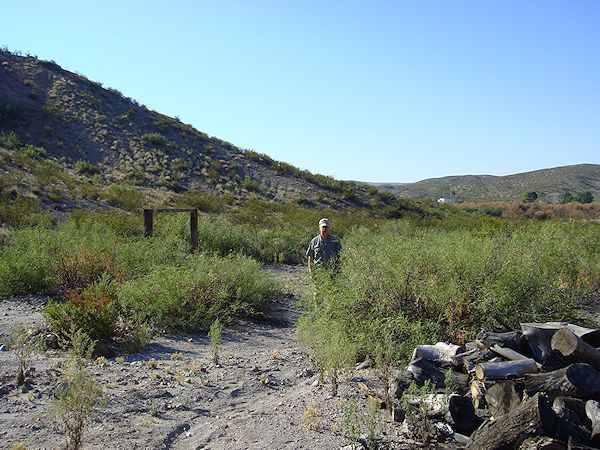
 Here is another before and after view…

Avoid becoming prey –
Let’s go back to the original mission of camouflage clothing…
“To stay alive.”
And you stay alive in one of two ways…
- Defensive – To remain undetected so animals can’t kill you while avoiding contact with said animals.
- Offensive – To remain undetected so you can render said animals lifeless.
OK, now I really want to shift directions on you for a moment. Let’s put you into the position of not wanting to be ambushed by the guy above. Here is a little info that might well save your life.
But I do want to touch on “instinct” as it applies to overcoming camo clothing and ambushes.
Ask anyone who has walked “point” in combat. Ask anyone who has stalked game in the wild. Even ask those that have played airsoft or paintball outdoors. Ask women who had been “hit on” in nightclubs. Ask them about instinct.
Your senses are on full alert, you are walking along watching for an ambush (or game) and you just “feel” something isn’t right. You know that you are being watched, or there is danger nearby. That can be your instinct as work; a “sixth sense” if you will.
Now, I won’t dispute that people can have a sixth sense. I also won’t argue against the existence of that “still small voice.” What I will refer to in this case is your subconscious.
Your subconscious can process information approximately 500,000 times faster than the conscious part of your mind. As you are moving along trying to avoid that ambush the ability of your subconscious mind to gather and process subtle clues can be the most valuable part of SA in a situation like that.
But, since it is the subconscious and you aren’t actually thinking it through, the danger impulse will come through as a “feeling” vs. “knowing”. The feeling will come through much faster than you trying to consciously process visual clues. Your brain won’t tell you, “Hey, there are five guys over there dressed in camo clothing all holding an M4 or AR-15 with 30round mags. And they are all pointing their weapons at you. And if you don’t avoid them they will click off their safeties, apply pressure to the triggers till their weapons fire, and then bullets will enter your body creating sufficient wound channels to terminate your life.”
Instead, you will simply get that prompting, that feeling, that life threatening danger is close by. You will feel like prey. Then it is up to your training as to what comes next. Hopefully your muscle memory will come into play and you will react with sufficient aggression to terminate the threat. Or, if that fails, maybe your “fight or flight” instinct will kick in sufficiently to help you survive by fleeing.
Let your instinct work for you. Train to allow your subconscious to process your incoming SA clues. An advantage by a factor of 500,000 is a pretty good benefit to have on your side.
< click here to read more about Situational Awareness >
Avoid acting like a predator –
Working against you is you “staring” at someone while trying to remain hidden, camo clothing or not.
You can have all the best camo clothing, have a great shadow to hide in, but if you are staring directly as someone you are trying to avoid, chances are they might pick up on that as well. Why?
Go back to the “instinct” advantage I mentioned just a minute ago. And now tie that back into our genetic wiring to avoid being prey. Most predators, just before they pounce, will do what? Stare at their prey to calculate how fast to run, how far to jump, where to bite to make the kill. Same thing in the field…with humans.
If you are laying in an ambush for the guys walking down the trail, you might not want to stare intently right at them. Why? Remember, they too are wired to avoid becoming prey. And, if they are well trained, their subconscious is processing all their incoming SA clues 500,000 times faster than you can think about what you are doing and what you are waiting for them to do.
Their subconscious may pick up on a subtle disturbance in the dirt on the trail. And their eyes may pick up a minor variation in the coloration of a bush, or a leaf pattern. But as they are scanning the area around them, their subconscious may allow their eye to see your eyes staring at them. And that final subconscious clue is all it takes for the red flag to go up, the warning bell to sound, and they counter your ambush. Don’t stare right at people you are trying to avoid.
Ask any woman that has been to a bar, a nightclub, or anywhere; if a guy is staring at her intently (even across a large room) does it set off her “alarm.” That is true even if it is a guy staring at her from behind. And if the guy has a “creep factor” to him, they are doubly aware.
And I am sure you have probably had that feeling as well, of being watched. Ask those that have been in a combat area, they will tell you of similar feelings of being watched.
Listen to that “feeling”, pay attention to your “instinct” and act on it. If you are the person trying to remain invisible, remember what can trip their subconscious into alerting them to your presence. Then don’t do those things!
Summary-
Under normal every-day life this information is of virtually no worth at all to you. Who is going to be camo’d out like this going around trying to avoid bad guys? And even hunting in most states require you to wear something that is blaze orange. But, when the time comes that the grid goes down and the bad guys are roaming around looking for their next victim…you don’t have to be that victim. You can be this guy..or way better!

2009 - 2019 Copyright © AHTrimble.com ~ All rights reserved
No reproduction or other use of this content
without expressed written permission from AHTrimble.com
See Content Use Policy for more information.

 note: article first appeared January 2015
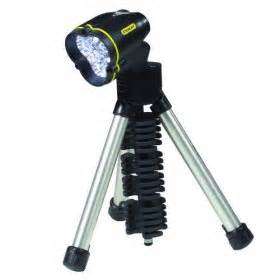
 thrilled with it! It is a great size for my pants pocket and fits any flashlight holder or belt mounted light/magazine holster that I use. I use a Command Arms Accessories Flashlight Holder Grip Adapter on my AR and this light fits it perfectly. The light shines a very bright narrow beam of light that exceeds my expectations of a tactical light. The light is not so bright that it will washout my vision in the dark but plenty bright enough for me to do whatever I need to with it. The distance the beam goes is amazing for such a little unit running on AAA batteries.
 You’ll love it!


 vs.
vs.