Tips, Tricks, Traps & Thoughts…

Download this page as a PDF file. <click here> Yes, you have my permission to pass this PDF file along to others. Please, just don’t alter it…meaning: don’t delete the footnote “Courtesy of AHTrimble.com”


2009 - 2020 Copyright © AHTrimble.com ~ All rights reserved
No reproduction or other use of this content 
without expressed written permission from AHTrimble.com
See Content Use Policy for more information.

My 2020 Garden: Day #1

As most of you know by now we’ve moved into our new home that I built. It is a modest home, small, functional, and perfect for us. I am behind schedule…as is normal when building. The house is by no means done…there remains a long list of smallish items to take care of. However, I wanted a garden.

My original plans called for a pretty substantial garden and some fruit trees. Ah, not going to happen this year…not even close. But, I felt the overwhelming “need” to put in some kind of, some size of garden. After a discussion with my wife we decided it had to be small enough to do quickly, only vegetables that we will eat each day, maybe some minor dehydrating, no canning. It had to be easy to care for, not time consuming. And it had to be “heirloom” based. If nothing else…we could/would harvest the seeds for next year.

The vegetables we decided on were tomatoes, peppers, squash, and an unnamed vegetable to be identified later. Tomatoes was a no brainer…we eat the heck out of tomatoes! We eat them on sandwiches, as a sandwich, on salads, by themselves…well, you get the idea. So we went with Beef Steak and Better Boy, plus a cherry tomato for salads.

For peppers we went with a serrano for spicy, then a sweet green and sweet red. And then some kind of squash that my wife likes…yeah, I am not a big squash fan.

We ended up with 8 plants total…7 pots, one had two plants in it. Yup…very small garden!

We have some problems to deal with here…mainly the sun, it is very, very intense in the summer. And the ground is dry, but we have a well so that is not a problem. For the sun, we planted on the east side of the house, shaded from about 1pm on. And then there are the dogs and rabbits. Our combination chain-link and electric fence keeps the dogs in and the rabbits out. A 2″x3″ mesh piece of leftover construction mesh keeps the rabbits and dogs out of the garden itself. But, there are also the mice and rats. Yup, the joys of living in the country. Some 1/2″ construction mesh from Lowe’s today will take care of that problem…hopefully.

And I mentioned our ground is dry…very dry and sandy…very little organic matter. So that had to be dealt with. But, I am not going to till up a large garden…actually, I am not tilling up anything. I am digging holes and improving the soil just in that specific area.

So here goes…

East side of the house to shade the plants in the afternoon. The house proximity might also deter the tougher rabbits that make it through the electric fence. And of course…a shorter walk to water, weed, and harvest.


As I mentioned earlier, I am digging holes for each individual plant. Saves work and reduces amount of soil amendments. Notice how dry and hard. Dug the hole approximately 14″ in diameter and a little over a foot deep.


For soil I mixed 1/3 native soil (sand), 1/3 peat moss, and 1/3 steer manure/compost. I mixed it in the wheelbarrow. I used the soil from lower in the hole where it was less hard and a little more moist.
I didn’t use fancy stuff like pearlite or vermiculite…WAY too expensive and WAY too little return on the dollars spent.


Here is what I choose to use to improve the soil. No specific reason I choose this stuff. It’s just what they had, and would work for what I wanted it to do.


So there you go! Our small garden in a small space (5′ x 5′) all laid out, in the ground…now the finishing touches.


Put up the non-fancy fence and watered it all in.
Tomatoes tomorrow???


Not going to let anything go to waste! These are little sprigs of grass I dug up when digging my plant holes. I moved them to an area where I have the potential for soil erosion. Grass in this area is scarce, so why not use it constructively? Yes, I watered it in. No, I have no idea if it will make it or not.

So why am I sharing this with you? Thought you might be interested…yeah, right. Now the real reason…I want to show you that a small garden is still possible, even if you are starting a bit late like I am. And while it may not feed you 100%…it might feed you 15% or 5%…and that is better than nothing. Plus you learn to garden for when you may really need it. And at the very least you can harvest the seeds and save them for next year.

So I am suggesting -HIGHLY encouraging you- that you plant a garden. It doesn’t have to be big or fancy or pretty…or anything but some vegetables that you are growing yourself. You never know how much you may need it…or just appreciate the fresh tomatoes 🙂

I will keep you updated on how our garden does.


2009 - 2020 Copyright © AHTrimble.com ~ All rights reserved
No reproduction or other use of this content 
without expressed written permission from AHTrimble.com
See Content Use Policy for more information.

Amended 5/7/2020 Immediate Action Warning

I amended my 5/7/2020 Immediate Action Warning to include vitamins and supplements. I inadvertently left those off the original post.

If you would like to know why I include them, you might like to read:

FAQ – 3/19/2020 (COVID-19)

Immediate Action Warning! (3/17/2020)

Does a bug out location make any sense at all?

article first appeared in March 2016

So, does it make sense to have a Bug Out Location (BOL)?

Why not stay put in your home?

Will you get to your bugout location if you have one?

Is a bugout location realistic for everyone?

What should it look like?

Is it right for you?

Wow, sorry. I probably gave you a headache already just asking the questions. But they are important questions. Why? Well, it might make the difference between your family being safe during disaster or grid-down…or dying with the masses.

Yeah, a little melodramatic, I know. But I am pretty passionate about bugout locations (BOL). Yeah, and I am sure that surprises you…right!

A while back I posted a couple of “myth” articles about BOLs and responded to another prepper blogger and their views on BOLs. And I just wanted to put out some information on what I think is relevant to the subject.

First – Does it make sense to have a BOL? Answer: Absolutely!! Why? I am assuming is your home- is your “shelter in place” location…well, what happens if you have to leave your home? “Shelter in place” is also known as “bugging in”; the terms are interchangeable.

Most professional disaster and emergency responders refer to shelter in place vs. bugging in. Most preppers talk about bugging in.

OK, so back to having a BOL. Of course it makes perfect sense to have a BOL. Where else would you go if you had to leave your home…a FEMA shelter? Something along the lines of the Superdome during Hurricane Katrina? Or, a Walmart parking lot? Really!?!

Second – I want to define a BOL before we go any further. A BOL can be any of the following:

  • A family cabin in the mountains.
  • A co-owned cabin in the mountains that you share with a group of friends or extended family.
  • A church camp owned by whatever church you belong to.
  • A friend’s ranch, farm or cabin in the mountains.
  • A state park.
  • A national park.
  • National forest or other public lands.
  • A Walmart or any other store.
  • A parking lot.

So by now you are getting the idea. A BOL is any location other than your home that you can flee to in times of emergencies, disasters and especially “grid-down”…and most importantly…TEOTWAWKI. Yes, I am serious.

Remember, I am a big believer in Plan A, Plan B, etc. You have to have multiple plans! If you don’t…then you are planning to fail. Your BOL might be your Plan A or Plan Z, or somewhere in between. If I had my way in my perfect post-incident world, sheltering-in-place would always be my Plan A. But, that is not realistic in potential incident scenarios.

But, is a single BOL location sufficient? I say “no” without any hesitation. Let me explain…

In the event of a house fire, your house fire, where does your family meet-up? Across the street at the neighbor’s house or maybe the street light three houses down the street. Wherever that location is…it is a BOL.

Now, what if it there is a large cloud of methyl-ethyl-death headed your way…you going to chance it and stay in your house? Ah, probably not. But where will you go? The street light down the street?

What about TEOTWAWKI? Are people going to realistically stay in their homes with mobs of looters and gangs of bad guys roaming around?

That answer might surprise you, or at least “my” answer. I will say “yes!” if you have an organized community and it is sufficiently large enough to provide security. Otherwise, the answer a resounding “no!” So you might as well start working on a BOL now.

Third – Based on the “layers” system coupled with the “emergencies, disasters, and grid-down” concept…BOL’s workout like this:

  1. Close-in rally point for emergencies such as house fires.
  2. Another rally point within ¼ mile or so of your house for situations where you shouldn’t gather close to the house but not too far away.
  3. A BOL that can serve as a close overnight location. This can be a large culvert, a remote radio or TV tower site (easy to see from a long distance), etc.
  4. A moderate-distance BOL that can serve as a safe refuge for several nights if needed to rally friends and family. This needs to be accessible but remote enough that people won’t be naturally traveling past it.
  5. A long-distance BOL in each general compass direction. Yes, that means 4 BOL’s. The reason being you need 4 is in case you are only able to leave the area in one specific direction…at least you have some place to go.
  6. Now that you have identified 1 – 4 long distance BOL’s you also need to identify several intermediate BOL’s along the way. Something more than just an overnight location to sleep. It needs to be a place where you would feel comfortable staying for a few days, a week, maybe a month.

Please don’t get discouraged reading about the need and “must-have” for BOL’s. This is the “best case” scenario. One way to work on this is taking the family camping and day trips to potential locations. You can learn a lot this way and have fun with your family do it as well. Make prepping fun, it’s not hard to do that.

For specifics of any potential BOL please read The Best Bugout Location – How to pick one < click here to read >


2009 - 2020 Copyright © AHTrimble.com ~ All rights reserved
No reproduction or other use of this content 
without expressed written permission from AHTrimble.com
See Content Use Policy for more information.

Immediate Action Warning! (5/7/2020 – Medical) : Amended 5/8/2020

5/7/2020 – 0800

Medical

There are significant indicators that show we could see a rapid decline in the economy, potential supply chain interruptions, and panic buying of certain retail items. Significant to the point that the one or medical/health related items may become unavailable.

With the recent economic developments, recent buying activity indicators, and supply chain disruptions, I am issuing an Immediate Action Warning – Medical.

I believe that the probability exists that as early as late summer or early fall we could see shortages of medical and health related retail items as well as some medications. The recent panic buying has clearly shown that the general public can easily fall prey to mass quantity buying of retail items more out of fear than out of need. Also, China provides 70 – 95% of many common over-the-counter (OTC) medications and 50% +/- of antibiotics… 80 percent of active pharmaceutical ingredients used by US based pharmaceutical manufacturers in the US are produced mostly in China. Should China and increase our existing trade/economic war, escalate the shooting war, or see further supply chain disruptions…these vital pharmaceutical ingredients could become scarce while US based manufacturers ramp up production. The time lag could be 3 – 9 months.

Possible steps to take:

  • Acquire 6 months of OTC medications that your family uses.
  • Ensure a 60 – 90 day supply of all prescription medications that family members take. Talk to your doctor, many physicians understand the need for a longer-term supply of medications to be “on-hand”.
  • Review your specific situation and assess the need for any OTC, trauma injury, or other health injury medication or medical related items. Then acquire what you may need.
  • “War game” possible scenarios (anticipate) and assess the need for other medical/health related items that you might need. Then acquire what you may need.
  • Acquire and safely store 6 – 12 months of vitamins and supplements. (see note below)

Make sure you properly store all medicines/pharmaceuticals and other related items to ensure their safe use when needed.

Note: I delayed writing this Immediate Action Warning for nearly a week. I was waiting to be 100% confident in what I was seeing…the probability of a serious enough issue to justify this warning. I never hit the 100% confidence level. However, considering the potential impact of not issuing the warning, I decided to proceed with it.

Note: Right after my breakfast in the morning I take:

  • 500mg of Vitamin C
  • Super Vitamin B-Complex that contains –
    • 150mg Vitamin C
    • 100mg Thiamine
    • 20mg Riboflavin
    • 25mg Niacin
    • 2mg Vitamin B6
    • 680mcg DFE
    • 15mcg Vitamin B12
    • 30mcg Biotin
    • 5.5mg Pantothenic Acid
  • 125mg Magnesium Citrate
  • 99mg Potassium
  • 50mg Zinc Gluconate

(Note: all of the above is followed by 2 snack size Hershey’s chocolate bars)

At night right before bed I take the following:

  • 1 Centrum Silver Men 50+ multivitamin
  • 1000mg Omega-3 (from fish oil)
  • 1200mg Red Yeast Rice
  • 1000mg Garlic

(Note: no Hershey’s chocolate bars)


Related articles:


2009 - 2020 Copyright © AHTrimble.com ~ All rights reserved
No reproduction or other use of this content 
without expressed written permission from AHTrimble.com
See Content Use Policy for more information.

The last few hours before the grid goes down…

article first appeared in March 2016

Awhile ago I was thinking about different scenarios of emergencies, disasters, and grid-down events and how they might develop and play out. I just let my mind really go off in a number of interesting directions. Then I caught myself saying “Wow!”

As I tend to do when thinking through a problem, I go to the “worst case” aspect of the problem. Now remember, I have 20+ hurricane seasons that I have gone through while I lived in Florida, so I have some real experience in this kind of thinking. So I decided to play it out a little more in my mind.

Here was the set-up…

  • A major grid-down event was going to occur.
  • I had 3 hours advanced warning that it would occur.
  • What would I do?
  • What would my wife do?

I then talked to my wife about this, as well as my best friend who lives in the same city that I do. Then I thought it through some more. Yeah, I do a lot of thinking.

What I came up with was an “action plan.” The list of things I would do in the three hours before the grid-down event and for the 6 – 12 hours immediately after the event occurred. As I built my “to-do” list some interesting points started to surface as well as what were the most important steps that I should take. So this article is the result of all of that thinking, talking, and planning.

Some of this may not apply to you, some of it may be a little overwhelming, and some of it may sound outright stupid. So be it. I am putting this out there for you to consider and if some or all it applies…use it, modify it, apply it, and make it your own.

But here are some of the take-a-ways from this mental exercise and its planning cousin.

  1. You have to avoid Normalcy Bias at all costs! When you have the warning that the event will occur, you must take action, no delays.
  2. You must have buy-in of the plan from your spouse. If not complete buy-in, at least not active objection.
  3. When the time comes to pull the trigger on the plan you must do so immediately.
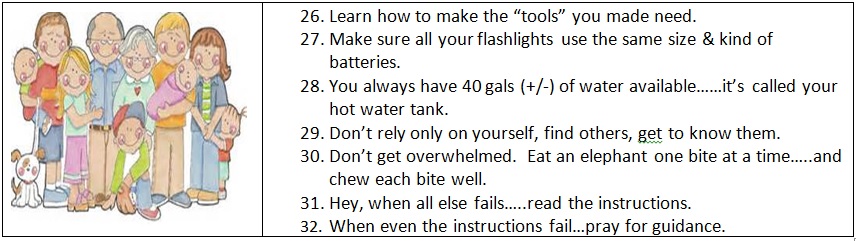
  4. You are going to need help.
  5. When going to the stores the optimum team will be three people. One person to guard the vehicle, one person doing the “shopping” and one person providing security for the shopper.
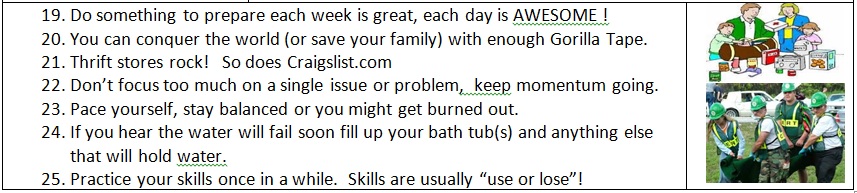
  6. You must have a cash stash already put aside. Banks and ATMs may not be available.
  7. As soon as you pull the trigger, your #1 priority is the safety of your family and group. After that is accomplished the next priority is getting whatever cash out of the bank and ATMs that you can…if it is even available.
  8. Do not stop or slow down completing the items on your “to-do” list while you still have the time and means. That means do not stop to explain what you are doing, to warn someone else, to stop and think it through again. You must stay on task and complete the list. Focus!
  9. Try to keep a low profile when you are working on your tasks. Example: when you bring home a load of food, pull into the garage and close the garage door before unloading the food. Your neighbors don’t need to see what you are doing. Poor OpSec can bring disaster upon you and your family.
  10. Don’t flash cash. If you are going to use cash (or gold or silver) to “influence” store personnel, do so off to the side where it is just you and them. Do let others watch what you are doing. Have your security “overwatch” standing far enough away to observe the area, people, and keep you safe by intervening as needed.
  11. Everyone involved must understand that safety is the priority #1 and anything that jeopardizes safety must be weighed against preventing harm being done. And when I talk about “safety” I mean the safety of your family and your group. While you don’t want to be cold or cruel, and you surely don’t want to take a life if you don’t have too…your family’s safety and your group safety is #1. You’ve committed to them, keep your promise, and keep them safe.

Remember, keep this in perspective…I am saying this is the “worst case scenario” that you would face. This is NOT what you would do for a hurricane or wildfire…just a major grid-down event where things won’t come back to normal anytime soon. Maybe a “martial law” kind of event might be a good way to think of it to put it all into perspective.

Then, once you have prepared for the “worst” you can dial it back to whatever is appropriate for the actual event that you are dealing with. This plan is flexible, adaptable, and scalable. But like any “plan”…it is worthless unless action is taken. And once you take action, be relentless, be a pitbull, and stay that way after it until your action items are all completed.

Once that is done…then you can move on to the next phase of surviving and thriving.

Let’s review the priorities:

  1. Safety¹ of our family and the group.
  2. Safety¹ of others.
  3. Everyone has to know what is going on and keep lines of communications open.
  4. Everyone involved must take action on the “to-do” list and be involved.
  5. Everyone must keep working through the “to-do” list until unable to physically continue (i.e. store runs out of toilette paper or travel is 100% restricted).
  6. OpSec is a must. No discussion outside of the family or group should take place about what your family and group are doing. This is extremely important! The safety of the family and/or group could be very easily jeopardized if what you are doing gets out to the wrong person or group.
  7. Pre-planning is vital. A cash stash (a must) and a precious metals stash (if possible) is critical to the success of this operation.
  8. Be mentally prepared. The only way to prepare mentally for something such as this is to talk it through…multiple times. Something that might help is a “dry-run.” No, not actually buying the times and doing the tasks on the list, but drive to each location, walk around the location, ask to see the manager and ask a question…just familiarize yourself with those places you will be going to should the need arise.

Let’s talk about security for a minute. I mentioned that 3-person teams are optimal. However, don’t delay action if you can’t reach that optimal team level. A person by themselves is an easy target, especially once word gets out about what is happening, and people realize and recognize what you are doing. So it is safer earlier on in an incident timeline than as the event develops. So yes, I would go to the bank by myself within the first hour of the operation without too much concern. But going to Sam’s Club by myself six hours after the event occurred could well be suicidal.

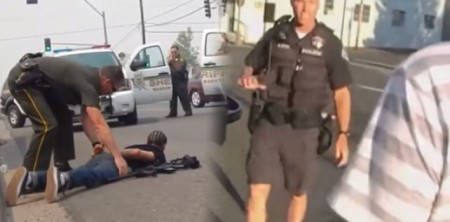
How you implement security will have to be “threat specific.” Openly carrying your AR while wearing your tactical vest with complete kit could really deter a whole lot of minor threats. But law enforcement might take exception to your tactical display and try to intervene. The outcome to that situation would be a “no-win” regardless of who is left standing.

On the other hand, carrying concealed might give you a lower profile and draw less attention while pumping your tank full of gas. But it also might make you look like easy prey. Setting a single security standard it is a tough call to make but you are going to have to make a decision on your security stance and public profile.

Just remember, there is safety is numbers. If you have someone acting as security overwatch as their only task you will be light-years ahead of 99.9% of everyone else.

But also remember this, you must protect yourself, your family and your group. But getting into a full-on firefight with someone, or some group, is not the answer…it is a mistake.

Now, it may come down to that as an only option, a last option, but be very careful. It should be only your last resort, not a top three option. When the bullets fly, who knows who gets lucky, or unlucky? I would normally rather give up a shopping cart full of food then take a life over it.

Well, that might not be entirely true…one less “thug” might not be a bad thing 😉

Choose wisely.

¹ – Means the physical safety of a person. Sufficient action to protect that safety may be required. Those involved must be mentally and physically ready to take that action if required.


2009 - 2020 Copyright © AHTrimble.com ~ All rights reserved
No reproduction or other use of this content 
without expressed written permission from AHTrimble.com
See Content Use Policy for more information.

MFJ 4230MV Compact 25a Power Supply

MFJ-4230MV COMPACT SWITCHarticle first appeared in June 2016

I love mobile radios! So far I have –

  • Yaseu FT-8800R
  • Yaesu FT-8900R
  • Yaesu FT-897D
  • Yaesu FT-2900R

Told you I like mobile radios! And yes…I like Yaesu brand mobile radios the most.

But, having all these mobile radios I need to be able to power them when I am outside of the truck. And the only commonsense way to do that is with stable and readily available AC power from the utility company. But, a little tiny bit of a problem…the radios all run off of 12vDC power.

OK, so it is really no problem at all…you just use a power supply. Technically it is a “transformer” if my memory serves me right. You are taking 120vAC voltage -and through the magic of electronics- transforming it into 12vDC power. And that DC power can be used to run your mobile radios without a vehicle battery.

As always…my mission statement –

“Provide clean, stable, reliable DC power from an AC power source to run one or more mobile radios.”

Requirements and Restrictions –

  • Must not induce “noise” into the radio on any band above an acceptable (minimal) level.
  • Must be able to work continuously for years at a time without being turned off.
  • Should generate minimal heat when in stand-by mode.
  • Should generate manageable heat when being used continuously.

Well, here is the deal…I had already been using an MFJ SWR meter and I liked it a lot. My first power supply was from Radio Shack and it performed really well and I had no complaints. However, it just didn’t push enough amps (power) for my new usage requirements. So I naturally looked to MFJ for a power supply option. I did my research and the 4230MV unit appeared to meet all my needs/demands. Then it was time to do my research.

I carefully read all the reviews I could get my hands on. I really dug into it. What became obvious to me from the beginning was a couple things:

  1. The overall price point was excellent. Same could be said for the “price to amp” cost.
  2. Users were reporting no real “noise” on the HF or any other bands.
  3. It was one of the most compact units on the market.

Here is some technical information –

  • 30 Amps Surge (up to 5 minutes), 25 Amps Continuous.
  • 4 to 16 VDC adjustable output, detent at 13.8VDC.
  • Light weight, only 3.4 lbs/1.35kg
  • Compact, only 5″ x 2 ½” x 6″ (W x H x D).
  • Backlit meter that displays amps or volts.
  • Five-Way binding post for high current radios
  • Over Voltage protection.
  • Over Current protection with “FAULT” LED.
  • QUIET Internal Cooling Fan with “FAN” LED
  • Super Regulation, works with AC input from 85 to 135 VAC (115VAC model) or from 170 to 260 VAC (230VAC model), 47-63Hz
  • Noise <100mV. AC Line Fuse( 6.3 Amps)

Findings –

I purchased my first unit several years ago and began my testing. Let’s not make this difficult…it performed exactly as it was advertised and met 110% of my expectations. Yup…a great little unit. But, let me give you a few more details –

  1. The unit will warm up a bit when using it continuously. There is a cooling fan that will spin up initially when you turn on the unit, then shut-down. Then it will come back on at about 70 degrees. It seems to spin faster as the temp rises. There was minimal sound from the fan, no problem at all.
  2. I could detect no noise on the HF side or any other band.
  3. While the unit is rated at 25amp, it can handle 30amp surges with no problem. But, it won’t operate continuously at 30amp.
  4. I’ve seen folks who have been running this unit for 3 – 4 years with ZERO problems.
  5. I like the adjustable vDC output, gives you some nice operating capability options.
  6. I really like the clean face of the unit. It may sound silly, but it looks very professional. And I like that look sitting there on the shelf while it is working away for me.

Summary –

A great power supply unit!!

Yeah, there are some folks who like to poke fun at MFJ from time-to-time…but don’t buy into that. MFJ has a 1-year “no matter what” warranty. And that is very reassuring and tells you how confident they are in their equipment. Think about it…if a piece of electronic equipment it going to breakdown to poor quality it will probably do so in the first 30 days, undoubtedly within the first 120 days. MFJ has your back!


2009 - 2020 Copyright © AHTrimble.com ~ All rights reserved
No reproduction or other use of this content 
without expressed written permission from AHTrimble.com
See Content Use Policy for more information.

I apologize…

Without realizing it till yesterday, my Power Box Project articles were posted without editing and without pictures. I apologize for that mistake. I got sidetracked with the SitRep – 05/01/20 – WARNING ! and all the Immediate Action Warnings. I have gone back and did some quick editing and added the associated pictures to the 3-article series My “Power-Box” Project.

Please take the time and review those articles again.

Click to start reading the first article…


My “Power-Box” Project – Part #3

Time to finish the portable power box!

I finished up Part #2 showing how I built the basic box and wired it up. In this article I will show you how I finished wiring it and then added a great option. OK, I think it is a great option. And, I will include a really basic wiring diagram. No, I am no electrical engineer and the diagram won’t be some high-grade schematic, but it will clearly show you how I wired everything. And hey, remember…it all works…and works really well. A little secret…I made some changes to the wiring, but not to worry, I will explain the changes.

< Read Part #1 by clicking here >

< Read Part #2 by clicking here >

Here are some of the additional options I wanted to add to the power box-

  • Distributing higher amperages,
  • Distributing a “cluster” of outlets on an extension cord,
  • Using a heavy duty battery charger to charge the internal battery, and
  • “Daisy-chain” boxes together for more ampere hours.

As I was thinking through the additional options I wanted, I figured I needed heavier gauge wiring than just #10. And I also wanted really well protected wire outside of the box to protect against heavy-duty usage. So I naturally gravitated to my standard…Anderson Powerpoles…the PP75 option seemed as if it was made to order for my application.

Anderson Powerpoles
Powerwerx PP75

For my wire I followed my own advice…I went to Walmart and purchased a set of 12’ booster cables in 8 gauge wire. Cheaper than buying the equivalent wire and it comes with much heavier-duty protective insulation. I snipped off the clamps, installed the PP75 connectors and my “extension cord” was good to go.

Next came the wiring from the battery “through” the box itself. I wanted it to be a “through the chassis” connection vs. just laying out the extension cord. And it had to be fused since this was going directly to the battery vs. through the distribution block that I also installed since the last article. The extension cord would not be going through the PWRgate since it is designed to handle much higher amperages than the 40amps of the PWRgate. And I didn’t want to fry the PWRgate by sending voltage in a reverse direction through the PWRgate into the battery.

To make this connection I started with a fused connector from Powerwerx – MAXI Fuse Holders with Ring terminals and 75 Amp Powerpole Connectors.

Powerwerx RGH-08

It is a heavy duty 8 gauge fuse holder with 40 amp MAXI fuse – 75 amp Powerpole connectors on one end and gold plate 3/8 inch ring terminals on the other end. It is their item # RGH-08.

To make a solid “through the chassis” connection I went with the Powerwerx Powerpole Mounting Clamp, item # 1463G1. I wanted the connection in the vicinity of the other connections simply for convenience. So I located the right spot, measured the right opening size, and cut it out.

Powerwerx Powerpole Mounting Clamp, item # 1463G1

Note: don’t make the opening too large. You want it to be a tight fit to lock the connectors into the mounting clamp and firmly against the box material as well.

I secured the top plate first making sure that the fit was very tight to the box.

Then I drilled my holes and secured the lower plate. Make sure you have a solid fit! You must have a solid fit so the connector doesn’t come loose when plugging and unplugging the extension cord.

Bingo…done! I had my 75amp heavy duty connection made directly to the battery. I now had my options. First was simple attaching the extension cord to another box. I want to hook the batteries up in parallel to increase the “capacity” so the extension cord is already made correctly… positive to positive, negative to negative.

Power Box with 75amp extension cord.

I also wired up a couple of battery clamps to a set of PP75 connectors. Now, I can connect the box to another battery directly. Note: the Anderson Powerpoles make it virtually impossible to make revers connections damaging electrical components.

I also had a Powerwerx PS-75-45-4 in my parts box to connect to the end of my extension cord. Now I could run my extension cord 12’ add the PS-75-45-4 and connect four devices to the extension cord. Devices such as four radios, etc.

Power Box with 75amp extension cord plus the options of battery clamps and the Powerwerx PS-75/45-4 power distribution block.

Note: Be aware that the Powerwerx PS-75-45-4 is no longer being made but can still be found at suppliers such as GigaParts. Powerwerx has a replacement option called the “PD-75” which will accomplish the same thing.

Now my power box is ready to go to the field!

In my next article in this series I will share a few of my ideas on how to use the box. And for those of you that are wondering…yes, this could be considered a “solar generator” when connected with solar panels for charging. But, yes again…it is so much more than just a simple “solar generator” if you think through the possibilities.

Power Box wiring diagram.
click the image to enlarge

Download the wiring diagram in a PDF < AHTrimblePowerBoxWiringDiagram>


2009 - 2020 Copyright © AHTrimble.com ~ All rights reserved
No reproduction or other use of this content 
without expressed written permission from AHTrimble.com
See Content Use Policy for more information.

Immediate Action Warning! (5/1/2020 – Energy/Fuel)


5/1/2020 – 1500

Energy/Fuel

With the recent societal developments and potential for civil unrest, including utility disruptions, I am issuing an Immediate Action Warning – Energy/Fuel.

To help offset the potential for energy and/or fuel shortages I am suggestion the possible steps to take:

  • Keep all your vehicles 3/4 full of fuel, or more.
  • Have a way (i.e. hand transfer pump) to move fuel from one vehicle to another.
  • Have a minimum of one 5gal fuel can with fuel safely stored on your property. Use a fuel stabilizing additive such as Pri-G or Sta-Bil.
  • Have at least one change oil of supplies ( oil and filter) for your primary vehicle. For all vehicles would be best.
  • Have an adequate supply of batteries for all lights, radios, etc. Rechargeable batteries would be best…and redundant methods of recharging them.
  • Consider purchasing a small solar system of 1000w or less (panels, battery, charge controller, inverter, etc.).

Do not delay in implementing those things you know need to be done.


2009 - 2020 Copyright © AHTrimble.com ~ All rights reserved
No reproduction or other use of this content 
without expressed written permission from AHTrimble.com
See Content Use Policy for more information.