 Time to finish the portable power box!
I finished up Part #2 showing how I built the basic box and wired it up. In this article I will show you how I finished wiring it and then added a great option. OK, I think it is a great option. And, I will include a really basic wiring diagram. No, I am no electrical engineer and the diagram won’t be some high-grade schematic, but it will clearly show you how I wired everything. And hey, remember…it all works…and works really well. A little secret…I made some changes to the wiring, but not to worry, I will explain the changes.
< Read Part #1 by clicking here >
< Read Part #2 by clicking here >
Here are some of the additional options I wanted to add to the power box-
- Distributing higher amperages,
- Distributing a “cluster” of outlets on an extension cord,
- Using a heavy duty battery charger to charge the internal battery, and
- “Daisy-chain” boxes together for more ampere hours.
As I was thinking through the additional options I wanted, I figured I needed heavier gauge wiring than just #10. And I also wanted really well protected wire outside of the box to protect against heavy-duty usage. So I naturally gravitated to my standard…Anderson Powerpoles…the PP75 option seemed as if it was made to order for my application.

Anderson Powerpoles
Powerwerx PP75
For my wire I followed my own advice…I went to Walmart and purchased a set of 12’ booster cables in 8 gauge wire. Cheaper than buying the equivalent wire and it comes with much heavier-duty protective insulation. I snipped off the clamps, installed the PP75 connectors and my “extension cord” was good to go.
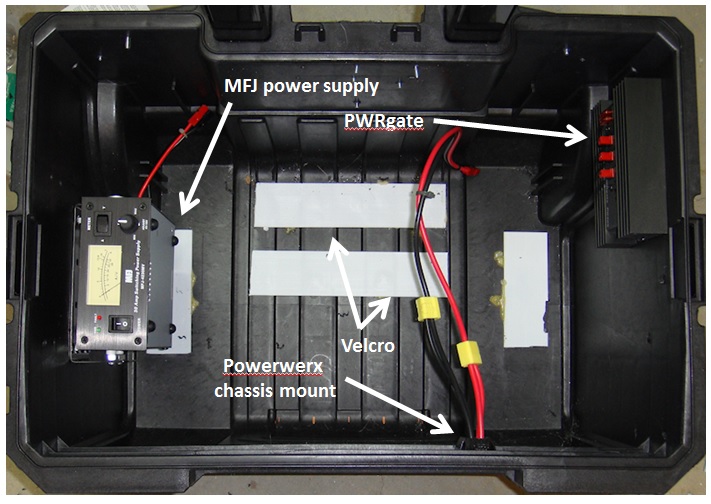
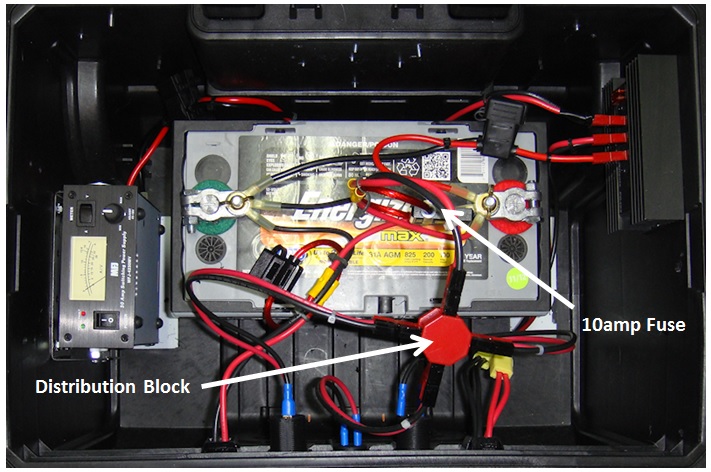
Next came the wiring from the battery “through” the box itself. I wanted it to be a “through the chassis” connection vs. just laying out the extension cord. And it had to be fused since this was going directly to the battery vs. through the distribution block that I also installed since the last article. The extension cord would not be going through the PWRgate since it is designed to handle much higher amperages than the 40amps of the PWRgate. And I didn’t want to fry the PWRgate by sending voltage in a reverse direction through the PWRgate into the battery.
To make this connection I started with a fused connector from Powerwerx – MAXI Fuse Holders with Ring terminals and 75 Amp Powerpole Connectors.

Powerwerx RGH-08
It is a heavy duty 8 gauge fuse holder with 40 amp MAXI fuse – 75 amp Powerpole connectors on one end and gold plate 3/8 inch ring terminals on the other end. It is their item # RGH-08.
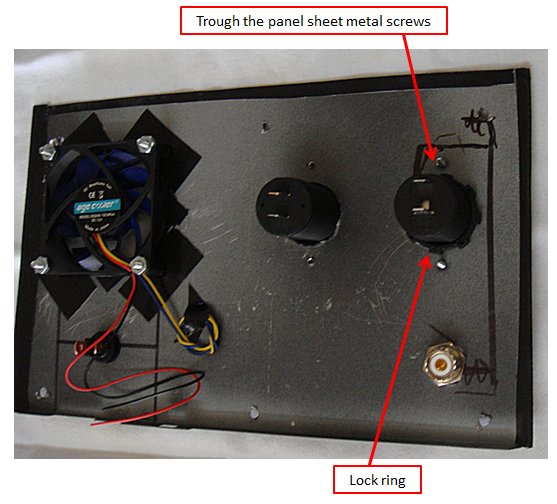
To make a solid “through the chassis” connection I went with the Powerwerx Powerpole Mounting Clamp, item # 1463G1. I wanted the connection in the vicinity of the other connections simply for convenience. So I located the right spot, measured the right opening size, and cut it out.
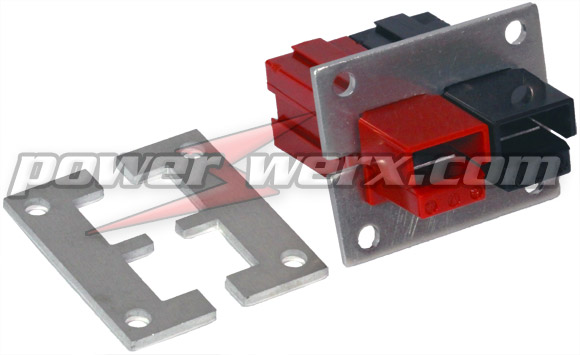
Powerwerx Powerpole Mounting Clamp, item # 1463G1
Note: don’t make the opening too large. You want it to be a tight fit to lock the connectors into the mounting clamp and firmly against the box material as well.

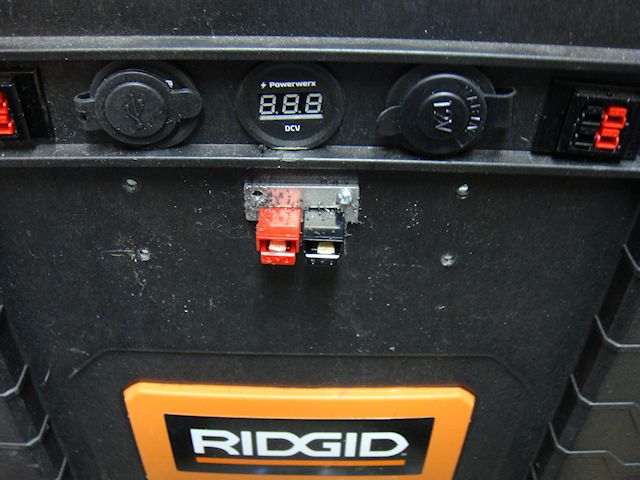
I secured the top plate first making sure that the fit was very tight to the box.

Then I drilled my holes and secured the lower plate. Make sure you have a solid fit! You must have a solid fit so the connector doesn’t come loose when plugging and unplugging the extension cord.
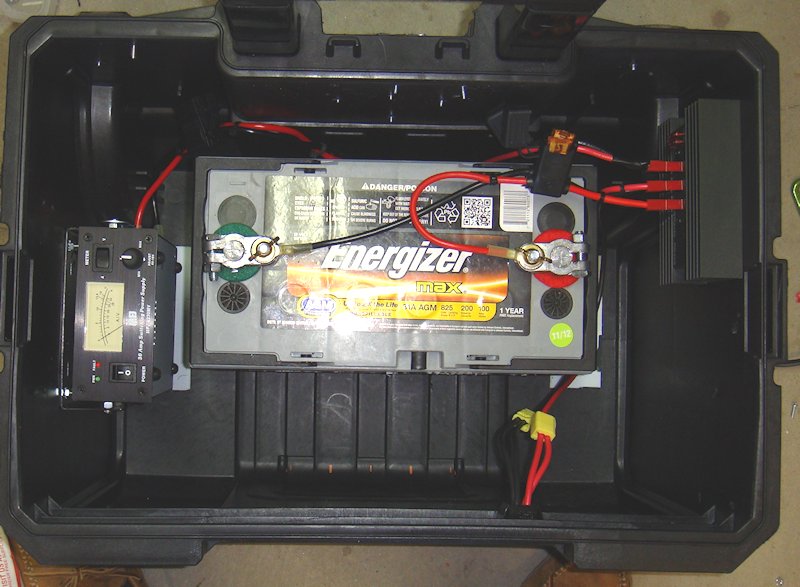
Bingo…done! I had my 75amp heavy duty connection made directly to the battery. I now had my options. First was simple attaching the extension cord to another box. I want to hook the batteries up in parallel to increase the “capacity” so the extension cord is already made correctly… positive to positive, negative to negative.
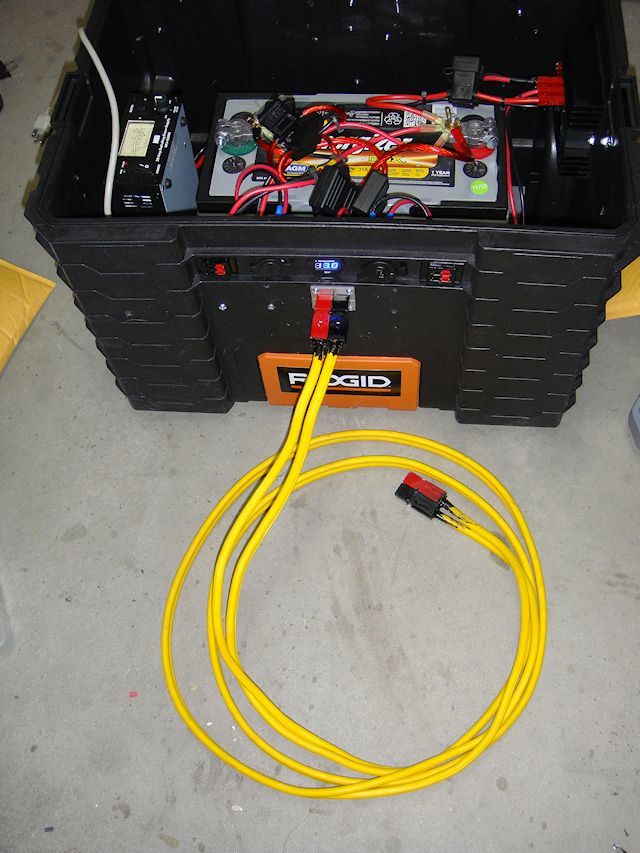
Power Box with 75amp extension cord.
I also wired up a couple of battery clamps to a set of PP75 connectors. Now, I can connect the box to another battery directly. Note: the Anderson Powerpoles make it virtually impossible to make revers connections damaging electrical components.
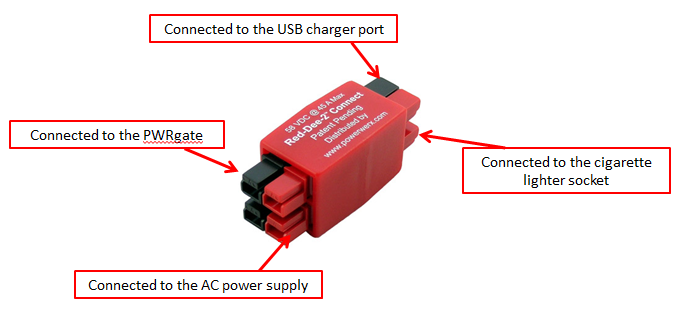
I also had a Powerwerx PS-75-45-4 in my parts box to connect to the end of my extension cord. Now I could run my extension cord 12’ add the PS-75-45-4 and connect four devices to the extension cord. Devices such as four radios, etc.
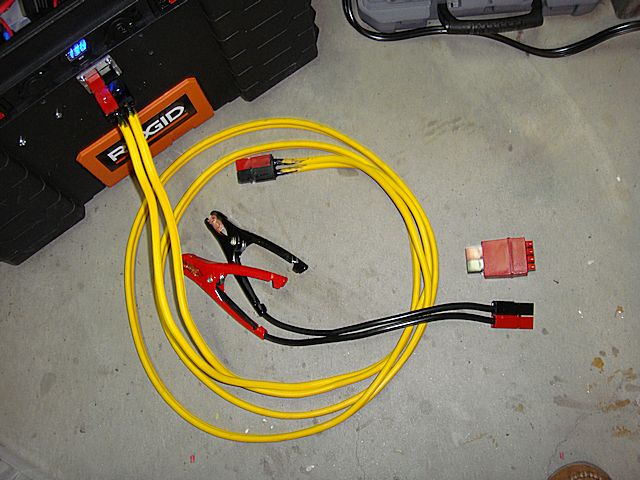
Power Box with 75amp extension cord plus the options of battery clamps and the Powerwerx PS-75/45-4 power distribution block.
Note: Be aware that the Powerwerx PS-75-45-4 is no longer being made but can still be found at suppliers such as GigaParts. Powerwerx has a replacement option called the “PD-75” which will accomplish the same thing.
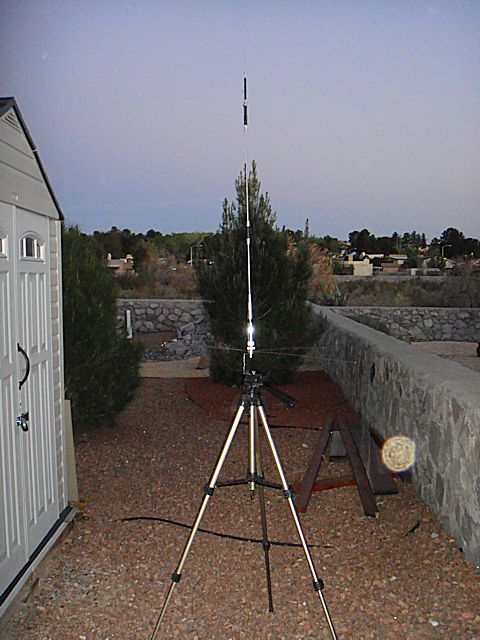
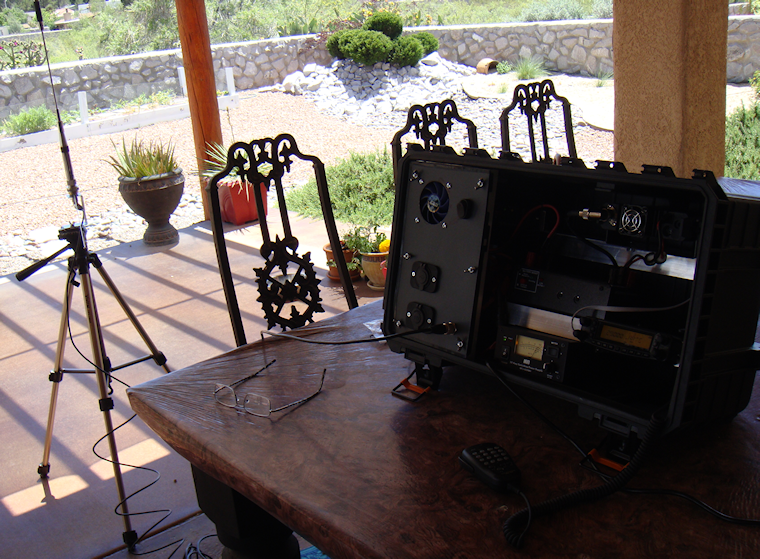
Now my power box is ready to go to the field!
In my next article in this series I will share a few of my ideas on how to use the box. And for those of you that are wondering…yes, this could be considered a “solar generator” when connected with solar panels for charging. But, yes again…it is so much more than just a simple “solar generator” if you think through the possibilities.
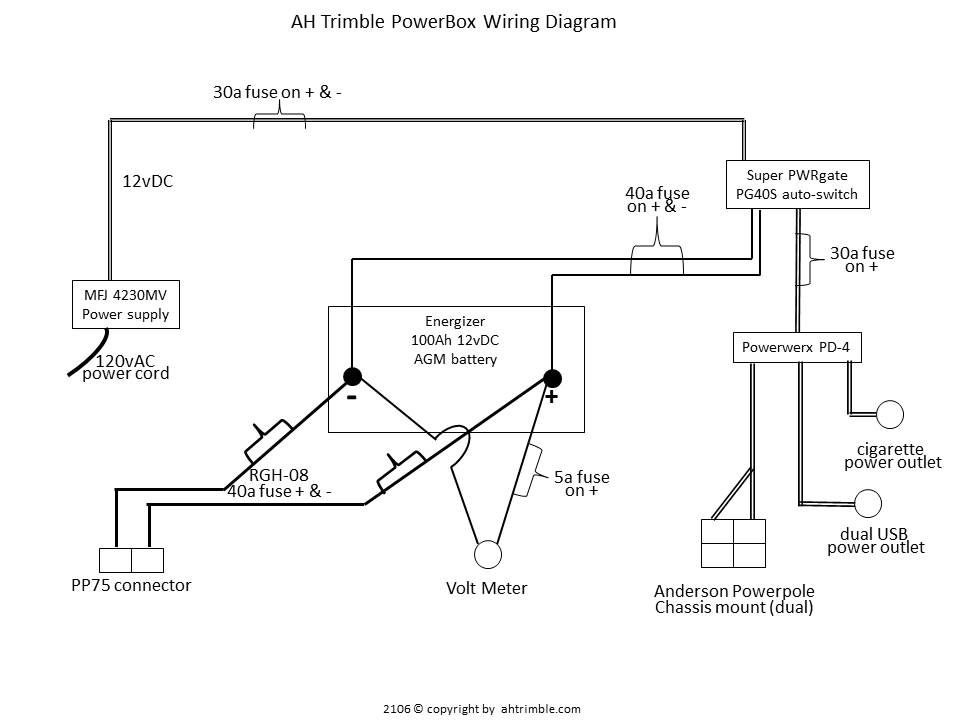
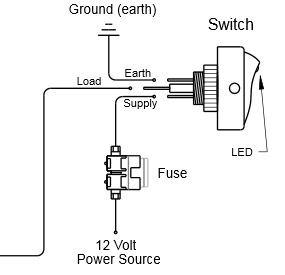
Power Box wiring diagram.
click the image to enlarge
Download the wiring diagram in a PDF < AHTrimblePowerBoxWiringDiagram>
2009 - 2020 Copyright © AHTrimble.com ~ All rights reserved
No reproduction or other use of this content
without expressed written permission from AHTrimble.com
See Content Use Policy for more information.

 Energy/Fuel